> ## Documentation Index
> Fetch the complete documentation index at: https://docs.customei.com/llms.txt
> Use this file to discover all available pages before exploring further.
# Create a library
> Make a box for one kind of thing, then fill it with items or split it into categories.
A library is a named box holding one kind of thing: pictures, product photos, colours, fonts or vector artwork. One library becomes one set of choices for your customer, so it pays to keep each one about a single decision: *Dog breeds*, *Frame colours*, *Handwriting fonts*.
## Create it
On **Assets**, click **Create**.
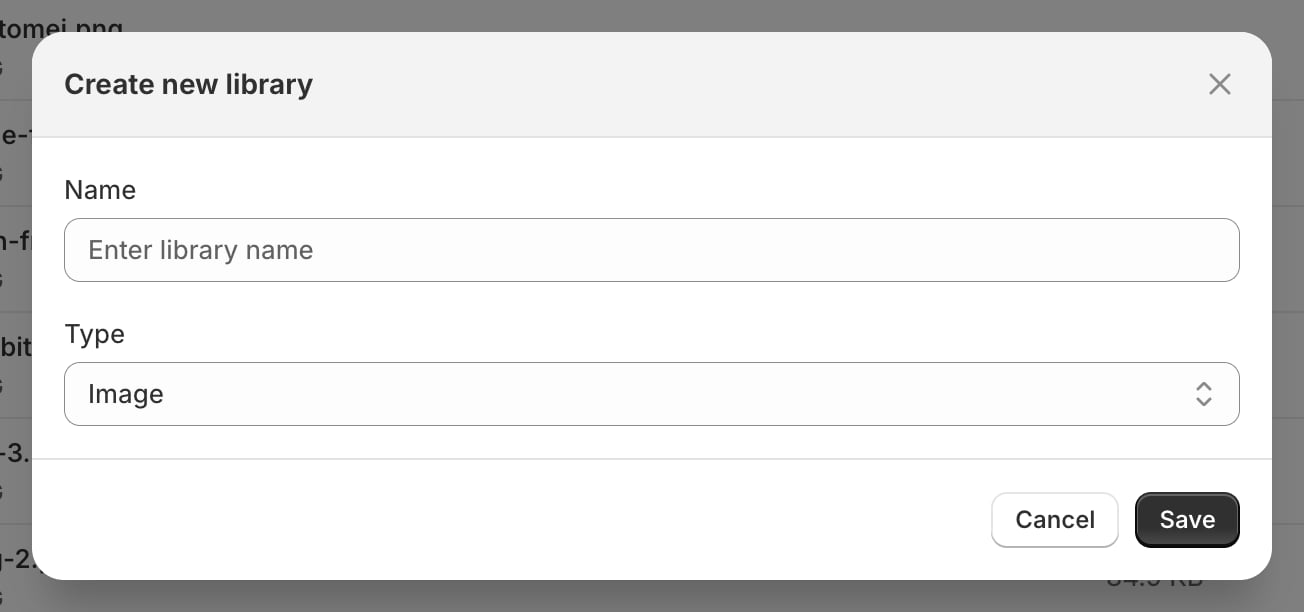 | Field | What to put |
| -------------- | ------------------------------------------------------------------------------------------- |
| **Name** | What the box is for. Your customers never see it, so name it for yourself |
| **Type** | Image, Mockup, Color, Font or Vector |
| **Color mode** | Colour libraries only: **RGB** for anything shown on screen, **CMYK** to match your printer |
**Save** creates it and takes you straight in, with a banner offering to add another.
Open Assets on the tab you want first. The Create dialog starts on that kind, so creating five image libraries in a row means five clicks less.
## Fill it with items, or split it into categories
Inside a library you have two ways to organise, and Customei asks you to pick one.
Best for most libraries. Click **Add media** (or **Add font**, **Add vector**, **Add mockup**, **Add color** depending on the kind) and the things you upload sit directly in the library.
Best when one box really holds several sets, for instance *Pets* split into *Dogs*, *Cats* and *Birds*. Click **Add category**, then open a category and add items inside it.
A library holds one or the other, not both. Once it has items, **Add category** disappears. Once it has categories, you add items inside a category rather than at the top. An empty library offers you both, so decide before your first upload.
## Rename it, or give it a cover
The **...** menu on the Assets list has **Settings**.
| Field | What it does |
| -------------------- | ---------------------------------------------------------------- |
| **Name** | Renames the library. Nothing that points at it breaks |
| **Upload thumbnail** | The cover picture shown in the list. PNG, JPG or GIF, up to 15MB |
Without a cover, the list stacks the first few items as a thumbnail, which is usually enough.
## Duplicate it
**Duplicate** on the row menu copies the library and everything in it. Handy when you want a seasonal variation of a set without touching the original.
## Delete it
**Delete** on the library page, or **Move to trash** on the row menu. Either way it goes to Trash for 30 days and can be restored.
Check the **References** count before you delete. If a design template layer points at this library, the choices behind that layer go with it, and every option set fed by that layer loses its pictures.
## Where to next
Fill your new library with pictures, fonts or colours.
Back to the storeroom.
| Field | What to put |
| -------------- | ------------------------------------------------------------------------------------------- |
| **Name** | What the box is for. Your customers never see it, so name it for yourself |
| **Type** | Image, Mockup, Color, Font or Vector |
| **Color mode** | Colour libraries only: **RGB** for anything shown on screen, **CMYK** to match your printer |
**Save** creates it and takes you straight in, with a banner offering to add another.
Open Assets on the tab you want first. The Create dialog starts on that kind, so creating five image libraries in a row means five clicks less.
## Fill it with items, or split it into categories
Inside a library you have two ways to organise, and Customei asks you to pick one.
Best for most libraries. Click **Add media** (or **Add font**, **Add vector**, **Add mockup**, **Add color** depending on the kind) and the things you upload sit directly in the library.
Best when one box really holds several sets, for instance *Pets* split into *Dogs*, *Cats* and *Birds*. Click **Add category**, then open a category and add items inside it.
A library holds one or the other, not both. Once it has items, **Add category** disappears. Once it has categories, you add items inside a category rather than at the top. An empty library offers you both, so decide before your first upload.
## Rename it, or give it a cover
The **...** menu on the Assets list has **Settings**.
| Field | What it does |
| -------------------- | ---------------------------------------------------------------- |
| **Name** | Renames the library. Nothing that points at it breaks |
| **Upload thumbnail** | The cover picture shown in the list. PNG, JPG or GIF, up to 15MB |
Without a cover, the list stacks the first few items as a thumbnail, which is usually enough.
## Duplicate it
**Duplicate** on the row menu copies the library and everything in it. Handy when you want a seasonal variation of a set without touching the original.
## Delete it
**Delete** on the library page, or **Move to trash** on the row menu. Either way it goes to Trash for 30 days and can be restored.
Check the **References** count before you delete. If a design template layer points at this library, the choices behind that layer go with it, and every option set fed by that layer loses its pictures.
## Where to next
Fill your new library with pictures, fonts or colours.
Back to the storeroom.