> ## Documentation Index
> Fetch the complete documentation index at: https://docs.customei.com/llms.txt
> Use this file to discover all available pages before exploring further.
# Upload and import
> Add pictures, fonts, vectors and colours to a library, one drag or one ZIP at a time.
Open a library and use the button in the header: **Add media** for pictures, **Add font**, **Add vector**, **Add mockup**, or **Add color**. Everything you add gets an **Option ID**, which is how your options later say *this choice uses that picture*.
## Upload pictures, fonts or vectors
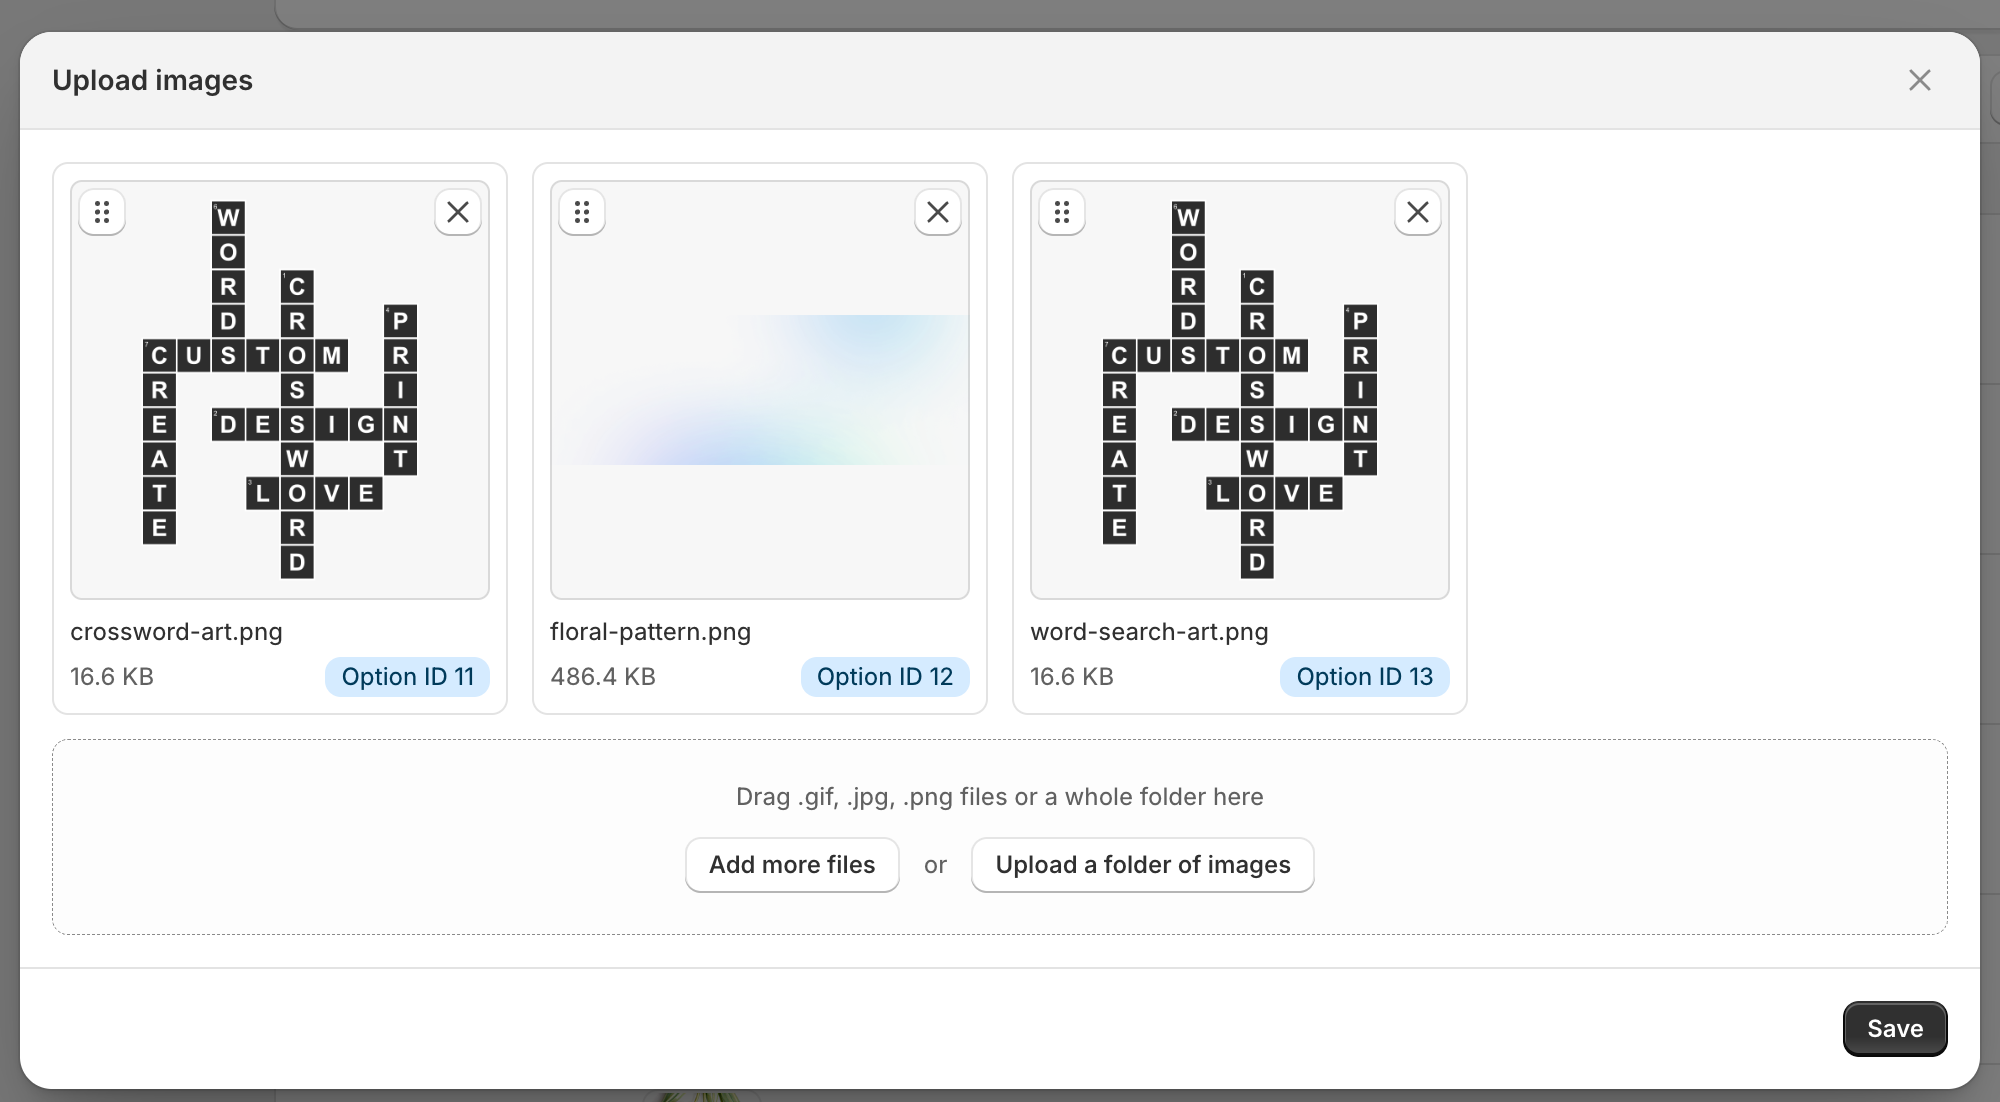 Three ways to get files in:
* Drag files onto the box.
* Click **Add images** and pick them.
* Click **Upload a folder of images** and pick a whole folder. Handy for a set of 200 that already lives in one place.
### What each library accepts
| Library | Accepted files |
| ------- | ------------------------------ |
| Image | `.gif` `.jpg` `.png` |
| Font | `.woff` `.woff2` `.ttf` `.otf` |
| Vector | `.svg` `.pdf` `.eps` `.ai` |
Anything else is left out and a message tells you how many were skipped. Files you've already queued are ignored rather than added twice.
**WebP pictures are not accepted here.** Convert them to PNG or JPG first. The only route that takes a WebP is the ZIP import further down this page.
### The queue
| Rule | Detail |
| ---------------- | -------------------------------------------------------------------------------- |
| Per upload | Up to **1,000 files** in one go |
| Saved in batches | **200 at a time**, one batch fully finished before the next starts |
| Thumbnails | Shown up to 200 files. Past that you get names and icons, to keep the page quick |
| Order | Drag a tile to move it. The order you leave them in is the order they're saved |
| Remove | The **x** on a tile drops it from the queue |
**Save** starts the upload. Each tile fills with a progress bar, and if one fails the button becomes **Retry** and only the failed files go again. Tiles already uploaded are outlined in green, so a retry never re-sends work that succeeded.
### Option IDs
Every tile carries a badge like **Option ID 7**. That number is the item's handle inside the library, given in the order the files are saved.
It matters because a picture choice in an option set stores the Option ID, not the file name. That's why the picker in [Connect options to your design](/optionsets/connect-to-a-template) shows *id: 1*, *id: 2* beside each picture.
Name your files in the order you want them offered before you upload, or drag the tiles into that order. Renaming a file afterwards doesn't renumber anything.
### After the upload
Customei makes smaller copies of every picture so your storefront loads quickly. The dialog stays open and shows each item going from **optimizing** to **ready**, then you click **Done**.
You don't have to wait. Close it and the work carries on, and the list shows which items are still being processed.
## Add colours
A colour library has **Add color** instead of an upload box.
Three ways to get files in:
* Drag files onto the box.
* Click **Add images** and pick them.
* Click **Upload a folder of images** and pick a whole folder. Handy for a set of 200 that already lives in one place.
### What each library accepts
| Library | Accepted files |
| ------- | ------------------------------ |
| Image | `.gif` `.jpg` `.png` |
| Font | `.woff` `.woff2` `.ttf` `.otf` |
| Vector | `.svg` `.pdf` `.eps` `.ai` |
Anything else is left out and a message tells you how many were skipped. Files you've already queued are ignored rather than added twice.
**WebP pictures are not accepted here.** Convert them to PNG or JPG first. The only route that takes a WebP is the ZIP import further down this page.
### The queue
| Rule | Detail |
| ---------------- | -------------------------------------------------------------------------------- |
| Per upload | Up to **1,000 files** in one go |
| Saved in batches | **200 at a time**, one batch fully finished before the next starts |
| Thumbnails | Shown up to 200 files. Past that you get names and icons, to keep the page quick |
| Order | Drag a tile to move it. The order you leave them in is the order they're saved |
| Remove | The **x** on a tile drops it from the queue |
**Save** starts the upload. Each tile fills with a progress bar, and if one fails the button becomes **Retry** and only the failed files go again. Tiles already uploaded are outlined in green, so a retry never re-sends work that succeeded.
### Option IDs
Every tile carries a badge like **Option ID 7**. That number is the item's handle inside the library, given in the order the files are saved.
It matters because a picture choice in an option set stores the Option ID, not the file name. That's why the picker in [Connect options to your design](/optionsets/connect-to-a-template) shows *id: 1*, *id: 2* beside each picture.
Name your files in the order you want them offered before you upload, or drag the tiles into that order. Renaming a file afterwards doesn't renumber anything.
### After the upload
Customei makes smaller copies of every picture so your storefront loads quickly. The dialog stays open and shows each item going from **optimizing** to **ready**, then you click **Done**.
You don't have to wait. Close it and the work carries on, and the list shows which items are still being processed.
## Add colours
A colour library has **Add color** instead of an upload box.
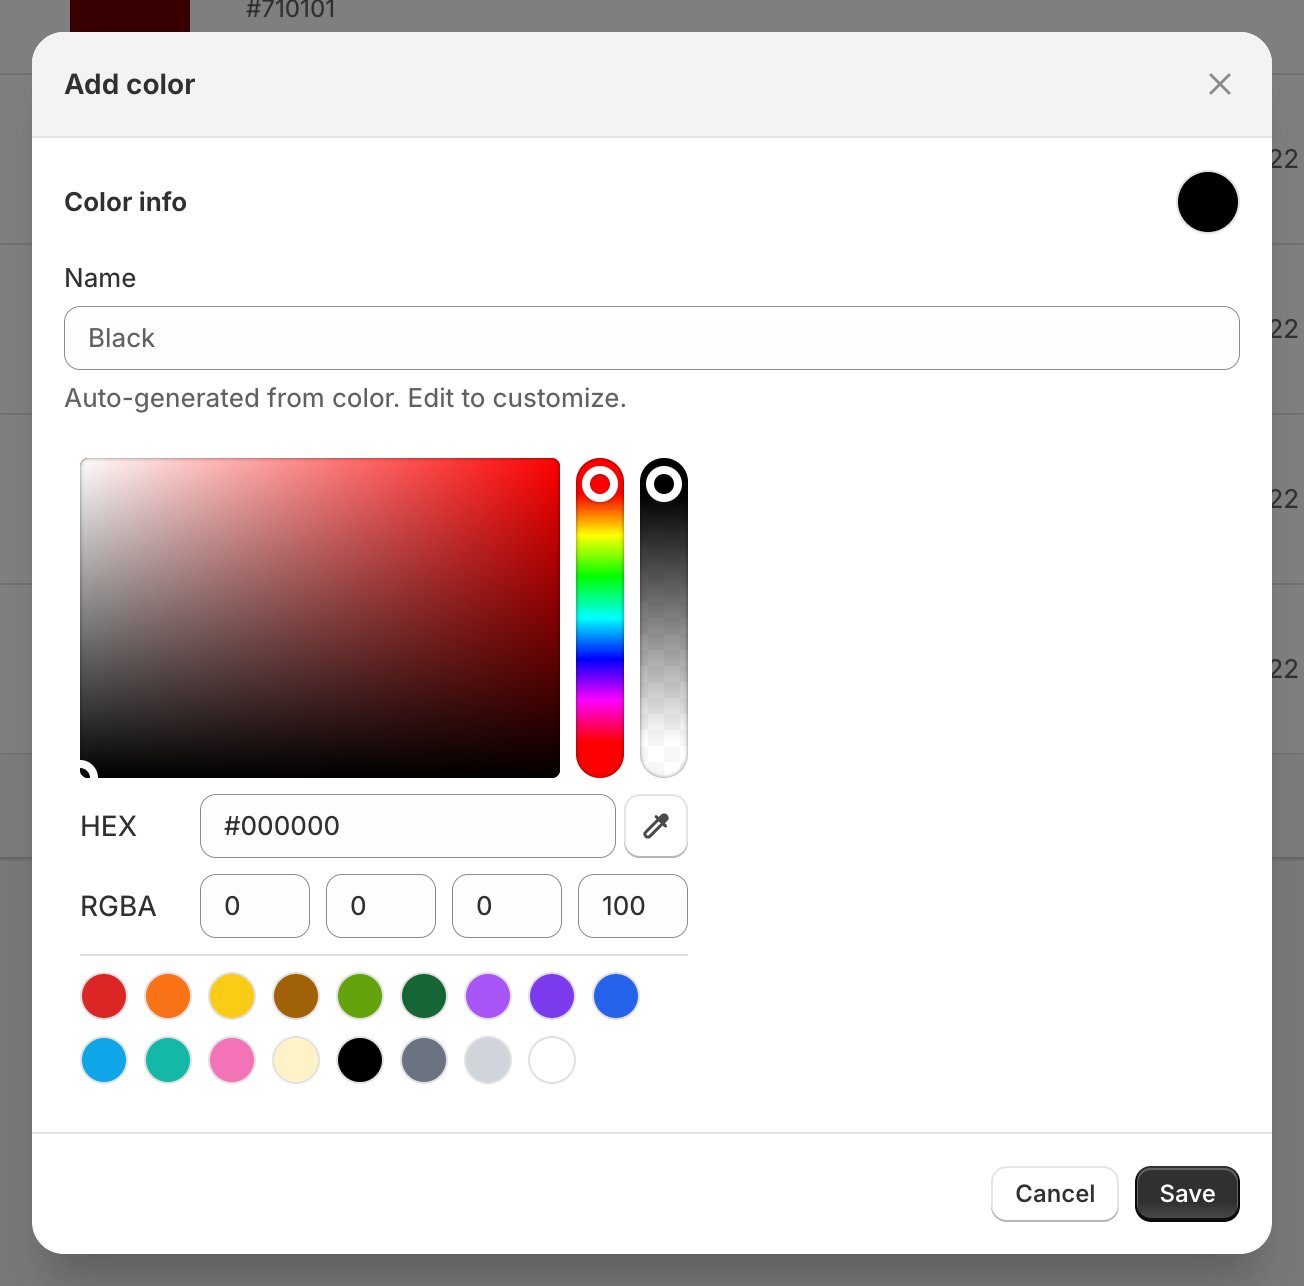 Pick from the presets, drag on the picker, type a **HEX** code, or use the eyedropper to grab a colour off your screen. The name fills in from whatever you land on, so type over it if you'd rather call it *Brand navy*.
## Bring in a whole ZIP
**Import** takes a `.zip` and unpacks it into a library. Use it when someone sends you a folder of 300 designs.
Pick from the presets, drag on the picker, type a **HEX** code, or use the eyedropper to grab a colour off your screen. The name fills in from whatever you land on, so type over it if you'd rather call it *Brand navy*.
## Bring in a whole ZIP
**Import** takes a `.zip` and unpacks it into a library. Use it when someone sends you a folder of 300 designs.
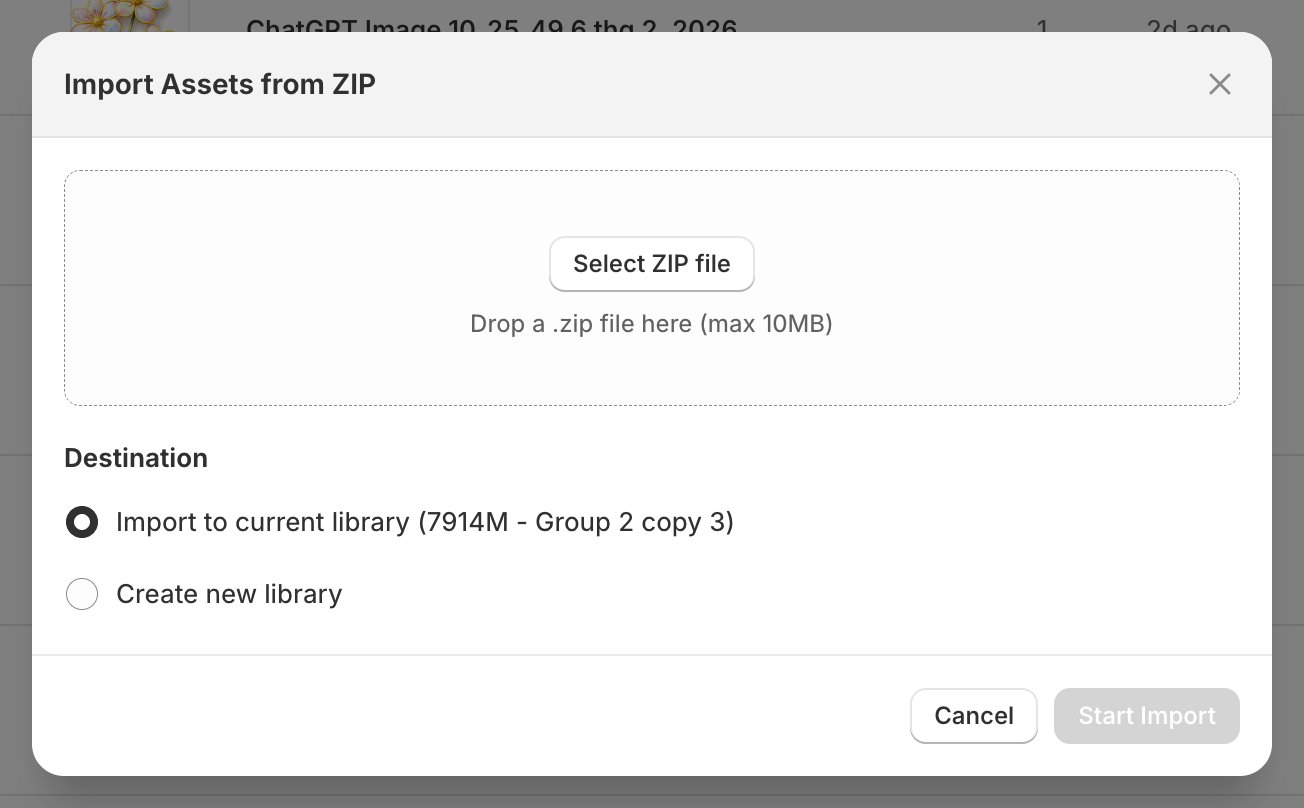 | | |
| ----------------- | --------------------------------------------------------------------------------------------------------------------------------------- |
| **File** | One `.zip`, up to **10MB** |
| **What it takes** | Pictures `.png` `.jpg` `.jpeg` `.webp` `.gif` `.svg` `.bmp` `.tiff`, fonts `.ttf` `.otf` `.woff` `.woff2`, and `.psd` files for mockups |
| **Destination** | The library you're in, or a brand new one you name here |
Drop the file in and Customei reads it without importing anything yet: you get a list of what it found, a count of supported files, and a count of anything it will skip.
A ZIP cannot mix loose files at the top with folders. Put everything in folders, or everything at the top level. Mixed, the import refuses to start and tells you so.
**Start Import** runs it in the background. You can leave the page: a banner keeps you posted and tells you when it's done.
## Where to next
Everything you've uploaded, and what uses each file.
Why topping up a library updates your options for you.
Turn a library into choices your customer can pick.
Back to making the box.
| | |
| ----------------- | --------------------------------------------------------------------------------------------------------------------------------------- |
| **File** | One `.zip`, up to **10MB** |
| **What it takes** | Pictures `.png` `.jpg` `.jpeg` `.webp` `.gif` `.svg` `.bmp` `.tiff`, fonts `.ttf` `.otf` `.woff` `.woff2`, and `.psd` files for mockups |
| **Destination** | The library you're in, or a brand new one you name here |
Drop the file in and Customei reads it without importing anything yet: you get a list of what it found, a count of supported files, and a count of anything it will skip.
A ZIP cannot mix loose files at the top with folders. Put everything in folders, or everything at the top level. Mixed, the import refuses to start and tells you so.
**Start Import** runs it in the background. You can leave the page: a banner keeps you posted and tells you when it's done.
## Where to next
Everything you've uploaded, and what uses each file.
Why topping up a library updates your options for you.
Turn a library into choices your customer can pick.
Back to making the box.