> ## Documentation Index
> Fetch the complete documentation index at: https://docs.customei.com/llms.txt
> Use this file to discover all available pages before exploring further.
# Moving around the canvas
> Zoom, recenter, undo, draw text and shapes, and switch snapping and rulers on or off.
Everything you do to the design itself happens on the canvas, so it pays to be quick at getting around it. All of the view controls sit in one small bar under the canvas, and two more live in the **Settings** tab of the left rail.
## The bar under the canvas
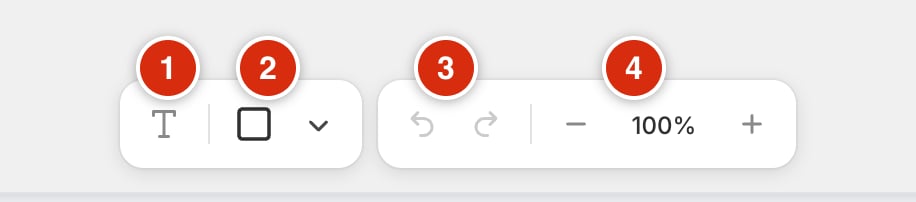 Click it, then drag a box on the canvas to place a new text layer at exactly the size you want.
Drag on the canvas to draw the shape shown on the button. The small arrow next to it switches between **Rectangle**, **Ellipse**, **Triangle**, and **Star**.
**⌘Z** and **⌘⇧Z** do the same thing from the keyboard. They step back through your edits, not through saves.
Minus and plus step the zoom level. Click the **percentage itself** to jump straight back to 100%.
Zoom only changes how big the design looks on your screen. It has no effect on the printed size, which is set by the canvas size shown above the design frame.
Panned somewhere odd and lost the design? The small **Recenter view** button in the bottom-left corner of the canvas slides both frames back into view.
## Controls that appear when you select a layer
Select a single layer and the right-hand group grows two more controls.
* **Align & Fit** lines the layer up against the canvas: **Align left**, **Align center**, **Align right**, **Align top**, **Align middle**, **Align bottom**, plus **Fit to canvas** to blow it up to fill the whole design area.
* **Flip horizontal** and **Flip vertical** appear for pictures only. Flipping a face or a hand is often the quickest way to make two figures look like they are turned towards each other.
Select more than one layer and these disappear, so align one layer at a time.
## Snapping and rulers
Open the **Settings** tab, the gear at the bottom of the left rail.
Click it, then drag a box on the canvas to place a new text layer at exactly the size you want.
Drag on the canvas to draw the shape shown on the button. The small arrow next to it switches between **Rectangle**, **Ellipse**, **Triangle**, and **Star**.
**⌘Z** and **⌘⇧Z** do the same thing from the keyboard. They step back through your edits, not through saves.
Minus and plus step the zoom level. Click the **percentage itself** to jump straight back to 100%.
Zoom only changes how big the design looks on your screen. It has no effect on the printed size, which is set by the canvas size shown above the design frame.
Panned somewhere odd and lost the design? The small **Recenter view** button in the bottom-left corner of the canvas slides both frames back into view.
## Controls that appear when you select a layer
Select a single layer and the right-hand group grows two more controls.
* **Align & Fit** lines the layer up against the canvas: **Align left**, **Align center**, **Align right**, **Align top**, **Align middle**, **Align bottom**, plus **Fit to canvas** to blow it up to fill the whole design area.
* **Flip horizontal** and **Flip vertical** appear for pictures only. Flipping a face or a hand is often the quickest way to make two figures look like they are turned towards each other.
Select more than one layer and these disappear, so align one layer at a time.
## Snapping and rulers
Open the **Settings** tab, the gear at the bottom of the left rail.
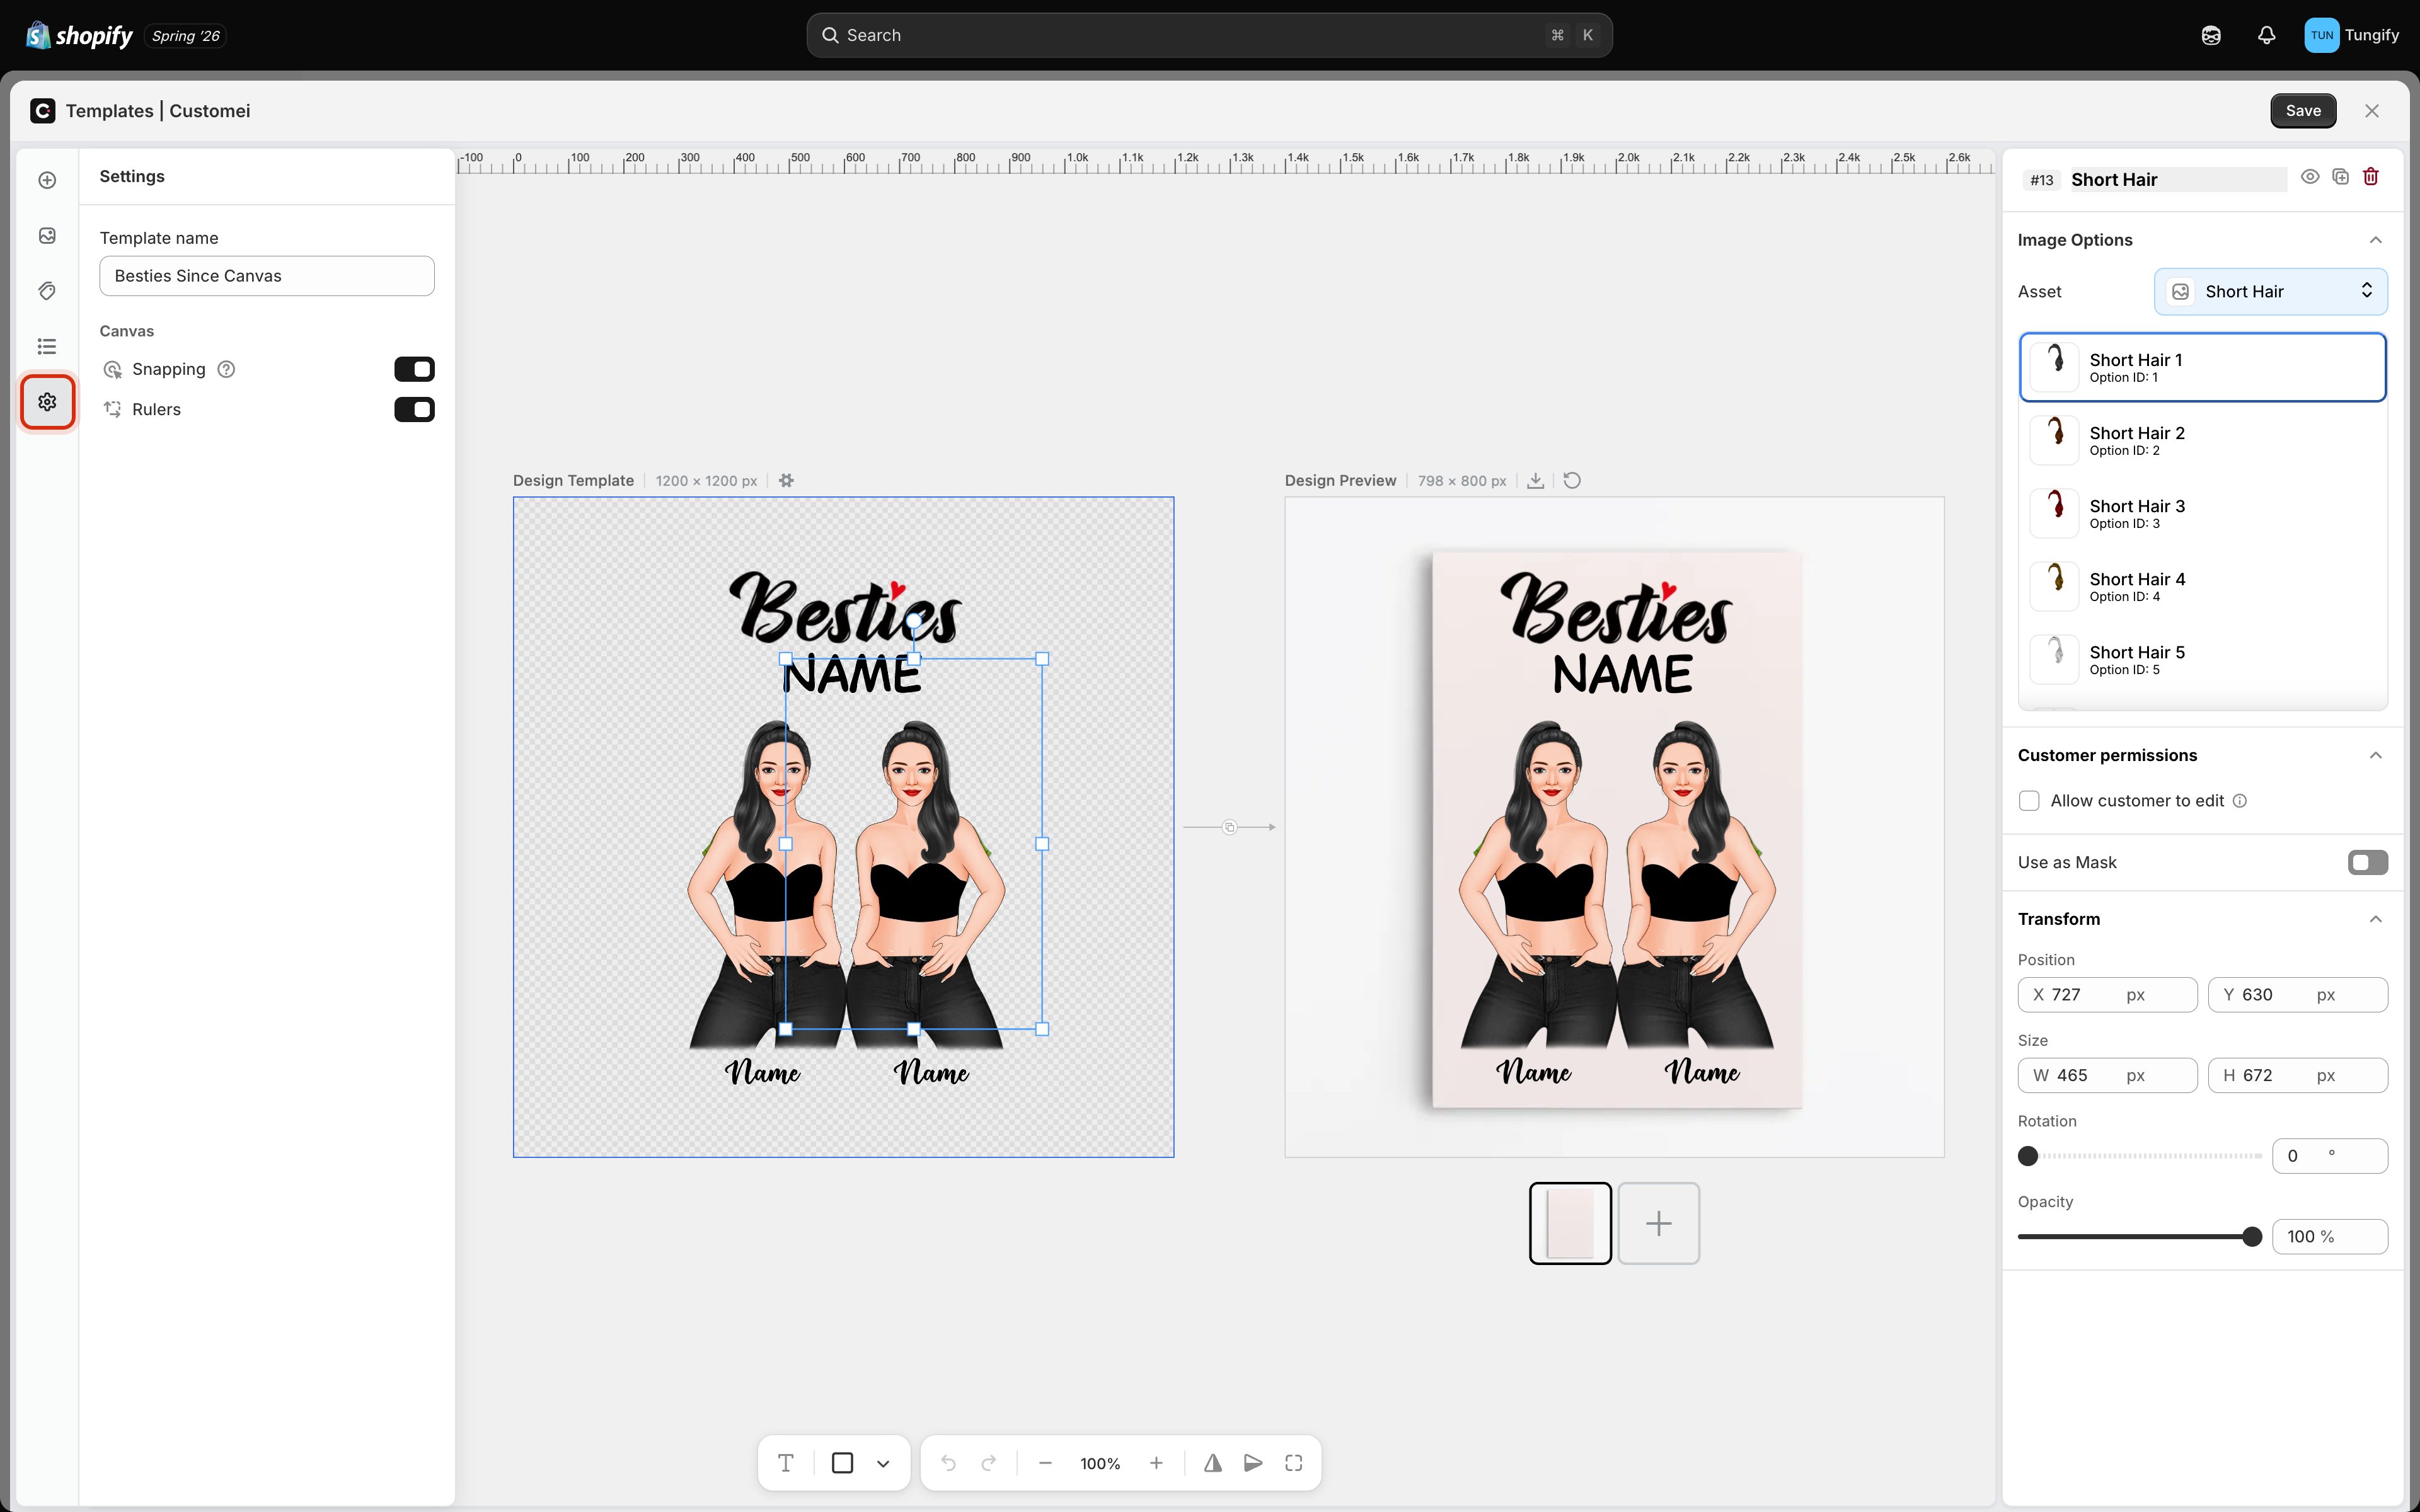 * **Snapping** makes layers align to guides and to each other as you drag them, so a name lands dead centre instead of two pixels off. Leave it on unless you are placing something deliberately off-grid.
* **Rulers** draw a measuring strip along the top and left edge of the canvas, marked in the same pixels as your canvas size. Useful when a print area has to start at an exact distance from the edge.
Both are your own working preferences. They change how the editor behaves for you, never what the customer sees.
The **Template name** field at the top of this panel is the name you will see in your template list, so make it something you will recognise later. It is saved with the rest of the template when you press **Save**.
## Where to next
Work through the stack instead of clicking the canvas.
Understand the two frames side by side on the canvas.
Style the text you just drew.
Start a new template from scratch.
* **Snapping** makes layers align to guides and to each other as you drag them, so a name lands dead centre instead of two pixels off. Leave it on unless you are placing something deliberately off-grid.
* **Rulers** draw a measuring strip along the top and left edge of the canvas, marked in the same pixels as your canvas size. Useful when a print area has to start at an exact distance from the edge.
Both are your own working preferences. They change how the editor behaves for you, never what the customer sees.
The **Template name** field at the top of this panel is the name you will see in your template list, so make it something you will recognise later. It is saved with the rest of the template when you press **Save**.
## Where to next
Work through the stack instead of clicking the canvas.
Understand the two frames side by side on the canvas.
Style the text you just drew.
Start a new template from scratch.