> ## Documentation Index
> Fetch the complete documentation index at: https://docs.customei.com/llms.txt
> Use this file to discover all available pages before exploring further.
# What customers can change
> Decide layer by layer what a shopper is allowed to edit, move, or upload on your product page.
Not every layer in a template is meant to be personalized. Your shop name, a fixed border, a legal line: those should stay exactly as you drew them. The customer's name and photo should not.
**Customer permissions** is where you draw that line, one layer at a time.
## Where to find it
Select a layer and scroll the right-hand panel to **Customer permissions**. Which toggles you see depends on the kind of layer you selected.
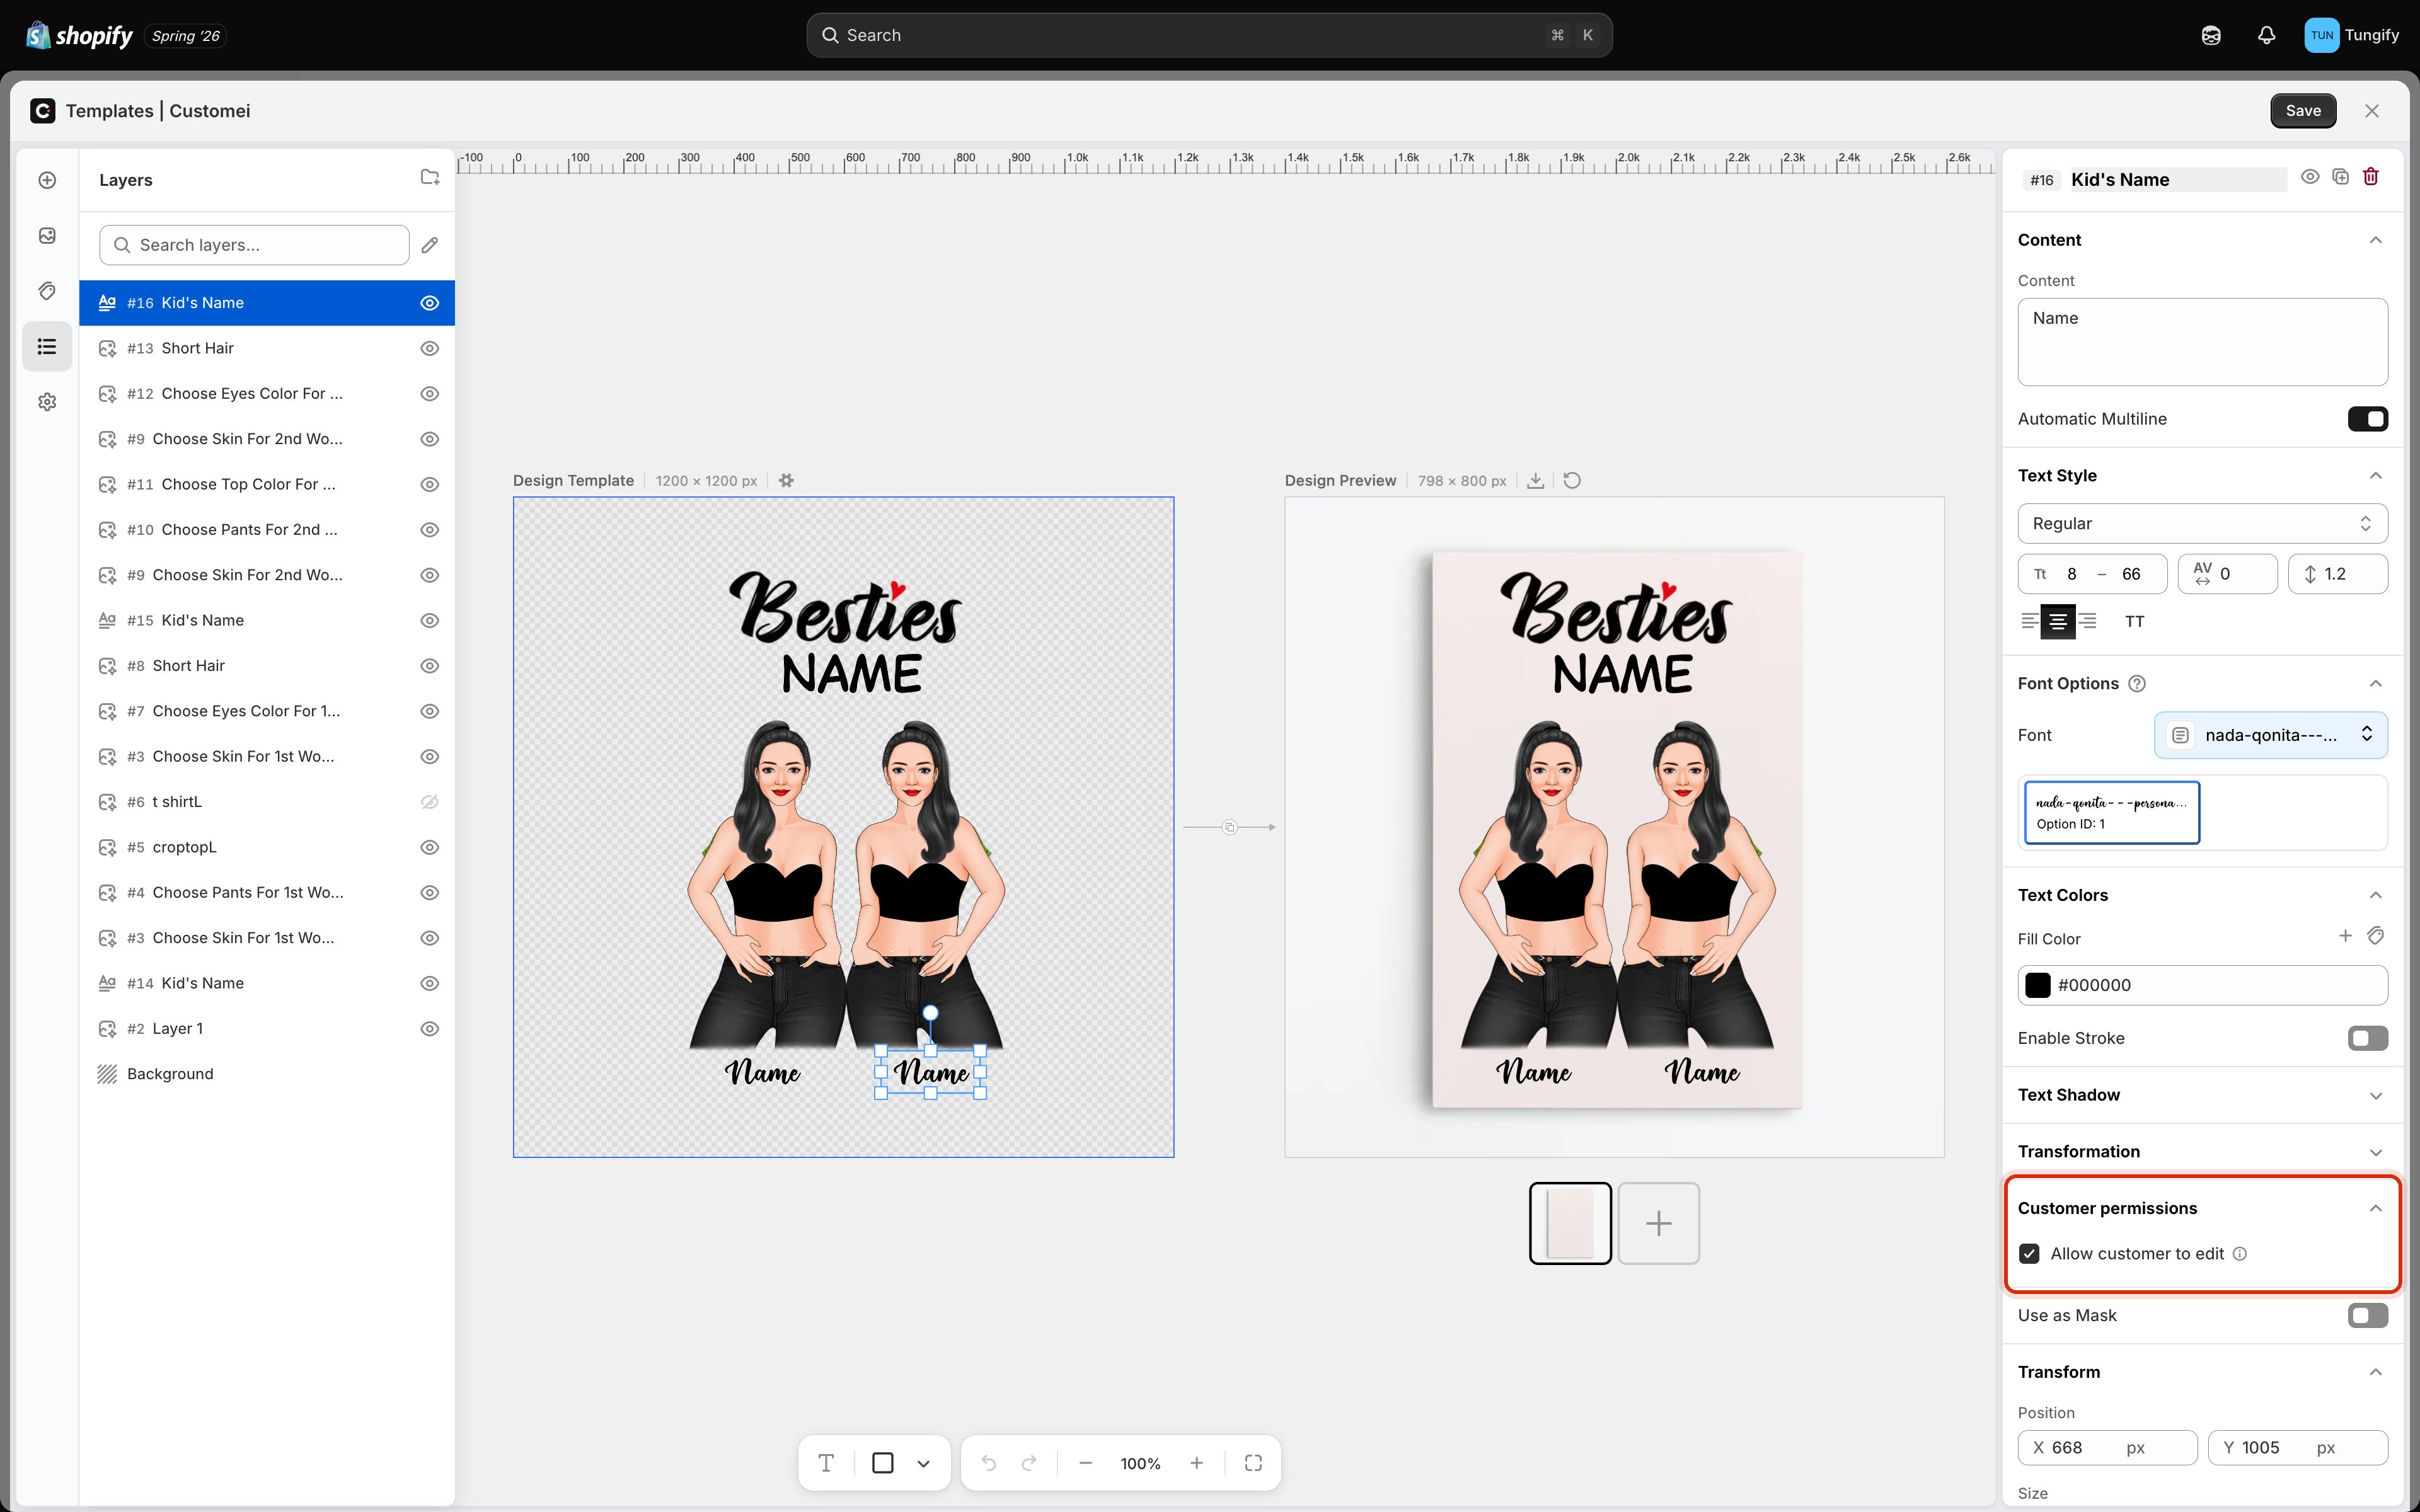 If a layer has no **Customer permissions** section at all, it is not a layer a shopper can interact with. Background art and decorative shapes are always fixed.
## The same label means two different things
**Allow customer to edit** appears on both text and image layers, but it does not grant the same thing.
| On this layer | "Allow customer to edit" means | Default |
| ------------- | ------------------------------------------------------------ | ------- |
| **Text** | The shopper can change the words | On |
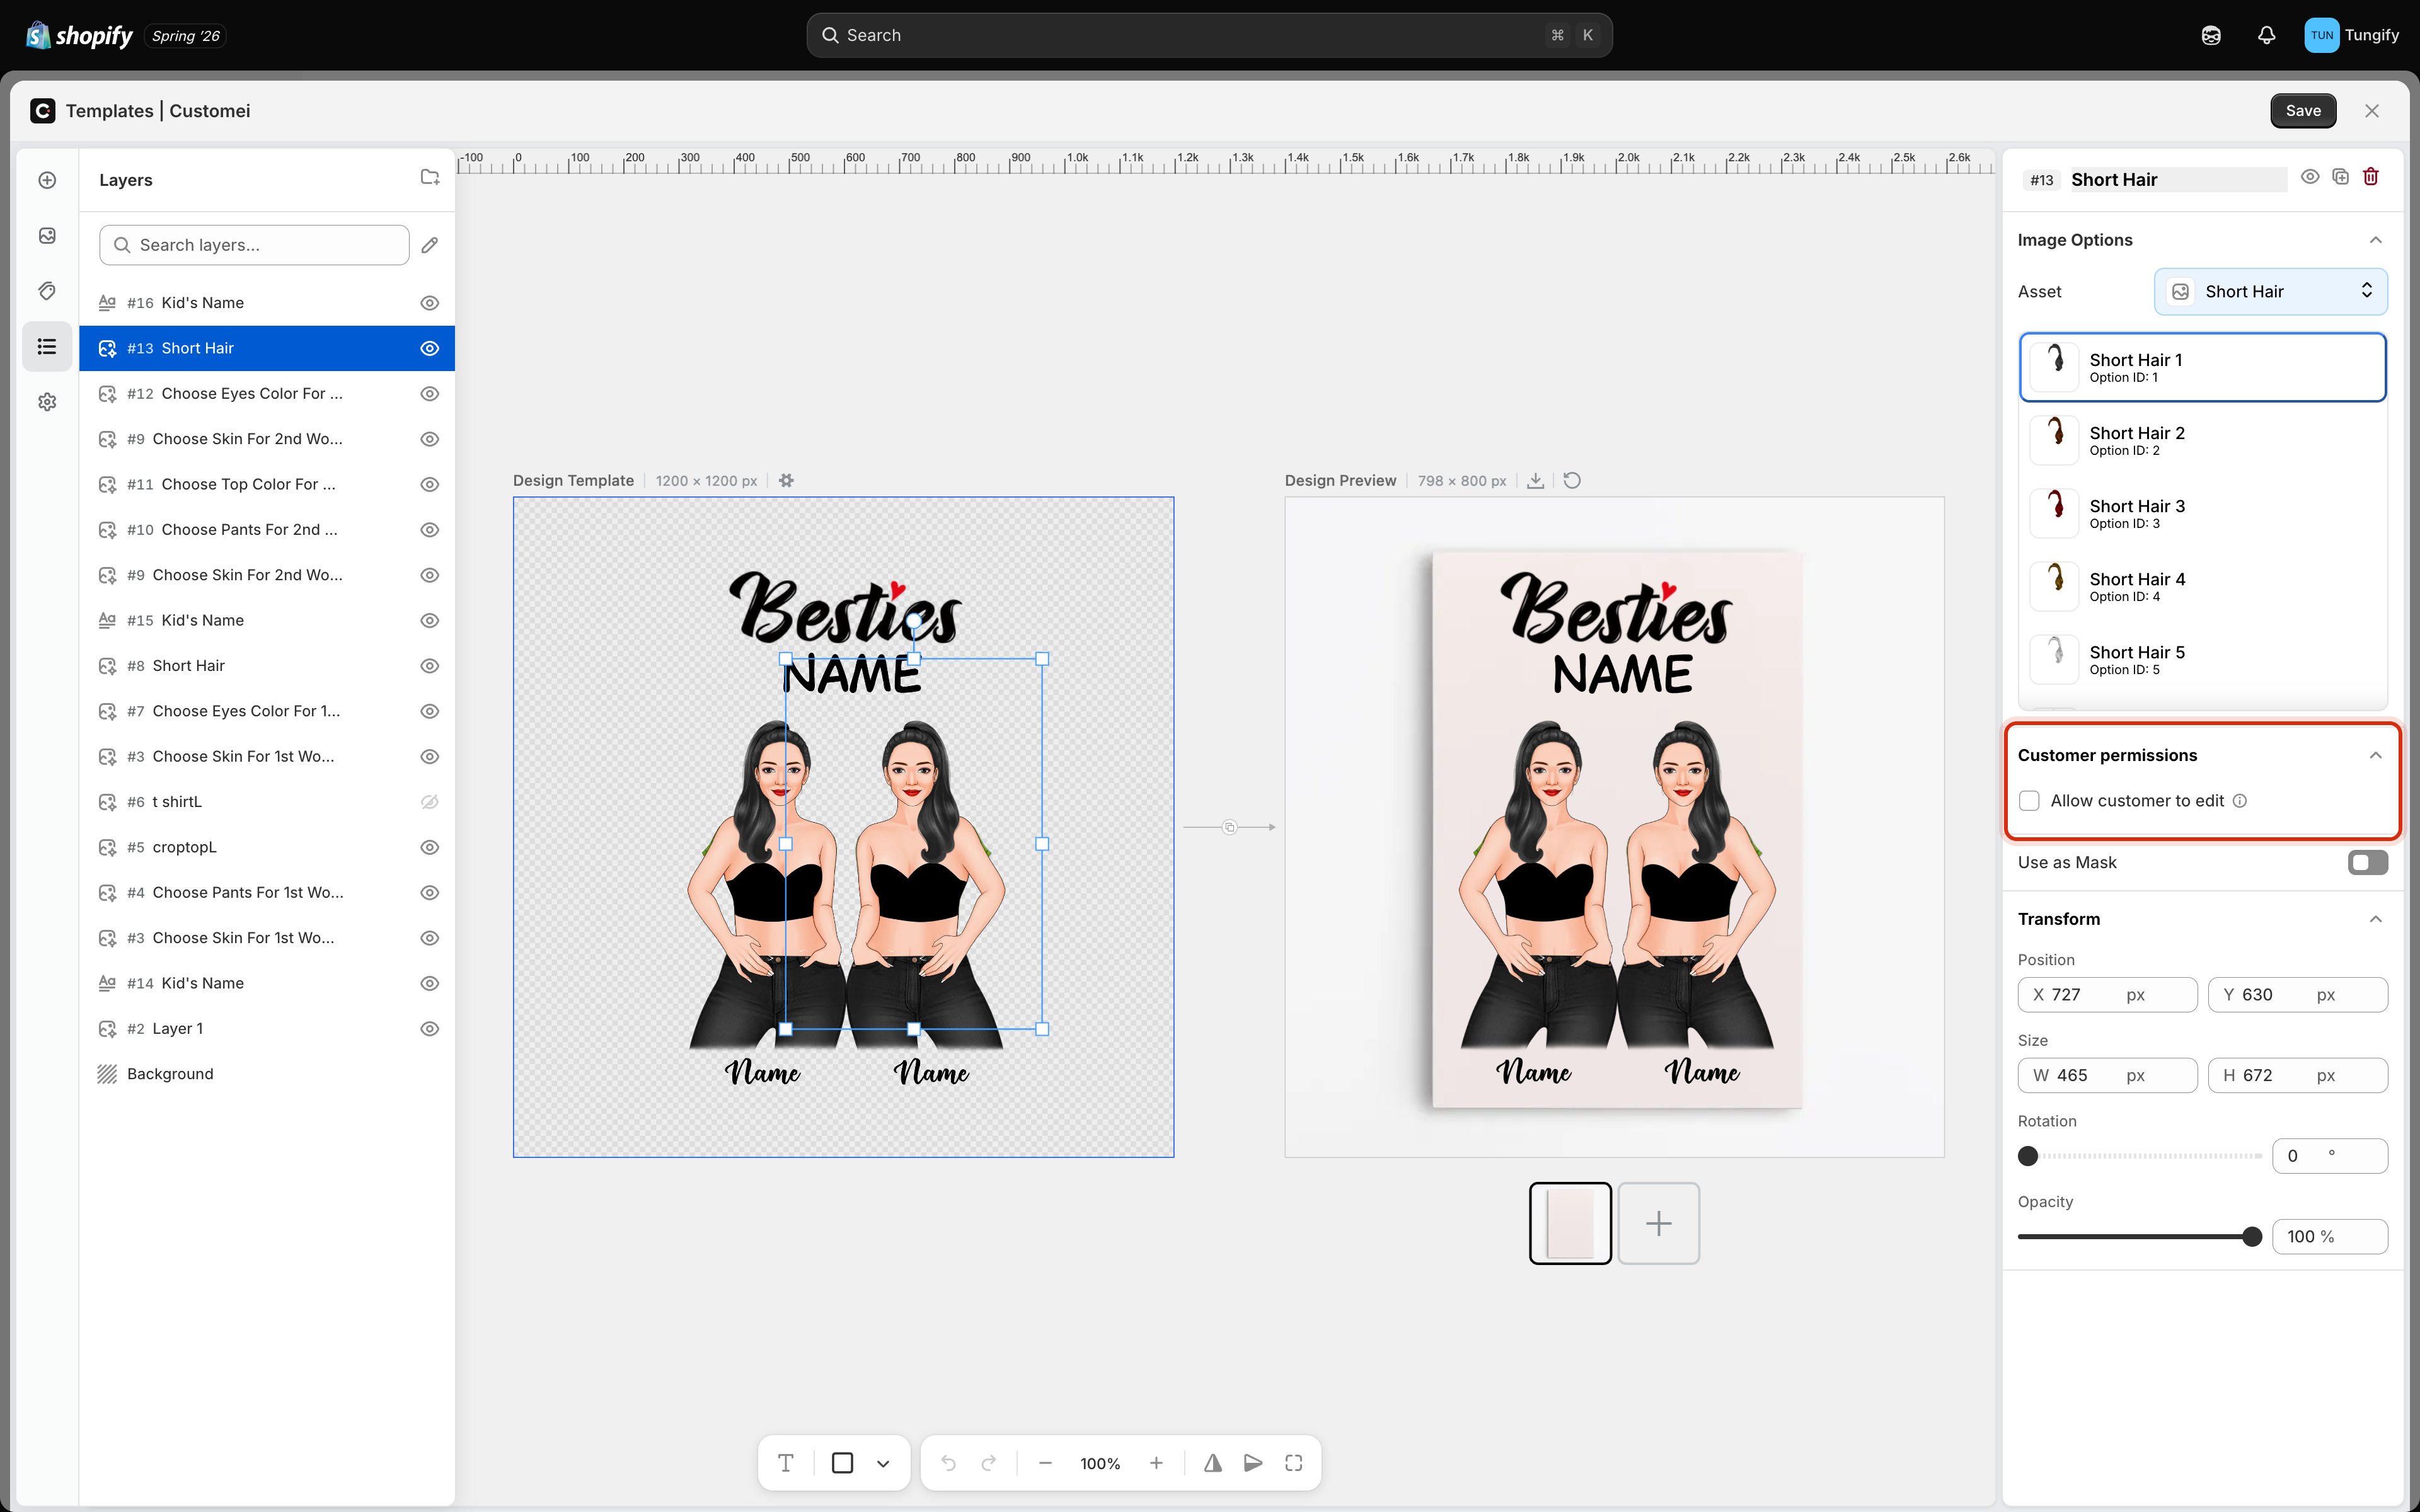
| **Image** | The shopper can move and rotate the picture inside its frame | Off |
That difference matters. Ticking it on a text layer is what turns it into a fill-in-the-blank. Ticking it on an image layer does not let anyone swap the picture, it only lets them nudge and turn the one that is already there.
If a layer has no **Customer permissions** section at all, it is not a layer a shopper can interact with. Background art and decorative shapes are always fixed.
## The same label means two different things
**Allow customer to edit** appears on both text and image layers, but it does not grant the same thing.
| On this layer | "Allow customer to edit" means | Default |
| ------------- | ------------------------------------------------------------ | ------- |
| **Text** | The shopper can change the words | On |
| **Image** | The shopper can move and rotate the picture inside its frame | Off |
That difference matters. Ticking it on a text layer is what turns it into a fill-in-the-blank. Ticking it on an image layer does not let anyone swap the picture, it only lets them nudge and turn the one that is already there.
 ## Letting customers upload their own photo
Layers built as a photo placeholder get a second toggle, **Allow customer to upload image**, and it starts switched **on**. That is the whole point of a placeholder: the shopper puts their own picture into the frame.
Pair the two toggles to control how much freedom they get:
* **Upload on, edit off.** The customer supplies the photo and you decide exactly how it sits. Predictable, and the safest choice for print.
* **Upload on, edit on.** The customer supplies the photo and can move and rotate it to frame it themselves. Better for pet portraits and family photos, where only the customer knows which part matters.
Letting customers move their own artwork means some of them will move it badly, and the print file follows what they did. If your product has an area that must stay clear, leave editing off and position the photo yourself.
## Other layers that can be personalized
Calendars, QR codes, maps, word clouds, and word searches also carry an **Allow customer to edit** toggle. On those it works like text: switch it on and the shopper can change what the layer is built from, such as the date on a calendar or the location on a map.
## A rule of thumb
Go through your template before you publish and ask one question of each layer: *should a stranger be able to change this?*
* Their name, their date, their photo: yes.
* Your logo, your border, your product's fixed wording: no.
A layer left editable by accident is one of the easier ways to receive an order you cannot fulfil. It costs a minute to walk the layer list and check.
## Where to next
Make sure any name a customer types still fits.
Turn an editable layer into a field on your product page.
Only ask for what is relevant to the customer's choices.
Put the template on a product page.
## Letting customers upload their own photo
Layers built as a photo placeholder get a second toggle, **Allow customer to upload image**, and it starts switched **on**. That is the whole point of a placeholder: the shopper puts their own picture into the frame.
Pair the two toggles to control how much freedom they get:
* **Upload on, edit off.** The customer supplies the photo and you decide exactly how it sits. Predictable, and the safest choice for print.
* **Upload on, edit on.** The customer supplies the photo and can move and rotate it to frame it themselves. Better for pet portraits and family photos, where only the customer knows which part matters.
Letting customers move their own artwork means some of them will move it badly, and the print file follows what they did. If your product has an area that must stay clear, leave editing off and position the photo yourself.
## Other layers that can be personalized
Calendars, QR codes, maps, word clouds, and word searches also carry an **Allow customer to edit** toggle. On those it works like text: switch it on and the shopper can change what the layer is built from, such as the date on a calendar or the location on a map.
## A rule of thumb
Go through your template before you publish and ask one question of each layer: *should a stranger be able to change this?*
* Their name, their date, their photo: yes.
* Your logo, your border, your product's fixed wording: no.
A layer left editable by accident is one of the easier ways to receive an order you cannot fulfil. It costs a minute to walk the layer list and check.
## Where to next
Make sure any name a customer types still fits.
Turn an editable layer into a field on your product page.
Only ask for what is relevant to the customer's choices.
Put the template on a product page.