> ## Documentation Index
> Fetch the complete documentation index at: https://docs.customei.com/llms.txt
> Use this file to discover all available pages before exploring further.
# The design and preview frames
> Why the editor shows two canvases side by side, which one gets printed, and how the preview keeps up with your design.
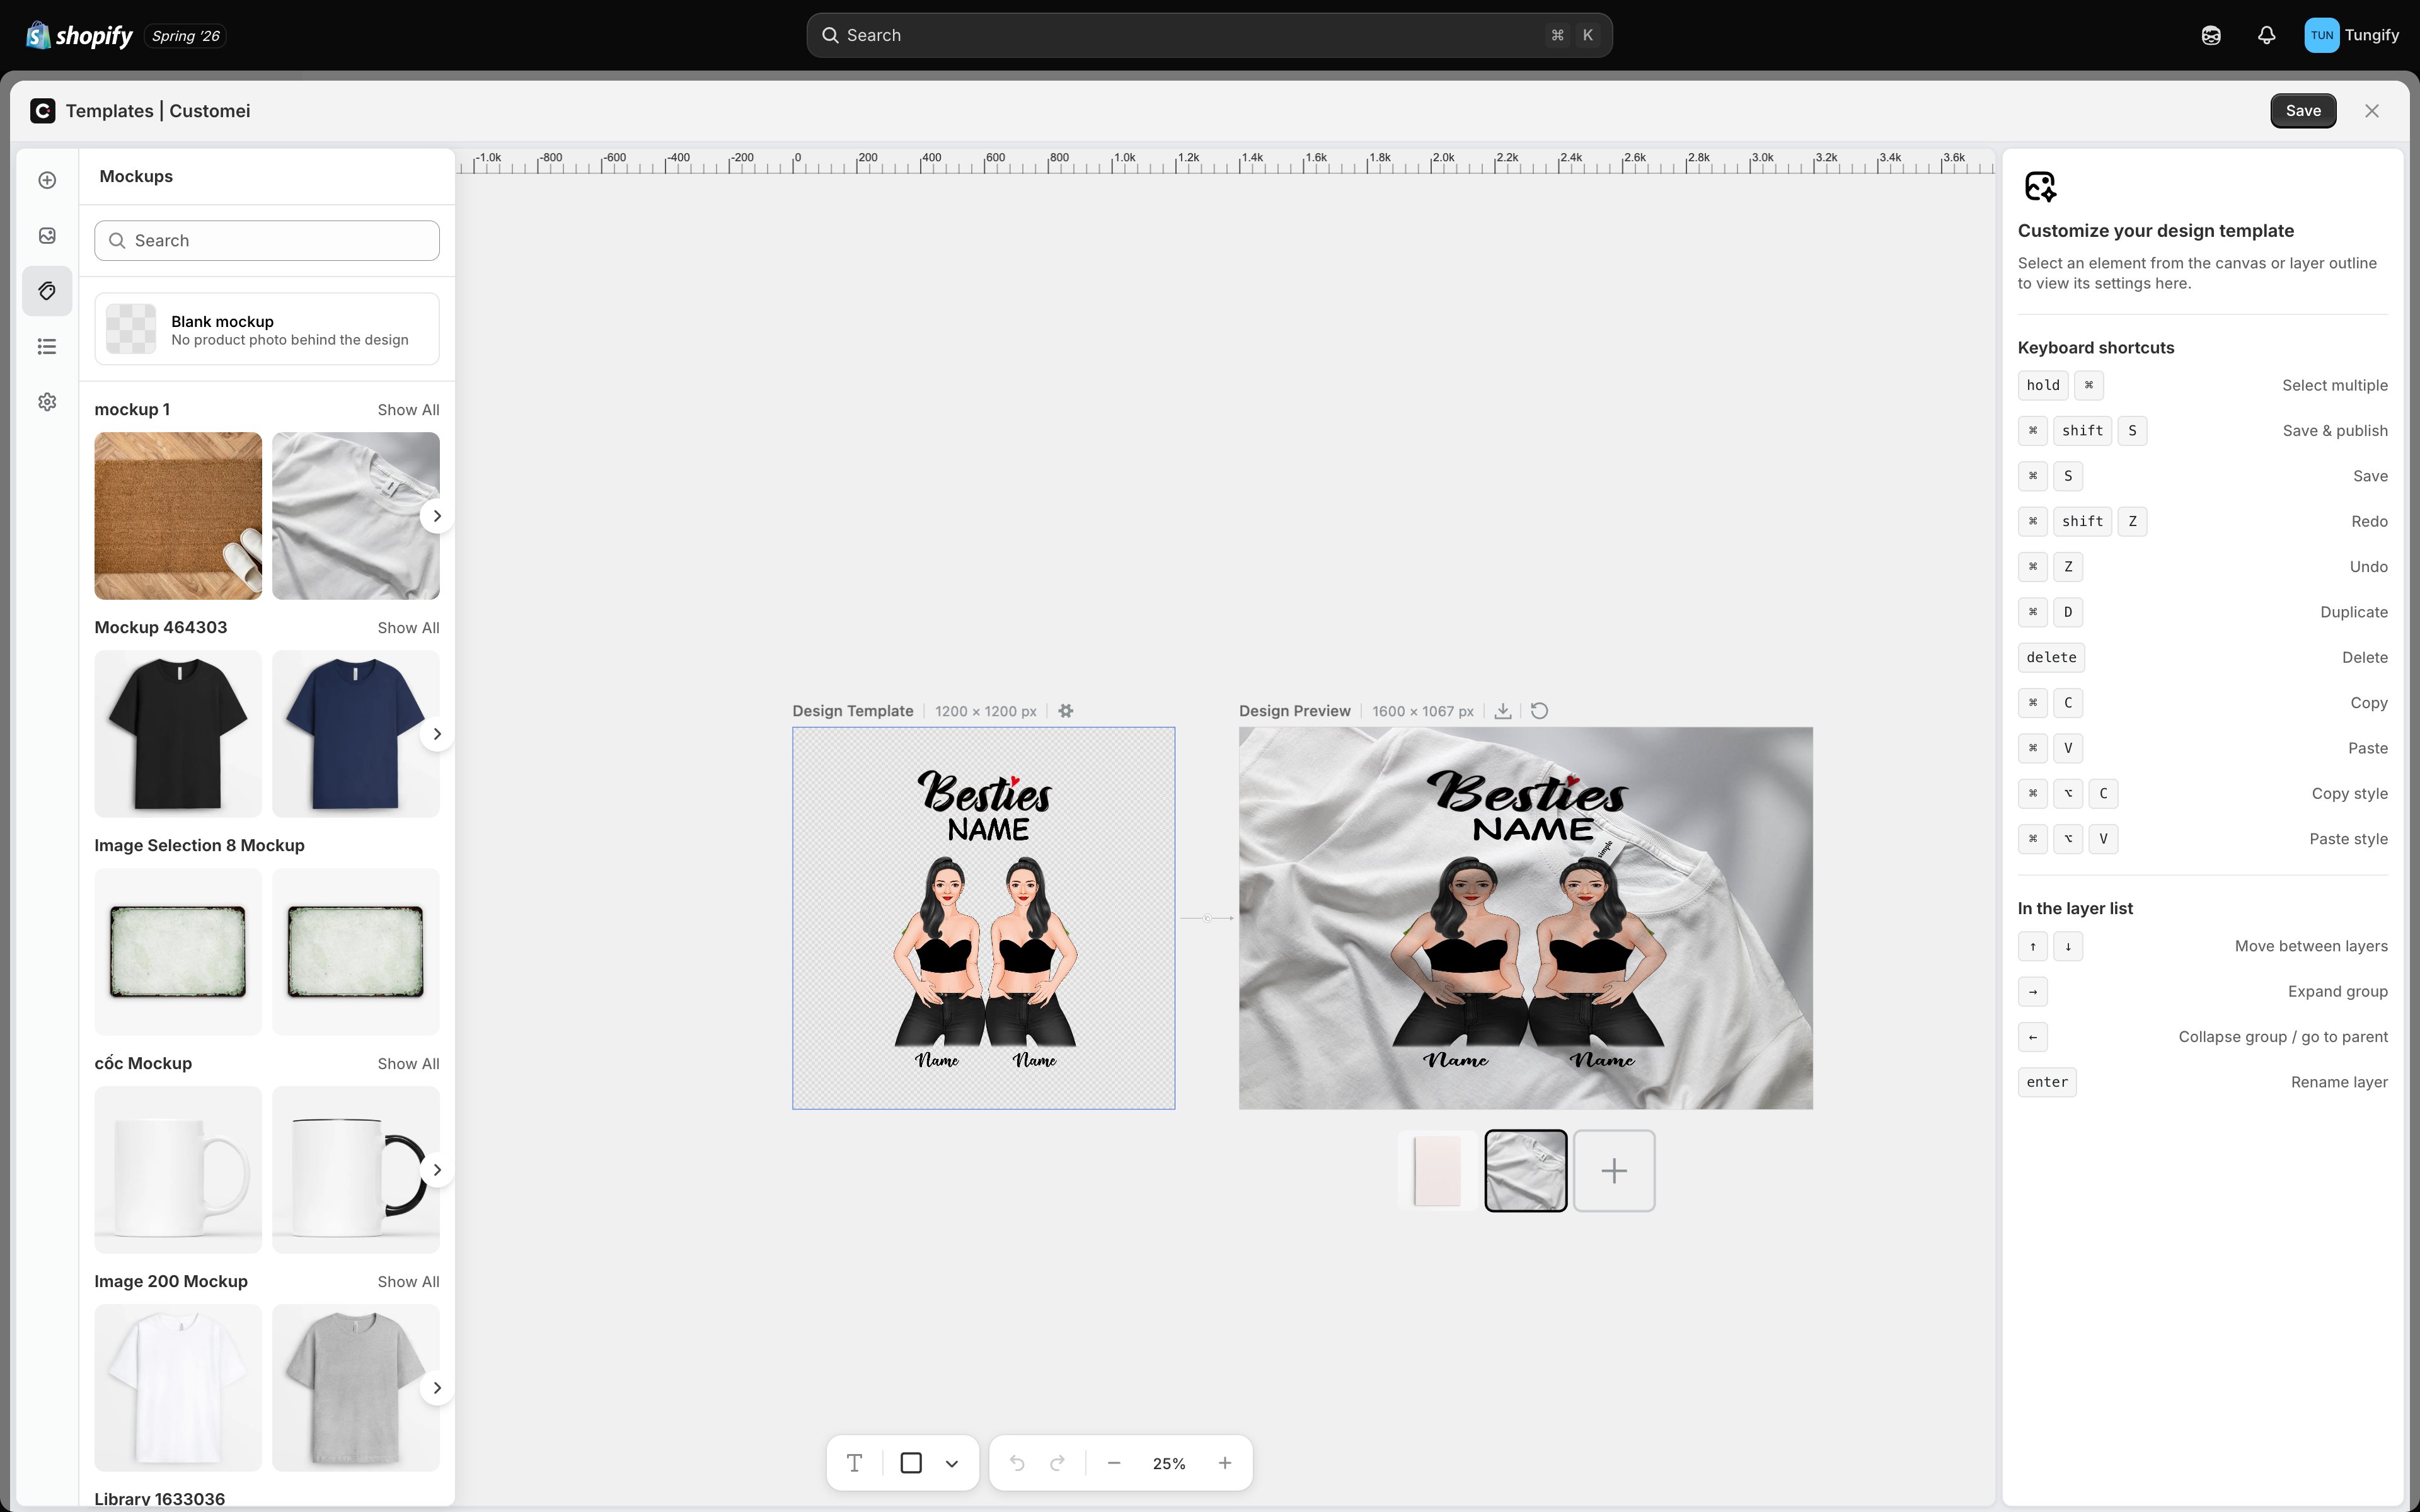
Open any design template and you'll see two canvases side by side. Understanding what each one is for is the single most useful thing to know about the editor.
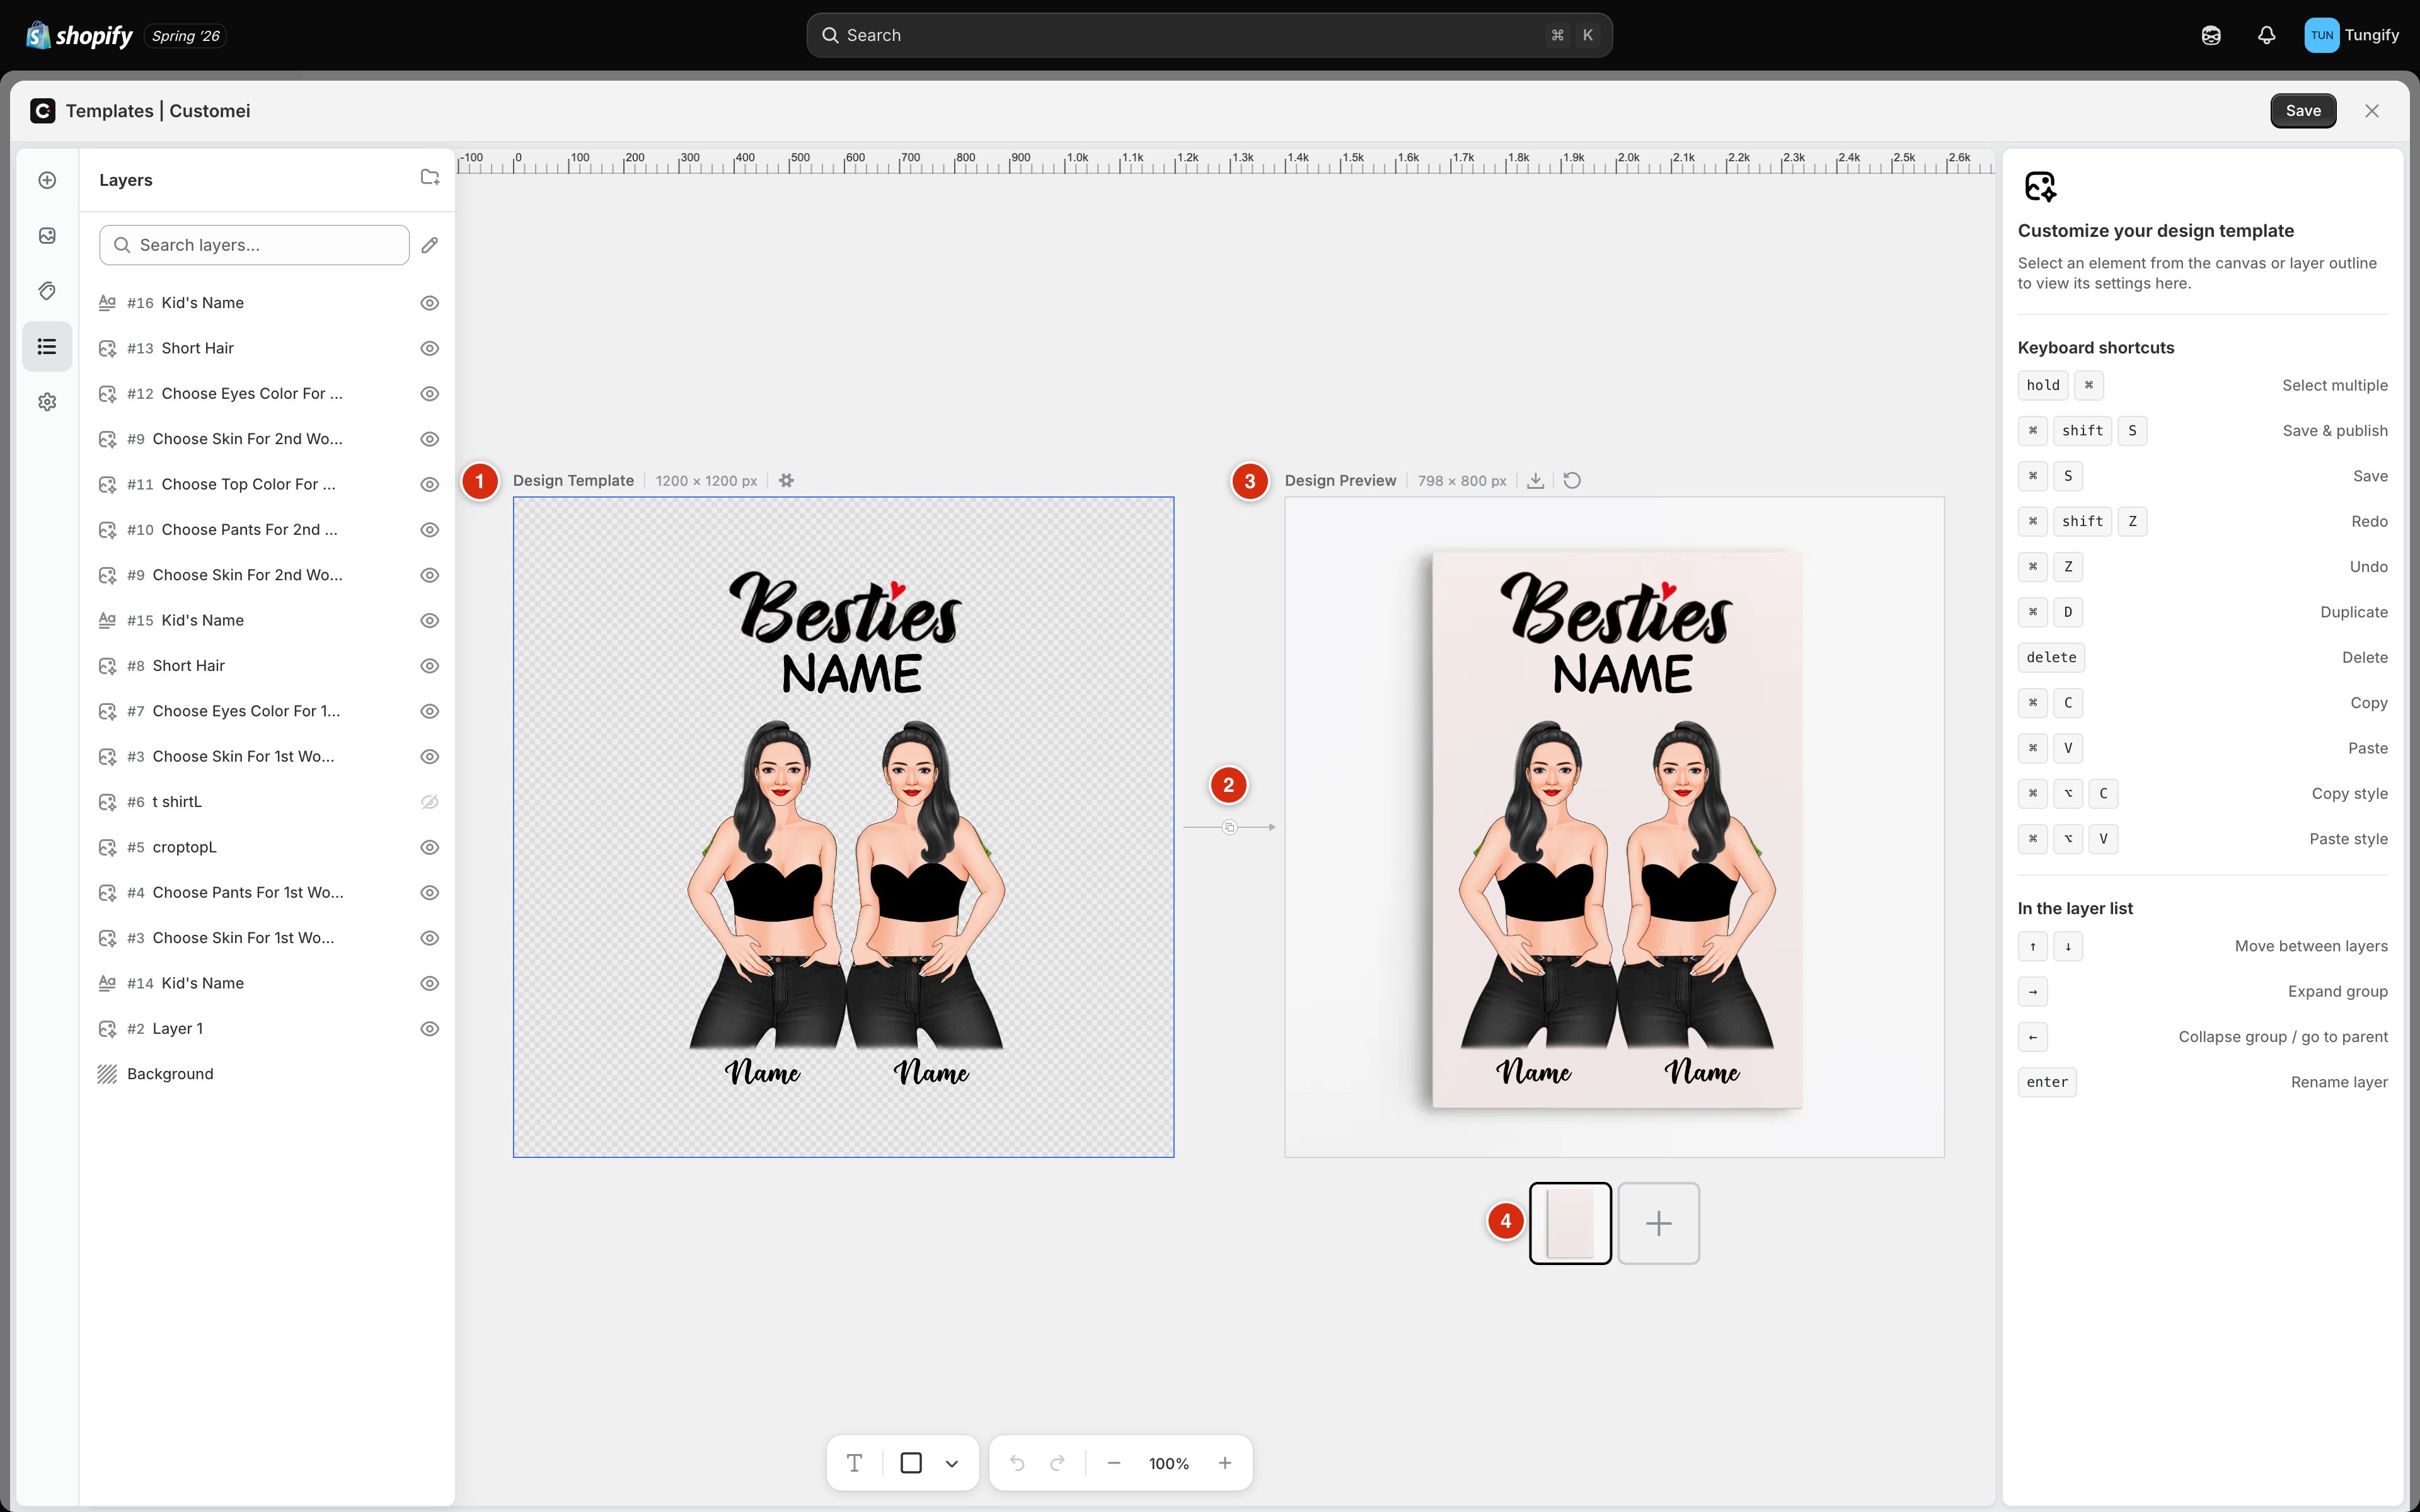 | | Design Template | Design Preview |
| ---------------- | -------------------------- | ------------------------------------------------ |
| **What it is** | Your artwork at print size | The same artwork shown on a photo of the product |
| **Who it's for** | Your printer | You and your shopper |
| **Gets printed** | Yes | No |
| **How many** | Always exactly one | As many as you like, one per product photo |
Everything you sell is made from the **Design Template**. The **Design Preview** exists so you and your customer can see how that artwork will look on the real thing: on a mug, on a t-shirt, on a canvas.
A brand-new template has no preview yet. The right-hand frame shows an **Add Mockup** button until you pick a product photo. See [Add a mockup preview](/editor/add-a-mockup).
## The label above each frame
Each frame is labelled with its name and its size in pixels, followed by a few small icons.
| Icon | On which frame | What it does |
| -------------- | --------------- | ---------------------------------------------------------------------------- |
| Gear | Design Template | Opens the template's settings |
| Download | Design Preview | Saves the preview as an image. See [below](#download-a-preview-as-an-image). |
| Circular arrow | Design Preview | Puts the layers back where the design frame has them |
The two sizes are often different, and that's normal. The Design Template is your print size. Each Design Preview is as big as the area the product photo has for artwork.
## The preview follows your design
By default a preview frame simply mirrors your artwork. Move a layer on the Design Template, and it moves on the preview too. Change the wording, swap a photo, restyle the text, and the preview keeps up without you doing anything.
That link holds until you rearrange something **on the preview frame itself**.
The moment you move, resize, rotate, or hide a layer while you're working on a preview frame, that frame stops following the Design Template and keeps its own arrangement instead. From then on, moving layers on the design frame no longer moves anything on that preview.
This applies to the whole frame, not just the layer you moved. And it applies to that one frame only, so your other previews carry on following as normal.
This is usually what you want. A design centred on a print file often needs nudging up a little to sit nicely on a t-shirt chest, and you don't want your next design edit to undo that nudge.
### Putting a preview back in step
If a preview has drifted somewhere you didn't intend, click the **circular arrow** next to its label. Every layer jumps back to where the Design Template has it, and the frame starts following your design again.
| | Design Template | Design Preview |
| ---------------- | -------------------------- | ------------------------------------------------ |
| **What it is** | Your artwork at print size | The same artwork shown on a photo of the product |
| **Who it's for** | Your printer | You and your shopper |
| **Gets printed** | Yes | No |
| **How many** | Always exactly one | As many as you like, one per product photo |
Everything you sell is made from the **Design Template**. The **Design Preview** exists so you and your customer can see how that artwork will look on the real thing: on a mug, on a t-shirt, on a canvas.
A brand-new template has no preview yet. The right-hand frame shows an **Add Mockup** button until you pick a product photo. See [Add a mockup preview](/editor/add-a-mockup).
## The label above each frame
Each frame is labelled with its name and its size in pixels, followed by a few small icons.
| Icon | On which frame | What it does |
| -------------- | --------------- | ---------------------------------------------------------------------------- |
| Gear | Design Template | Opens the template's settings |
| Download | Design Preview | Saves the preview as an image. See [below](#download-a-preview-as-an-image). |
| Circular arrow | Design Preview | Puts the layers back where the design frame has them |
The two sizes are often different, and that's normal. The Design Template is your print size. Each Design Preview is as big as the area the product photo has for artwork.
## The preview follows your design
By default a preview frame simply mirrors your artwork. Move a layer on the Design Template, and it moves on the preview too. Change the wording, swap a photo, restyle the text, and the preview keeps up without you doing anything.
That link holds until you rearrange something **on the preview frame itself**.
The moment you move, resize, rotate, or hide a layer while you're working on a preview frame, that frame stops following the Design Template and keeps its own arrangement instead. From then on, moving layers on the design frame no longer moves anything on that preview.
This applies to the whole frame, not just the layer you moved. And it applies to that one frame only, so your other previews carry on following as normal.
This is usually what you want. A design centred on a print file often needs nudging up a little to sit nicely on a t-shirt chest, and you don't want your next design edit to undo that nudge.
### Putting a preview back in step
If a preview has drifted somewhere you didn't intend, click the **circular arrow** next to its label. Every layer jumps back to where the Design Template has it, and the frame starts following your design again.
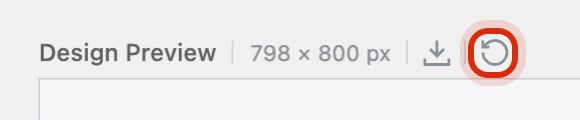 It only changes where layers sit; the wording and pictures on them are untouched. If you clicked it by mistake, ⌘ Z brings your arrangement back.
## Working on a preview frame
Click inside a preview frame and the editor quietly switches its attention to that frame. Two panels change with it, and each one tells you so.
It only changes where layers sit; the wording and pictures on them are untouched. If you clicked it by mistake, ⌘ Z brings your arrangement back.
## Working on a preview frame
Click inside a preview frame and the editor quietly switches its attention to that frame. Two panels change with it, and each one tells you so.
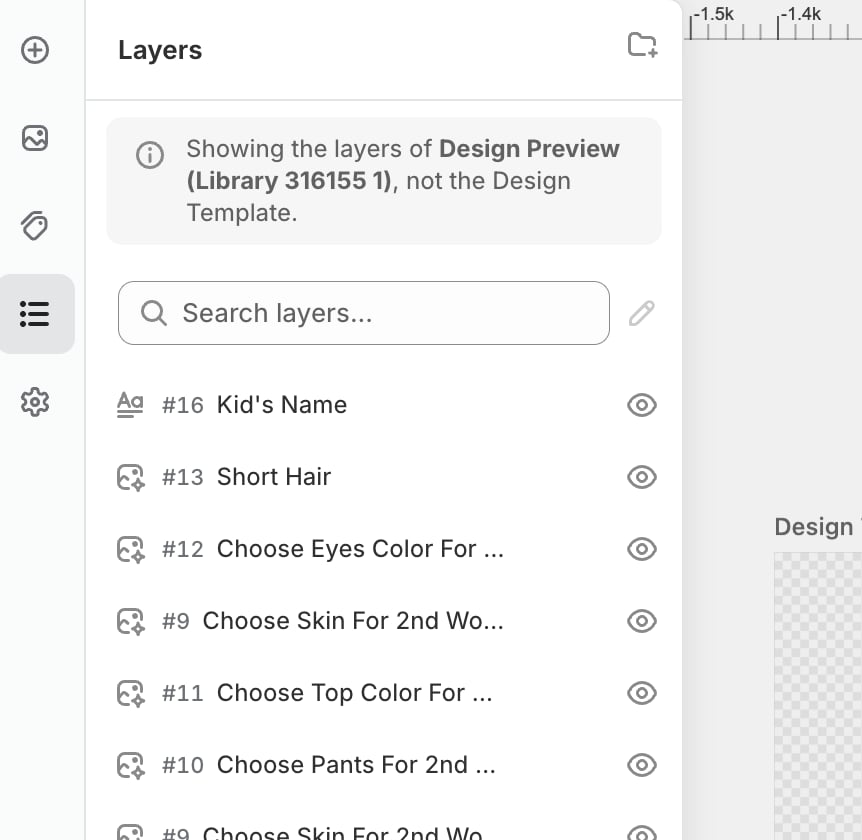
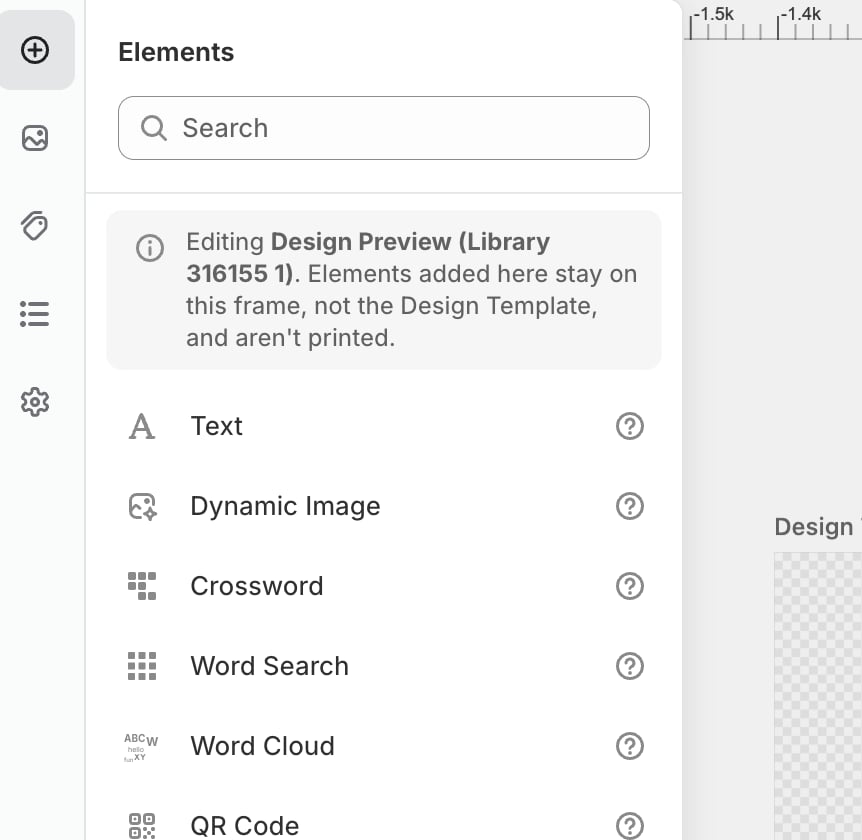 So an element you add here, such as a shadow, a sticker, or a bit of styling that flatters the photo, shows up on that one preview and is never printed. That's deliberate, and it's genuinely useful for making a listing photo look good. It also catches people out: if a layer you added has vanished from your print file, check whether you added it while a preview frame was selected.
To go back to editing the artwork itself, click the **Design Template** canvas.
## Two ways to edit a preview
The small round button on the arrow between the two frames switches how you work on the preview.
| Mode | What you can move | Does what you add get printed? |
| --------------------------------- | ---------------------------------------------- | --------------------------------------- |
| **Layer by layer** (two squares) | Each layer separately, on that frame | No, additions stay on the preview |
| **Whole design** (blue, two bars) | The artwork as one piece: drag, resize, rotate | Yes, you're editing the Design Template |
Use **layer by layer** to fine-tune where individual pieces sit on the product. Use **whole design** when the artwork is fine but the whole thing needs to sit a little higher, smaller, or at an angle on the photo. Resizing in whole-design mode keeps the proportions locked so your artwork can't stretch.
Whole-design mode isn't available on a preview where you've placed extra copies of a layer. Remove the extras, or switch to a different preview first.
## If your artwork covers the whole product
Sometimes the preview shows your design spread across the entire photo, hiding the product underneath.
So an element you add here, such as a shadow, a sticker, or a bit of styling that flatters the photo, shows up on that one preview and is never printed. That's deliberate, and it's genuinely useful for making a listing photo look good. It also catches people out: if a layer you added has vanished from your print file, check whether you added it while a preview frame was selected.
To go back to editing the artwork itself, click the **Design Template** canvas.
## Two ways to edit a preview
The small round button on the arrow between the two frames switches how you work on the preview.
| Mode | What you can move | Does what you add get printed? |
| --------------------------------- | ---------------------------------------------- | --------------------------------------- |
| **Layer by layer** (two squares) | Each layer separately, on that frame | No, additions stay on the preview |
| **Whole design** (blue, two bars) | The artwork as one piece: drag, resize, rotate | Yes, you're editing the Design Template |
Use **layer by layer** to fine-tune where individual pieces sit on the product. Use **whole design** when the artwork is fine but the whole thing needs to sit a little higher, smaller, or at an angle on the photo. Resizing in whole-design mode keeps the proportions locked so your artwork can't stretch.
Whole-design mode isn't available on a preview where you've placed extra copies of a layer. Remove the extras, or switch to a different preview first.
## If your artwork covers the whole product
Sometimes the preview shows your design spread across the entire photo, hiding the product underneath.
 That means the product photo has no **design area**, meaning no marked-out patch where artwork belongs, so Customei fills the frame instead. The fix is on the mockup, not on your template: open it and draw the print area. See [Design areas](/mockups/mockup-designer#design-areas).
## Download a preview as an image
The download icon next to the Design Preview label saves the preview exactly as you see it. It's the quickest way to get a listing photo for Shopify.
That means the product photo has no **design area**, meaning no marked-out patch where artwork belongs, so Customei fills the frame instead. The fix is on the mockup, not on your template: open it and draw the print area. See [Design areas](/mockups/mockup-designer#design-areas).
## Download a preview as an image
The download icon next to the Design Preview label saves the preview exactly as you see it. It's the quickest way to get a listing photo for Shopify.
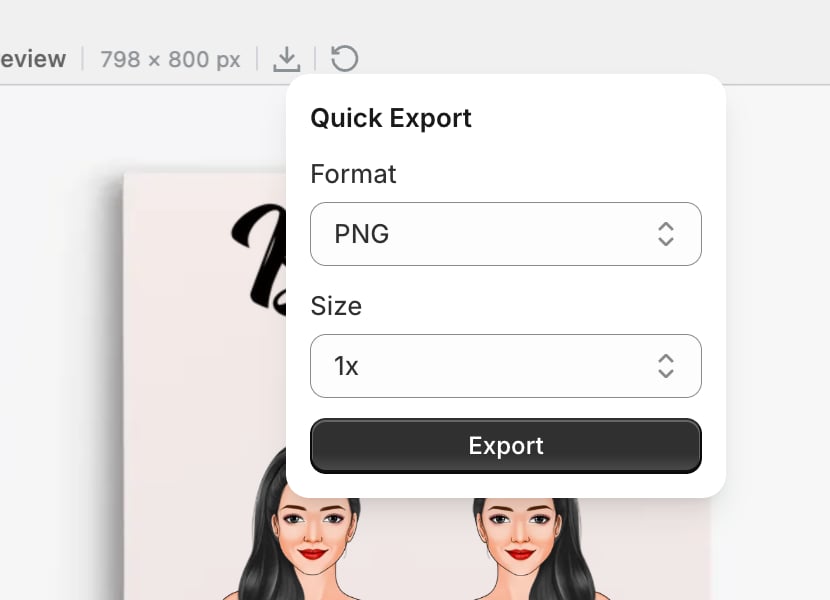 * **Format**: PNG for anything with transparency, JPEG for a smaller file, PDF for print.
* **Size**: 1x matches the frame, 2x and 3x give you a bigger image for a hero shot.
## Where to next
Put a product photo behind your artwork.
Blending, surface warp, and switch animations.
Where product photos live and how they're prepared.
Back to the artwork side.
* **Format**: PNG for anything with transparency, JPEG for a smaller file, PDF for print.
* **Size**: 1x matches the frame, 2x and 3x give you a bigger image for a hero shot.
## Where to next
Put a product photo behind your artwork.
Blending, surface warp, and switch animations.
Where product photos live and how they're prepared.
Back to the artwork side.