> ## Documentation Index
> Fetch the complete documentation index at: https://docs.customei.com/llms.txt
> Use this file to discover all available pages before exploring further.
# Assign products and go live
> Attach your option set to products, publish it, and read the status labels.
Your design template and option set are ready. Two steps left: choose which products get them, and publish.
## Step 1. Attach your products
Open the option set and switch to the **Config product** tab beside *Edit option*, then click **Assign products**.
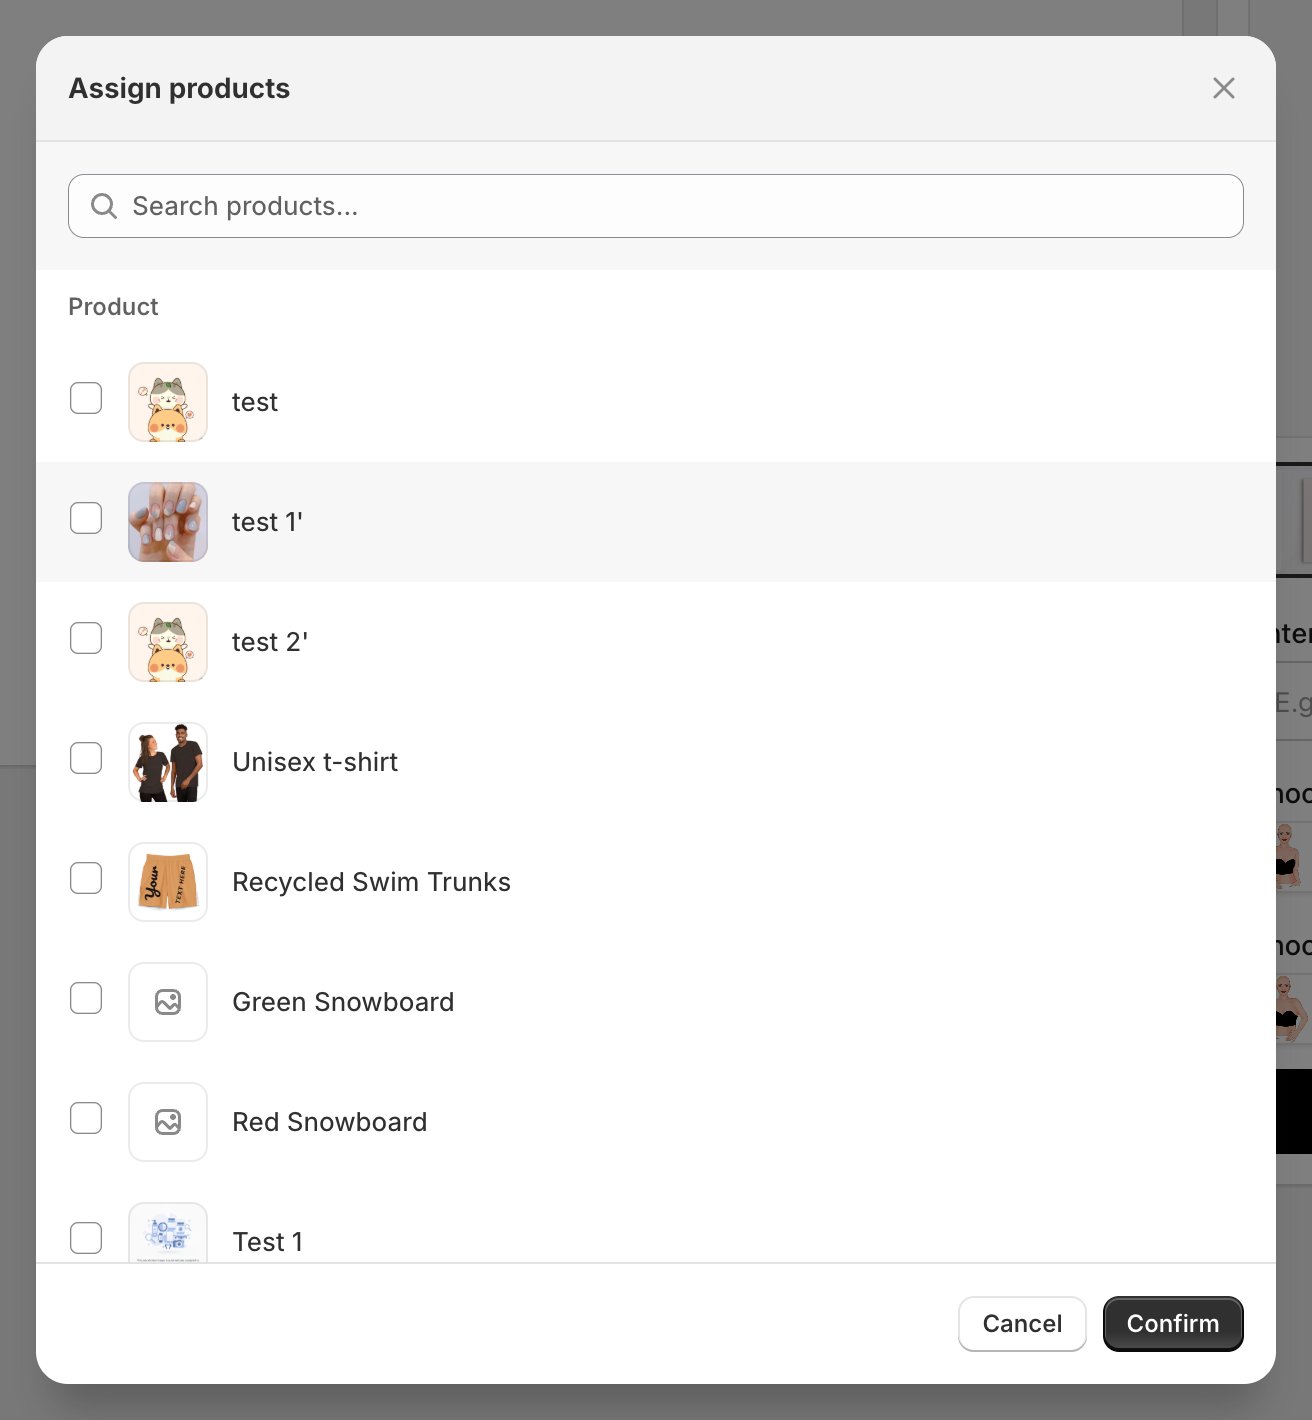 Tick the products you want and click **Confirm**. Search by name if your catalogue is long.
Each product you attach inherits the whole option set: the questions, the choices, and the design template behind them. Attach the same option set to five mugs and all five get the same personalization form.
Once products are attached, the **Config product** tab is also where you fine-tune each one individually, including which design layers change per Shopify variant.
## Step 2. Publish
Click **Publish** in the header. Customei pushes your options to every attached product and shows you the result product by product.
Tick the products you want and click **Confirm**. Search by name if your catalogue is long.
Each product you attach inherits the whole option set: the questions, the choices, and the design template behind them. Attach the same option set to five mugs and all five get the same personalization form.
Once products are attached, the **Config product** tab is also where you fine-tune each one individually, including which design layers change per Shopify variant.
## Step 2. Publish
Click **Publish** in the header. Customei pushes your options to every attached product and shows you the result product by product.
 Give it a few seconds, then open one of your product pages on the storefront. The options should be there.
Publishing is blocked until at least one product is attached. If you click **Publish** on an option set with no products, Customei opens the product picker instead. Pick your products there and publish again.
## Reading the status
The **Products** page shows where every product stands at a glance.
Give it a few seconds, then open one of your product pages on the storefront. The options should be there.
Publishing is blocked until at least one product is attached. If you click **Publish** on an option set with no products, Customei opens the product picker instead. Pick your products there and publish again.
## Reading the status
The **Products** page shows where every product stands at a glance.
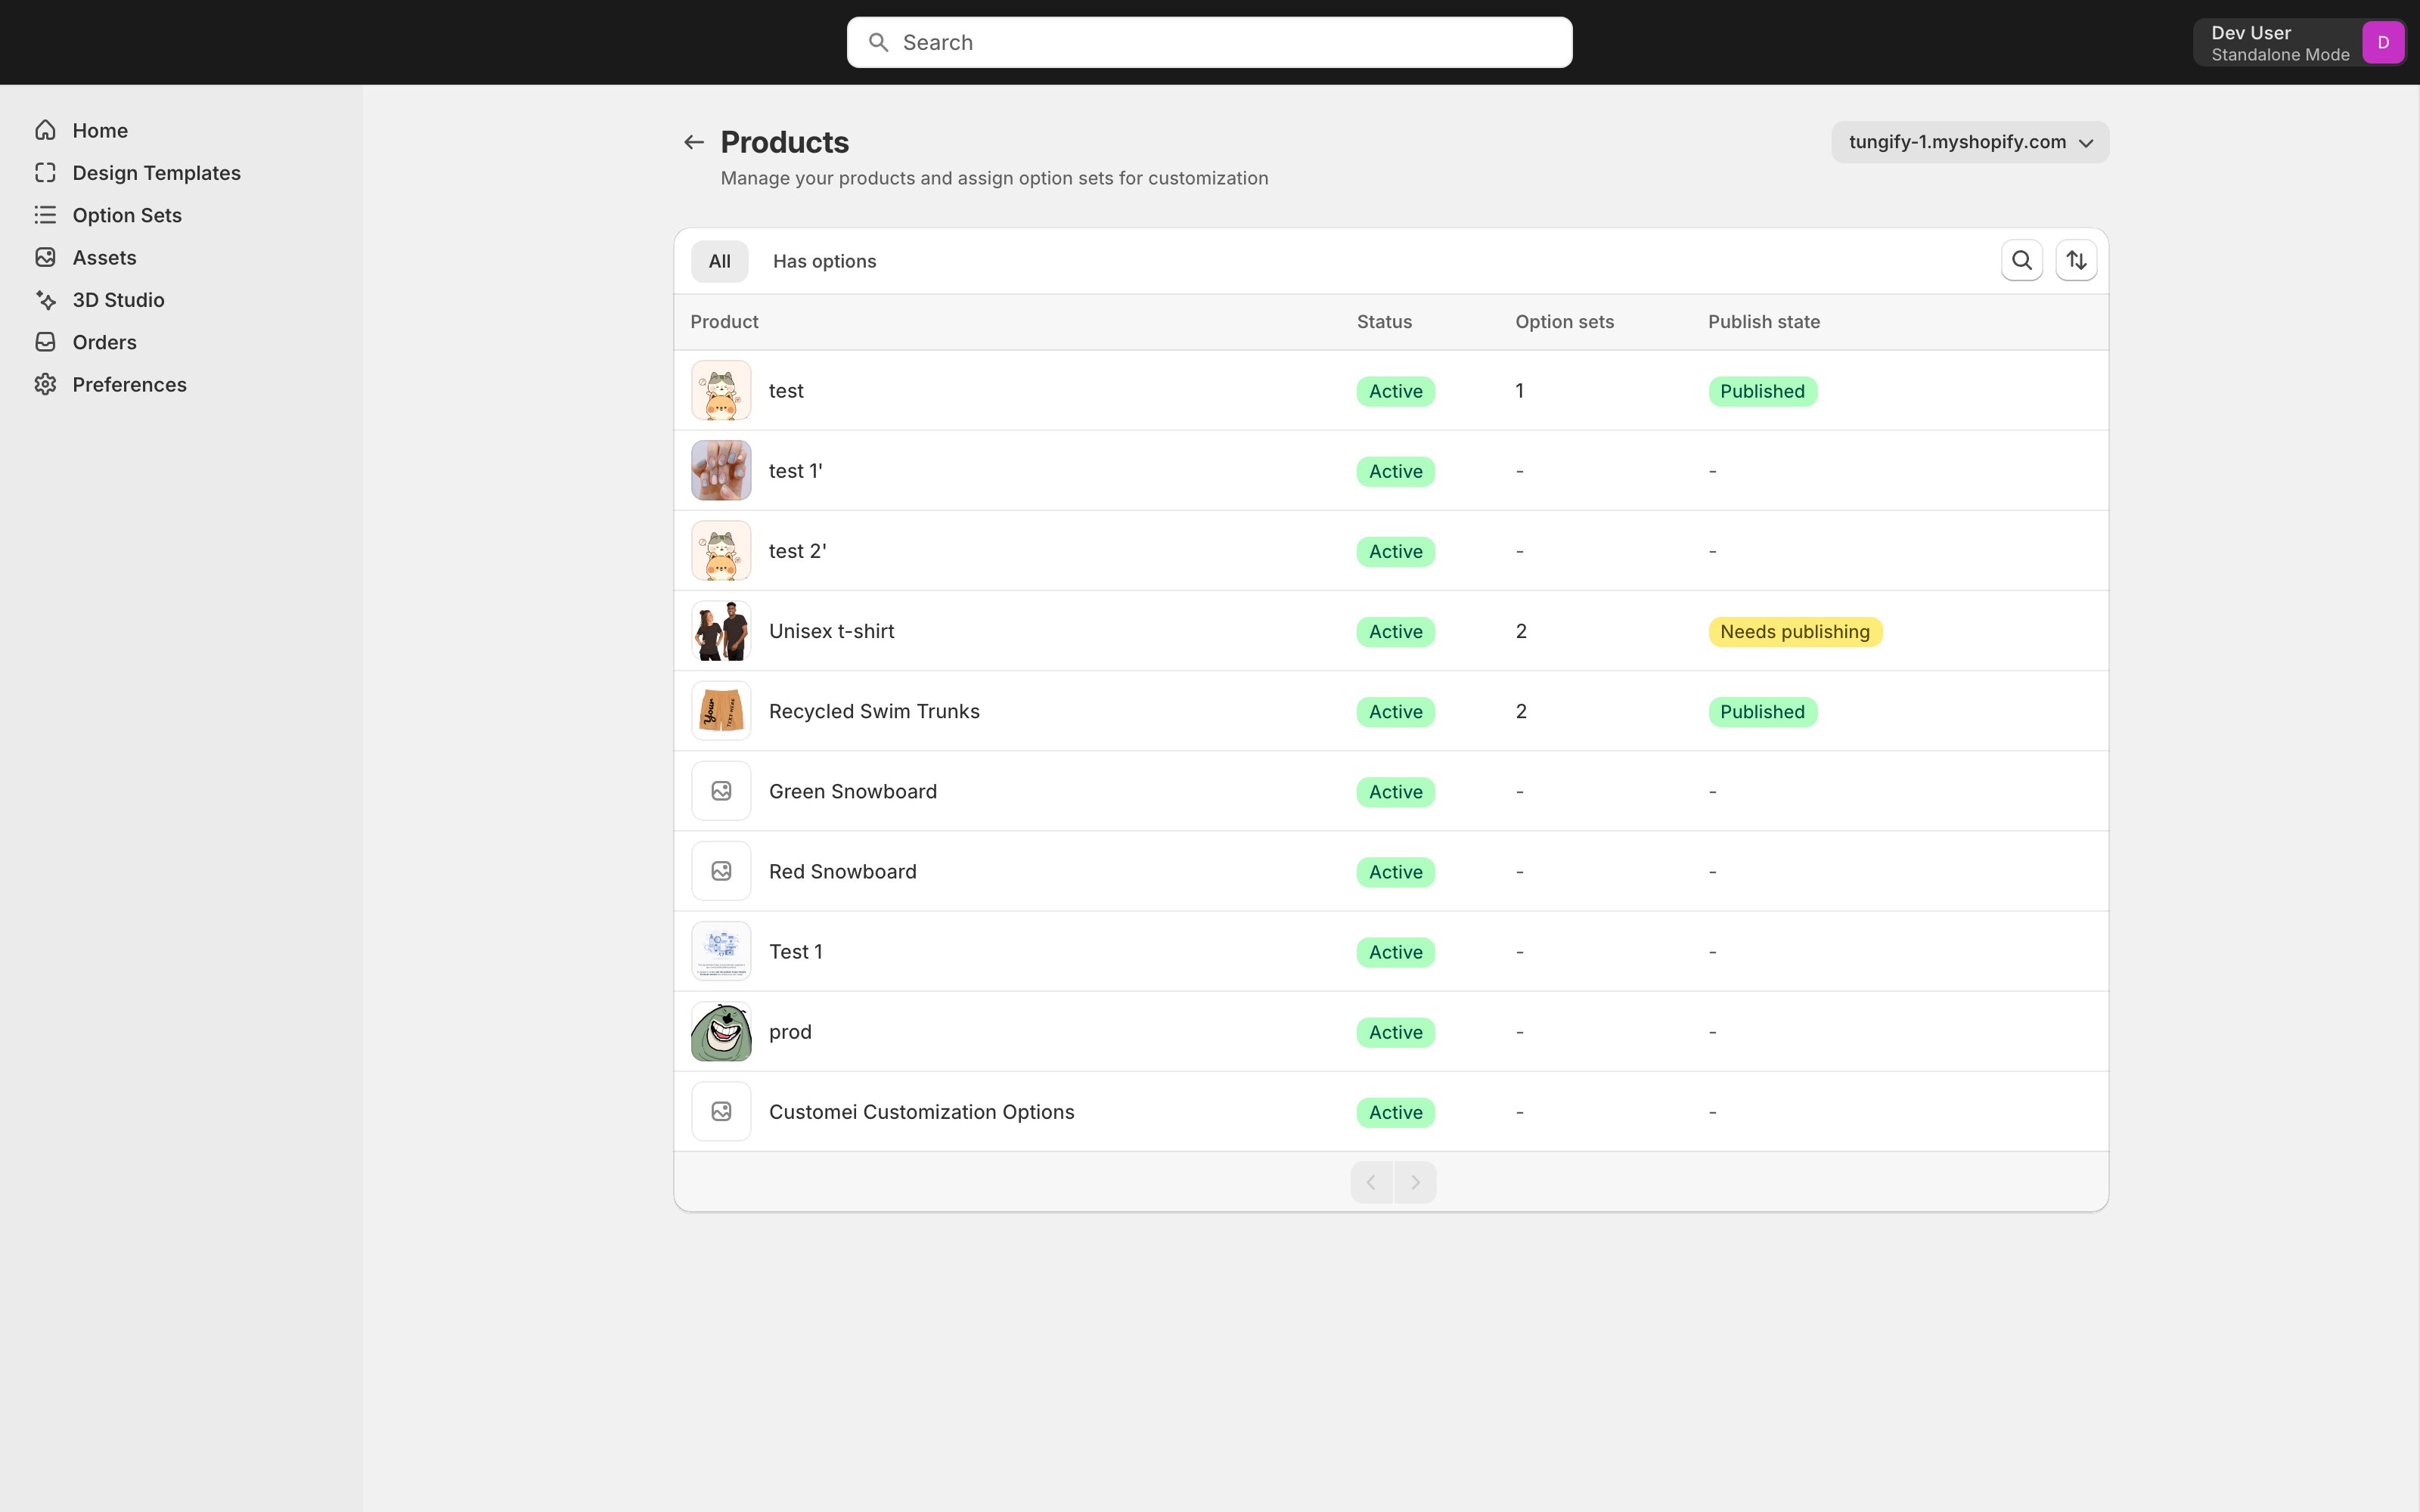 | Label | What it means | What to do |
| -------------------- | ------------------------------------------------------------------------------- | -------------- |
| **Published** | Live. Shoppers see the current version. | Nothing. |
| **Needs publishing** | Live, but you've changed something since. Shoppers still see the older version. | Publish again. |
| **Not live yet** | Set up but never published. | Publish. |
| *(blank)* | No option set attached to this product yet. | Attach one. |
**Needs publishing** is the label behind most *"I changed it but the storefront still shows the old one"* moments. Saving stores your work; publishing is what your customers see.
## Making changes later
Editing a live option set is safe. Your changes are saved as a draft and your storefront keeps serving the last published version until you publish again, so shoppers never catch you mid-edit.
The same goes for the design template: edit the artwork, save, and publish the option set to push the new look out.
## Where to next
Add more options or adjust the ones you have.
Wire a new option into the artwork.
| Label | What it means | What to do |
| -------------------- | ------------------------------------------------------------------------------- | -------------- |
| **Published** | Live. Shoppers see the current version. | Nothing. |
| **Needs publishing** | Live, but you've changed something since. Shoppers still see the older version. | Publish again. |
| **Not live yet** | Set up but never published. | Publish. |
| *(blank)* | No option set attached to this product yet. | Attach one. |
**Needs publishing** is the label behind most *"I changed it but the storefront still shows the old one"* moments. Saving stores your work; publishing is what your customers see.
## Making changes later
Editing a live option set is safe. Your changes are saved as a draft and your storefront keeps serving the last published version until you publish again, so shoppers never catch you mid-edit.
The same goes for the design template: edit the artwork, save, and publish the option set to push the new look out.
## Where to next
Add more options or adjust the ones you have.
Wire a new option into the artwork.