> ## Documentation Index
> Fetch the complete documentation index at: https://docs.customei.com/llms.txt
> Use this file to discover all available pages before exploring further.
# Mockups
> What a mockup is, where your product photos live, and how they get into a design template.
A **mockup** is a photo of the blank product you sell, prepared so Customei knows how to lay artwork onto it. The photo is only half of it. A finished mockup also carries:
* a **design area**, the patch of the photo where artwork belongs,
* a **surface shape**, how that patch curves, so print follows the product instead of lying flat on it,
* optional **clip masks**, edges that hide artwork where the product bends out of view.
Do that work once per product photo and every template you ever build can borrow it.
## Where mockups live
Mockups are assets, so they sit with your other reusable material under **Assets**. Open the **Mockup** tab to see just the mockup ones.
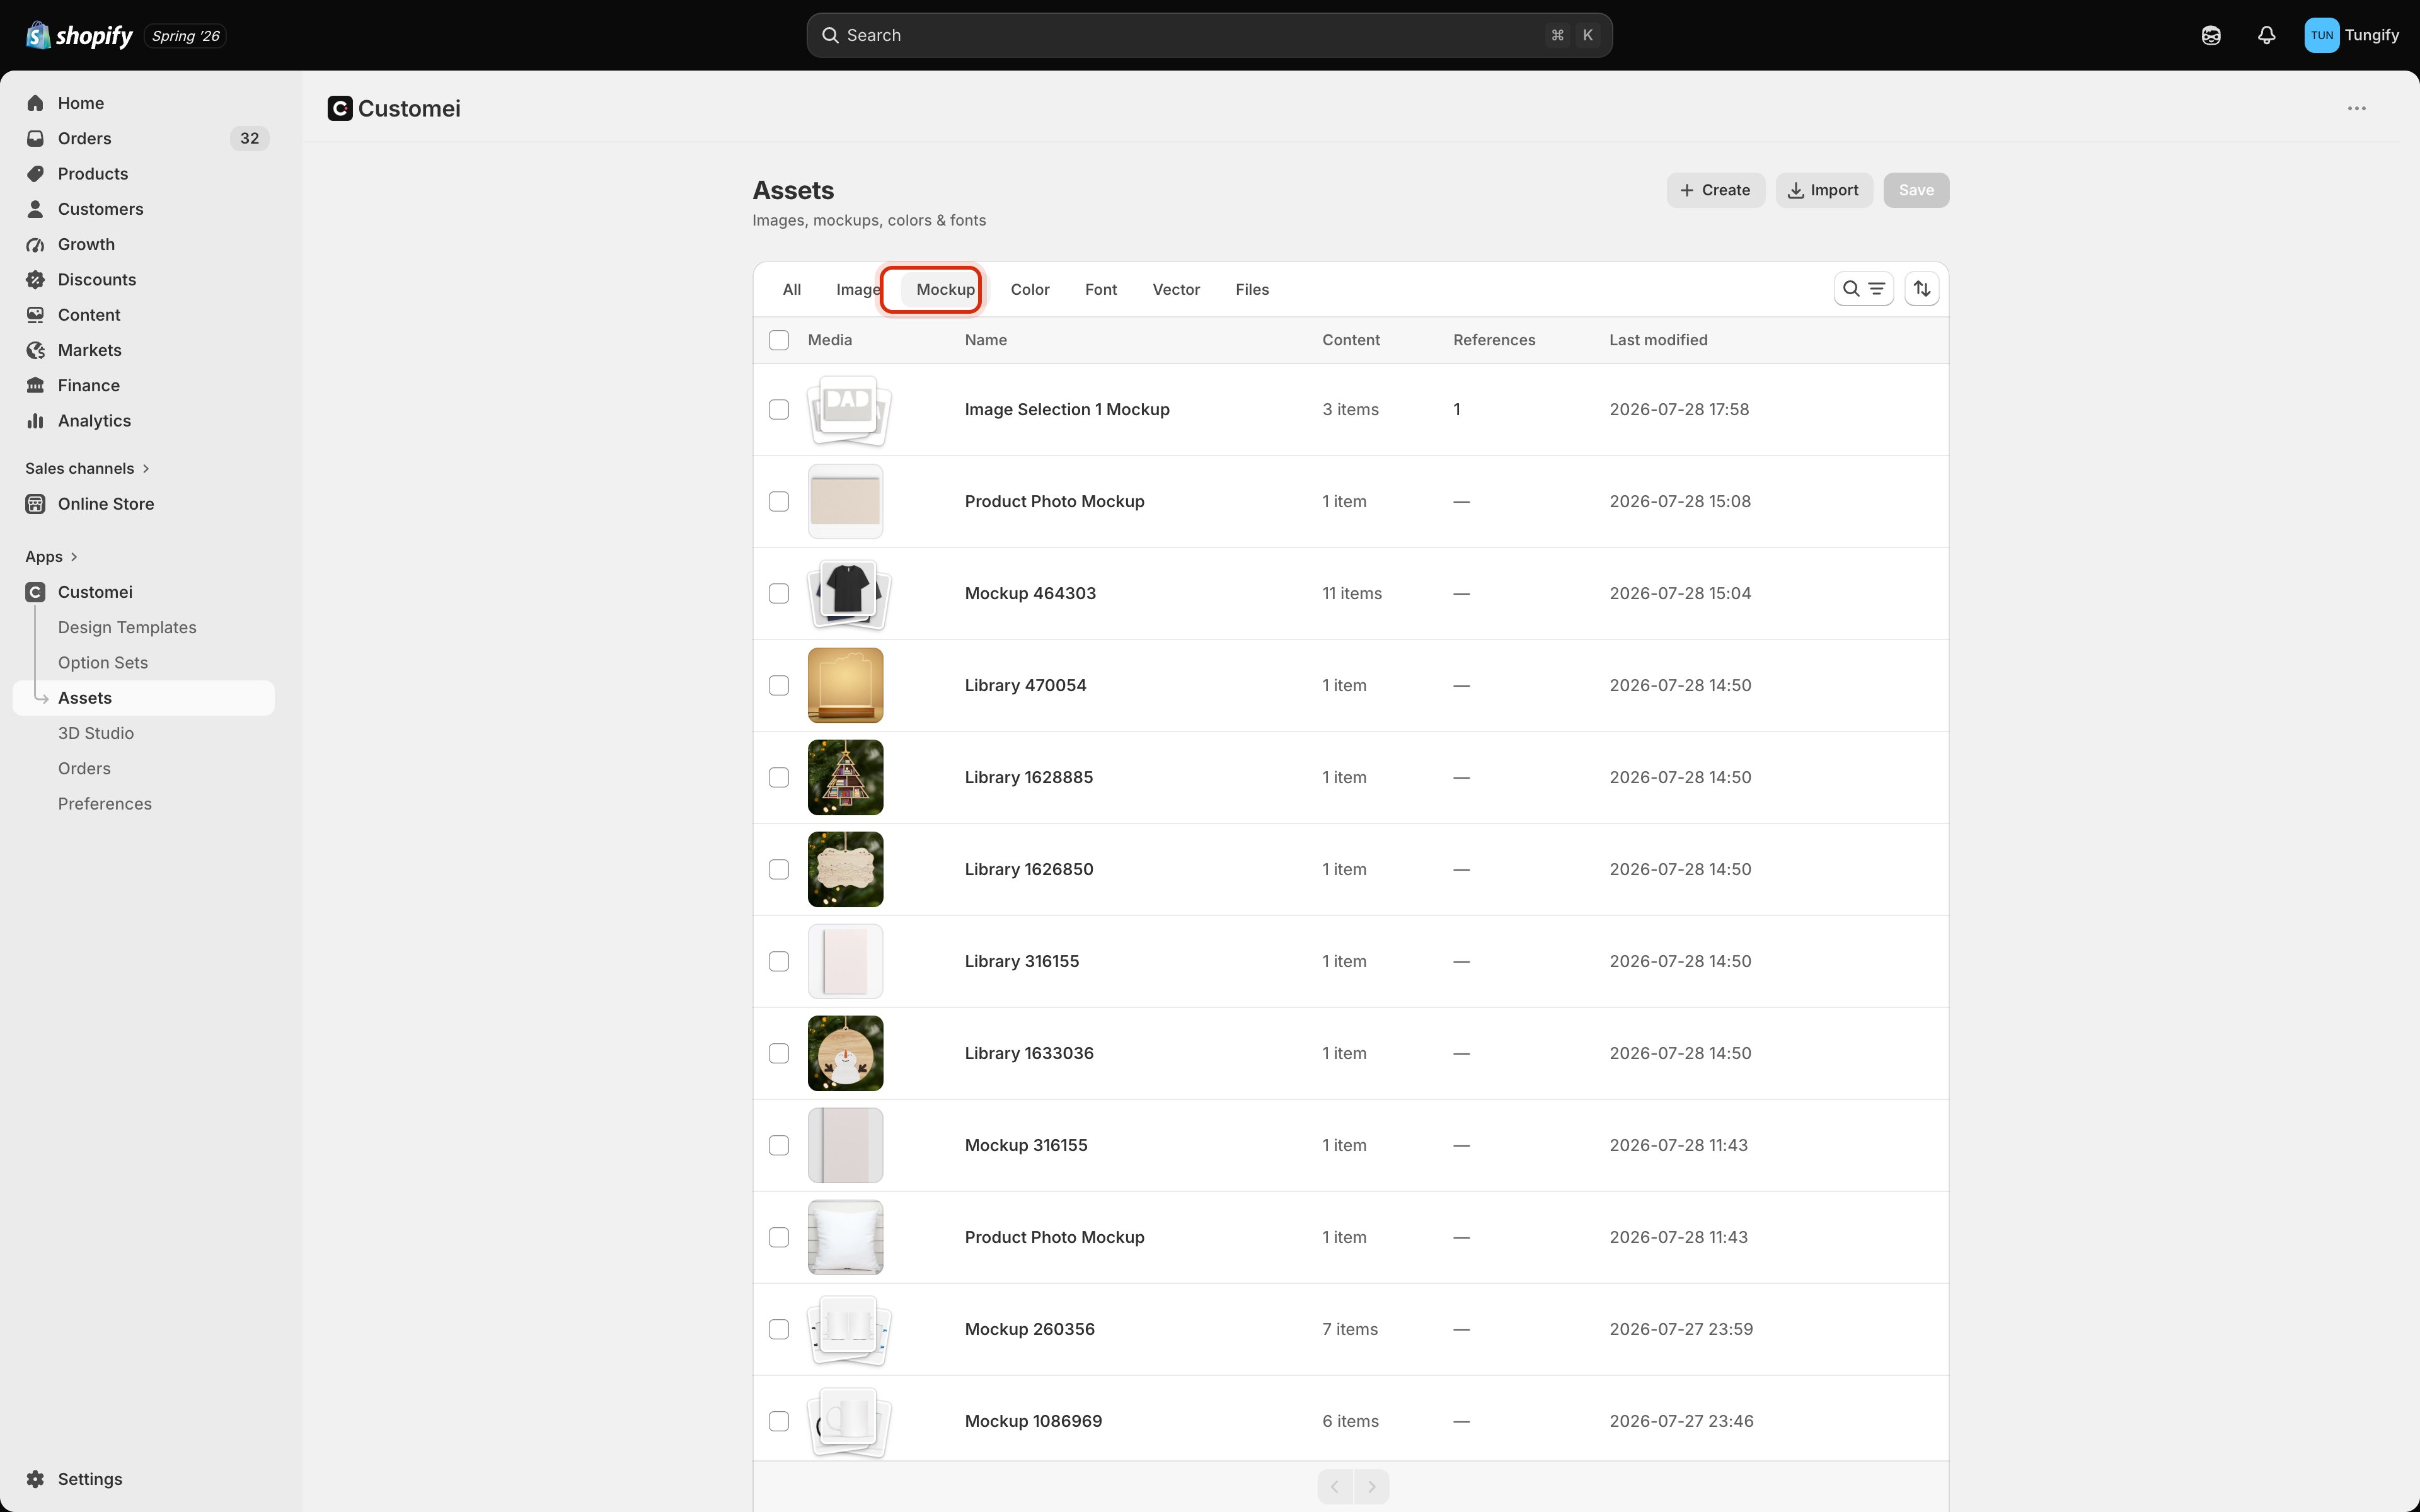 Mockups are kept in **libraries**, and a library is simply a named group of them. Keep one per product family and you'll find things later: *Mugs*, *Unisex tees*, *Framed canvas*.
Each row tells you:
| Column | What it means |
| ----------------- | ---------------------------------------------------- |
| **Media** | A stack of thumbnails from inside the library |
| **Name** | The library's name |
| **Content** | How many mockups it holds |
| **References** | How many design templates use it, or a dash for none |
| **Last modified** | When anything in it last changed |
## Inside a library
Click a library to see the individual mockups.
Mockups are kept in **libraries**, and a library is simply a named group of them. Keep one per product family and you'll find things later: *Mugs*, *Unisex tees*, *Framed canvas*.
Each row tells you:
| Column | What it means |
| ----------------- | ---------------------------------------------------- |
| **Media** | A stack of thumbnails from inside the library |
| **Name** | The library's name |
| **Content** | How many mockups it holds |
| **References** | How many design templates use it, or a dash for none |
| **Last modified** | When anything in it last changed |
## Inside a library
Click a library to see the individual mockups.
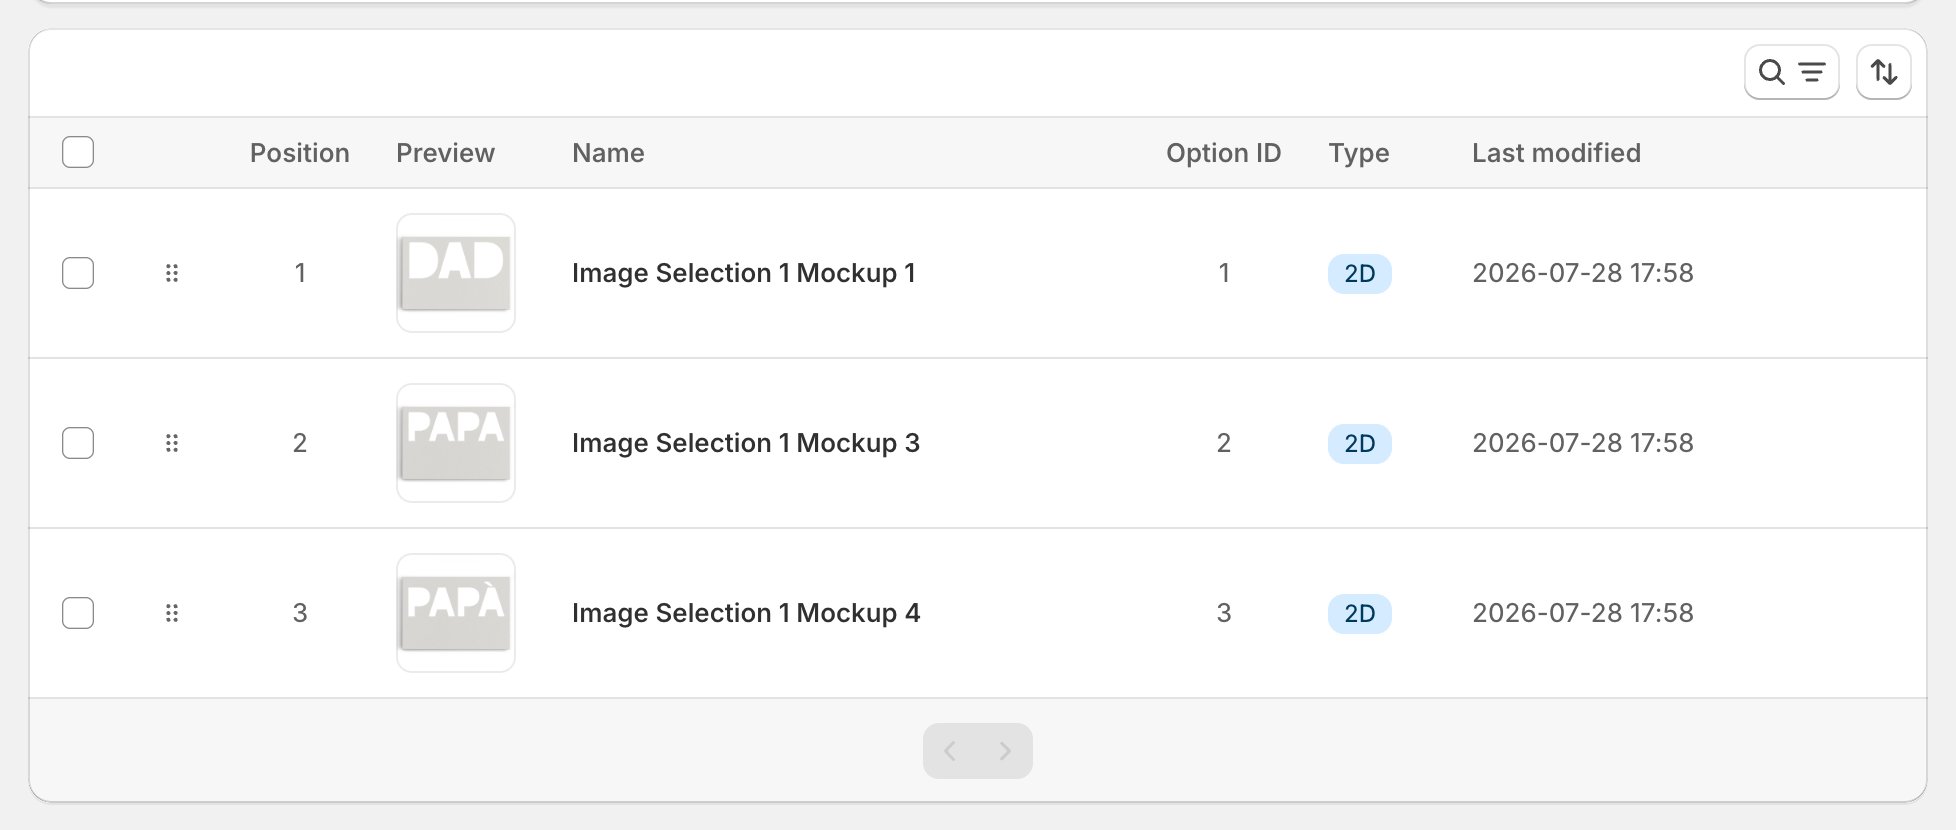 | Column | What it means |
| ----------------- | ----------------------------------------------------------- |
| **Position** | The order they appear in. Drag the handle to change it. |
| **Preview** | The product photo |
| **Name** | The mockup's name |
| **Option ID** | The number an option set uses to point at this exact mockup |
| **Type** | `2D` for a product photo, `3D` for a model |
| **Last modified** | When it last changed |
The banner at the top is worth reading before you change anything: it counts the design templates using this library, and **View** opens one so you can see where these photos actually land.
Editing a mockup changes it everywhere. If three templates use the same shirt photo and you move its print area, all three previews move. That's usually the point, but check the banner first so you know what you're affecting.
## Adding mockups
| Column | What it means |
| ----------------- | ----------------------------------------------------------- |
| **Position** | The order they appear in. Drag the handle to change it. |
| **Preview** | The product photo |
| **Name** | The mockup's name |
| **Option ID** | The number an option set uses to point at this exact mockup |
| **Type** | `2D` for a product photo, `3D` for a model |
| **Last modified** | When it last changed |
The banner at the top is worth reading before you change anything: it counts the design templates using this library, and **View** opens one so you can see where these photos actually land.
Editing a mockup changes it everywhere. If three templates use the same shirt photo and you move its print area, all three previews move. That's usually the point, but check the banner first so you know what you're affecting.
## Adding mockups
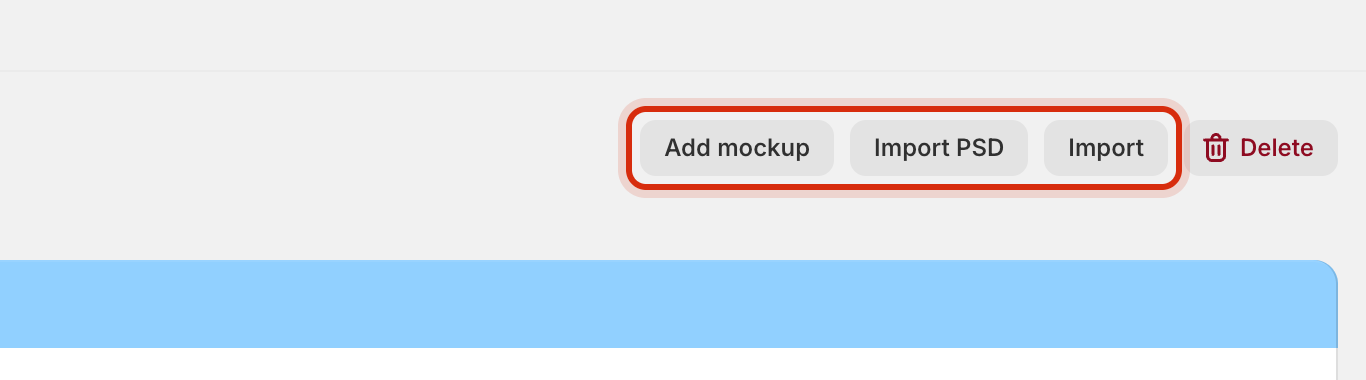 | Action | What it's for |
| -------------- | ----------------------------------------------------- |
| **Add mockup** | Upload product photos from your computer |
| **Import PSD** | Upload a Photoshop mockup file and keep its structure |
| **Import** | Bring in a prepared set of mockups in one go |
A freshly uploaded photo has no print area yet, so artwork will fill the whole frame until you mark one out. Open the mockup and draw it: see [The mockup designer](/mockups/mockup-designer).
Shoot or source photos of the *blank* product, evenly lit, with the print area facing the camera as squarely as you can manage. A photo taken at a sharp angle can be warped into shape, but a straight-on one takes minutes instead.
## How a mockup reaches a customer
Mockups aren't attached to products directly. They travel with your artwork:
In Assets, with its print area and surface shape set.
In the editor it becomes a **Design Preview** frame beside your artwork. See [Add a mockup preview](/editor/add-a-mockup).
As they fill in the options, the preview updates with their choices on the real product.
## Where to next
Mark out where artwork goes on a photo.
Make print follow the shape of the product.
Use a mockup in a design template.
How the editor's two canvases work.
| Action | What it's for |
| -------------- | ----------------------------------------------------- |
| **Add mockup** | Upload product photos from your computer |
| **Import PSD** | Upload a Photoshop mockup file and keep its structure |
| **Import** | Bring in a prepared set of mockups in one go |
A freshly uploaded photo has no print area yet, so artwork will fill the whole frame until you mark one out. Open the mockup and draw it: see [The mockup designer](/mockups/mockup-designer).
Shoot or source photos of the *blank* product, evenly lit, with the print area facing the camera as squarely as you can manage. A photo taken at a sharp angle can be warped into shape, but a straight-on one takes minutes instead.
## How a mockup reaches a customer
Mockups aren't attached to products directly. They travel with your artwork:
In Assets, with its print area and surface shape set.
In the editor it becomes a **Design Preview** frame beside your artwork. See [Add a mockup preview](/editor/add-a-mockup).
As they fill in the options, the preview updates with their choices on the real product.
## Where to next
Mark out where artwork goes on a photo.
Make print follow the shape of the product.
Use a mockup in a design template.
How the editor's two canvases work.