> ## Documentation Index
> Fetch the complete documentation index at: https://docs.customei.com/llms.txt
> Use this file to discover all available pages before exploring further.
# Create and manage option sets
> Start a new option set from a template or from scratch, and find your way around the list once you have a few.
An option set is the set of questions a shopper answers on your product page. This page covers making one and looking after the list once you have more than a handful.
## The option set list
Open **Option Sets** in the Customei menu. Everything you have built lives here.
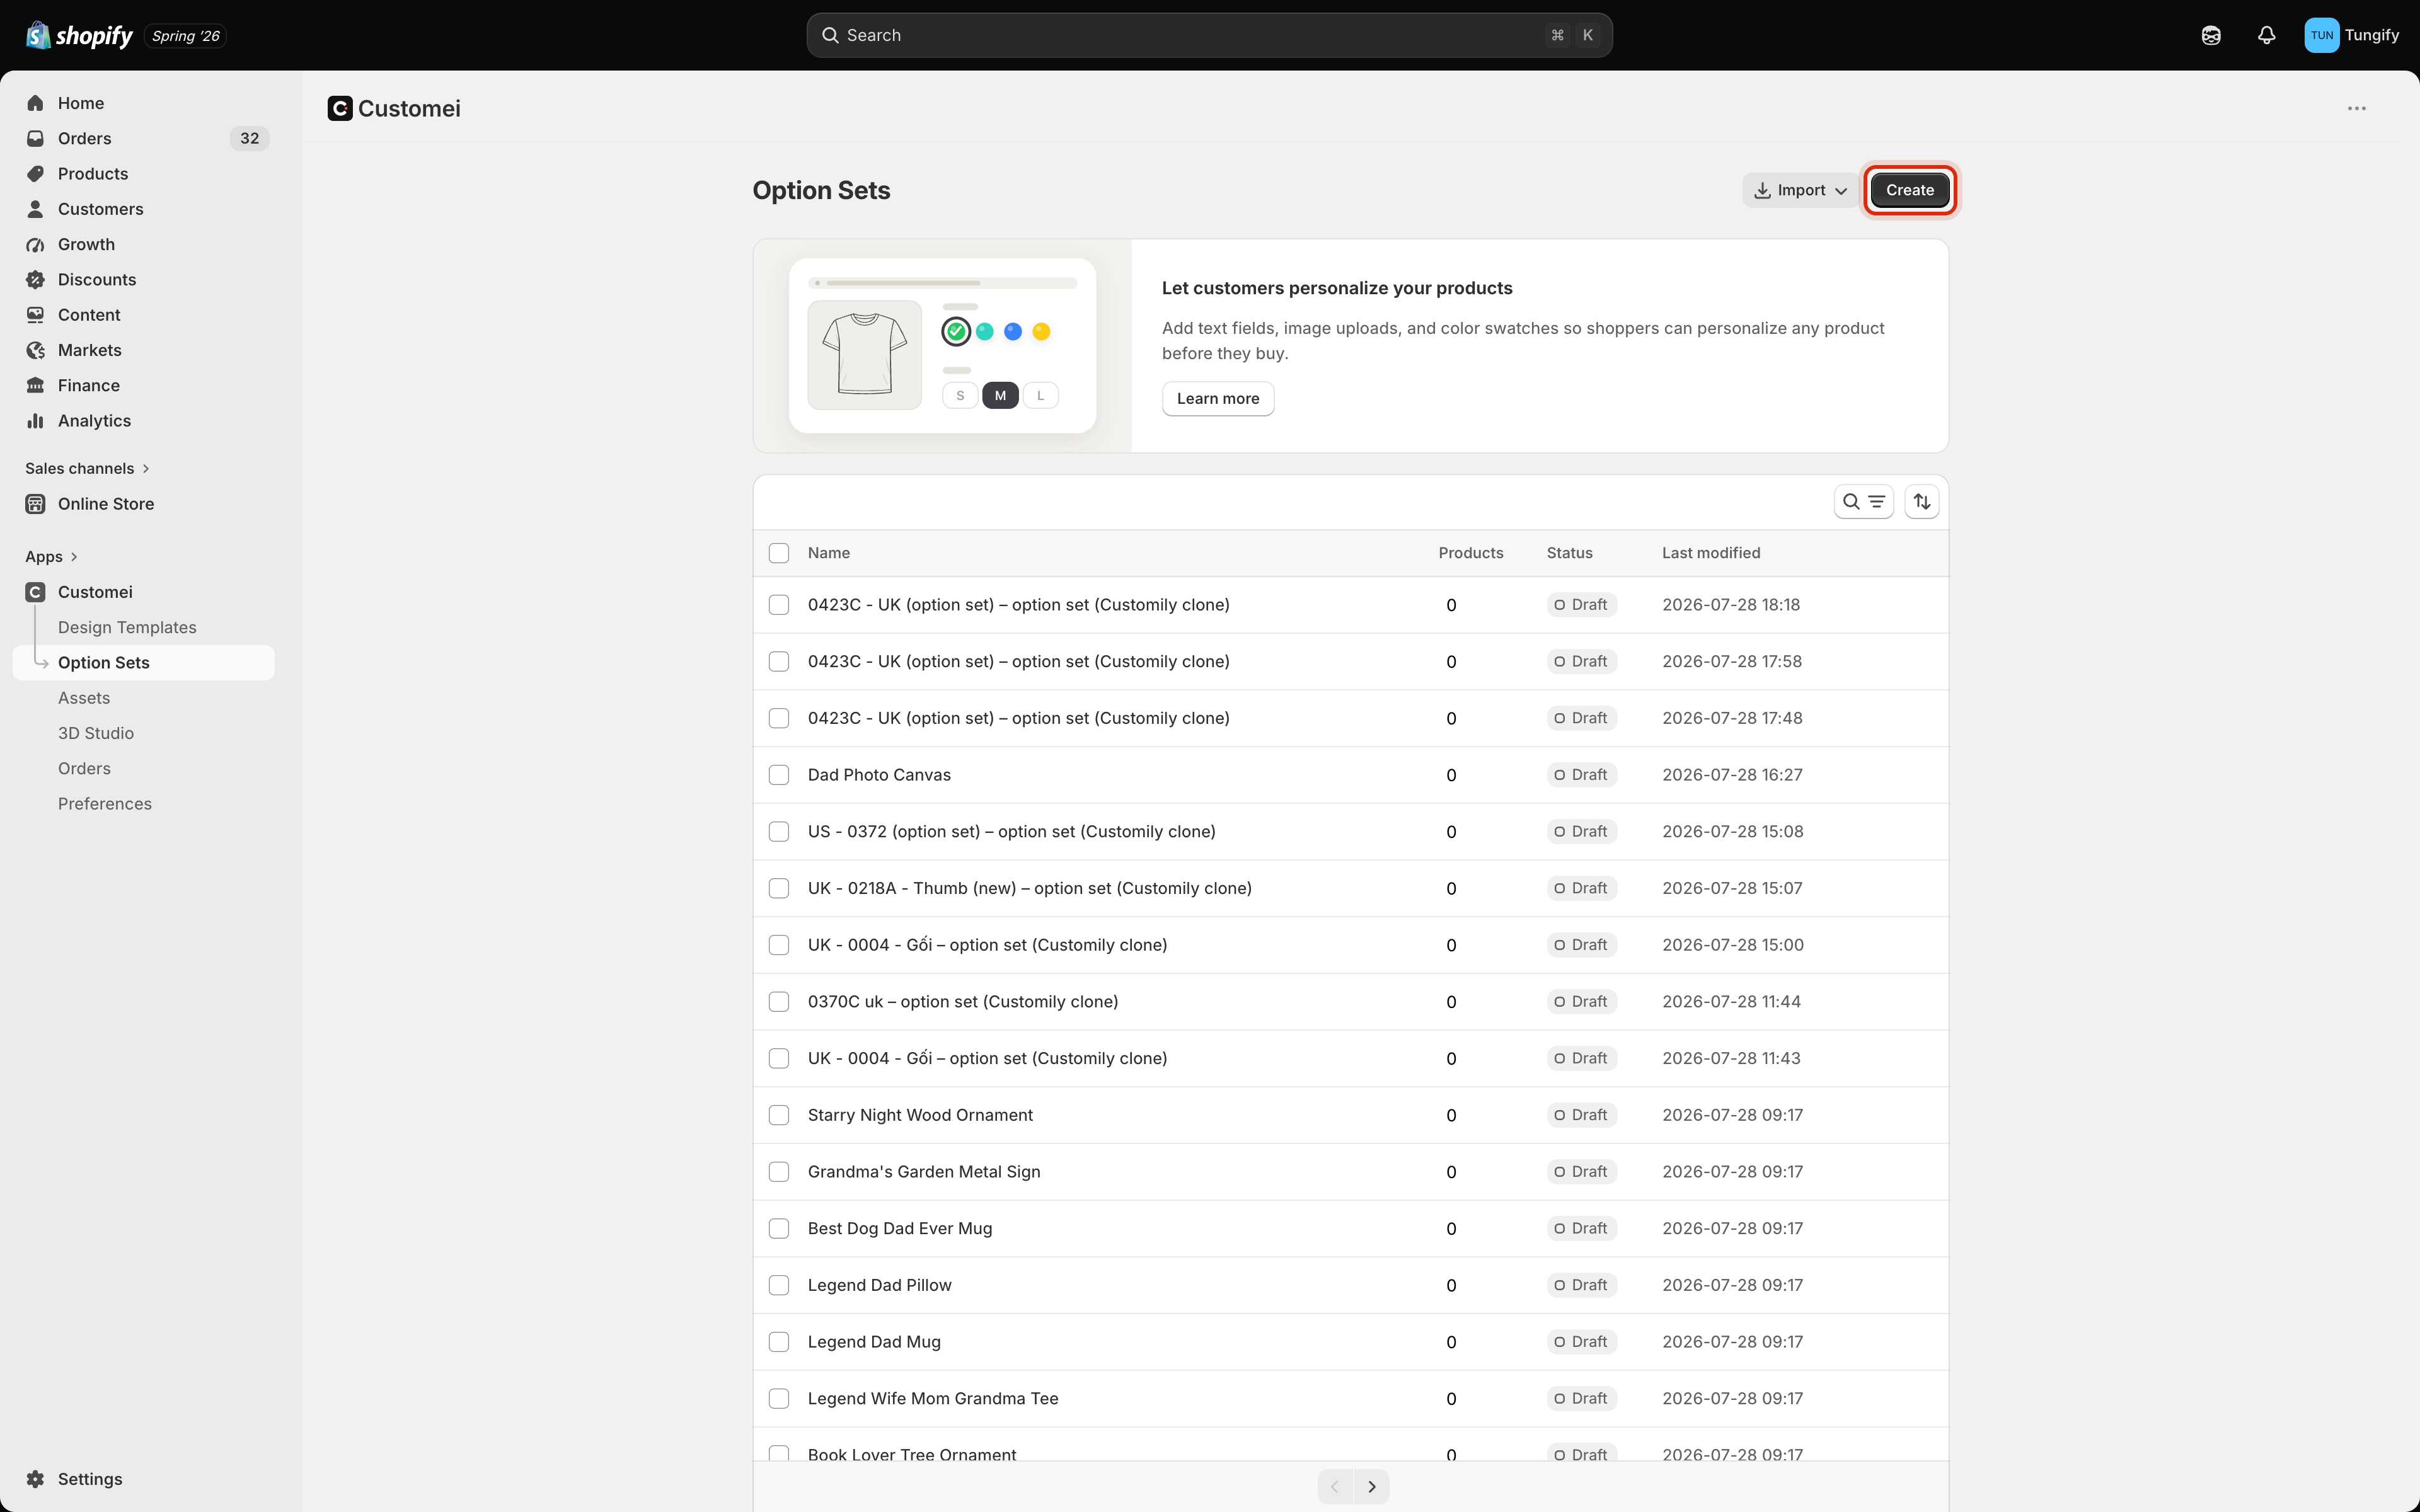 Four columns tell you the state of each one:
| Column | What it tells you |
| ----------------- | --------------------------------------------------------------------------- |
| **Name** | What you called it. Match it to the product it serves. |
| **Products** | How many products it is attached to. **0** means no shopper can see it yet. |
| **Status** | **Draft** until you publish it, then **Live**. |
| **Last modified** | When it last changed, newest first by default. |
The icons above the table search, filter, and sort the list, which starts to matter once you have a few dozen.
A **Products** count of 0 is the single most common reason a merchant says "my options are not showing up". Building an option set is only half the job, it still has to be assigned to a product and published.
## Creating one
Click **Create** and you get a picker with two routes.
Four columns tell you the state of each one:
| Column | What it tells you |
| ----------------- | --------------------------------------------------------------------------- |
| **Name** | What you called it. Match it to the product it serves. |
| **Products** | How many products it is attached to. **0** means no shopper can see it yet. |
| **Status** | **Draft** until you publish it, then **Live**. |
| **Last modified** | When it last changed, newest first by default. |
The icons above the table search, filter, and sort the list, which starts to matter once you have a few dozen.
A **Products** count of 0 is the single most common reason a merchant says "my options are not showing up". Building an option set is only half the job, it still has to be assigned to a product and published.
## Creating one
Click **Create** and you get a picker with two routes.
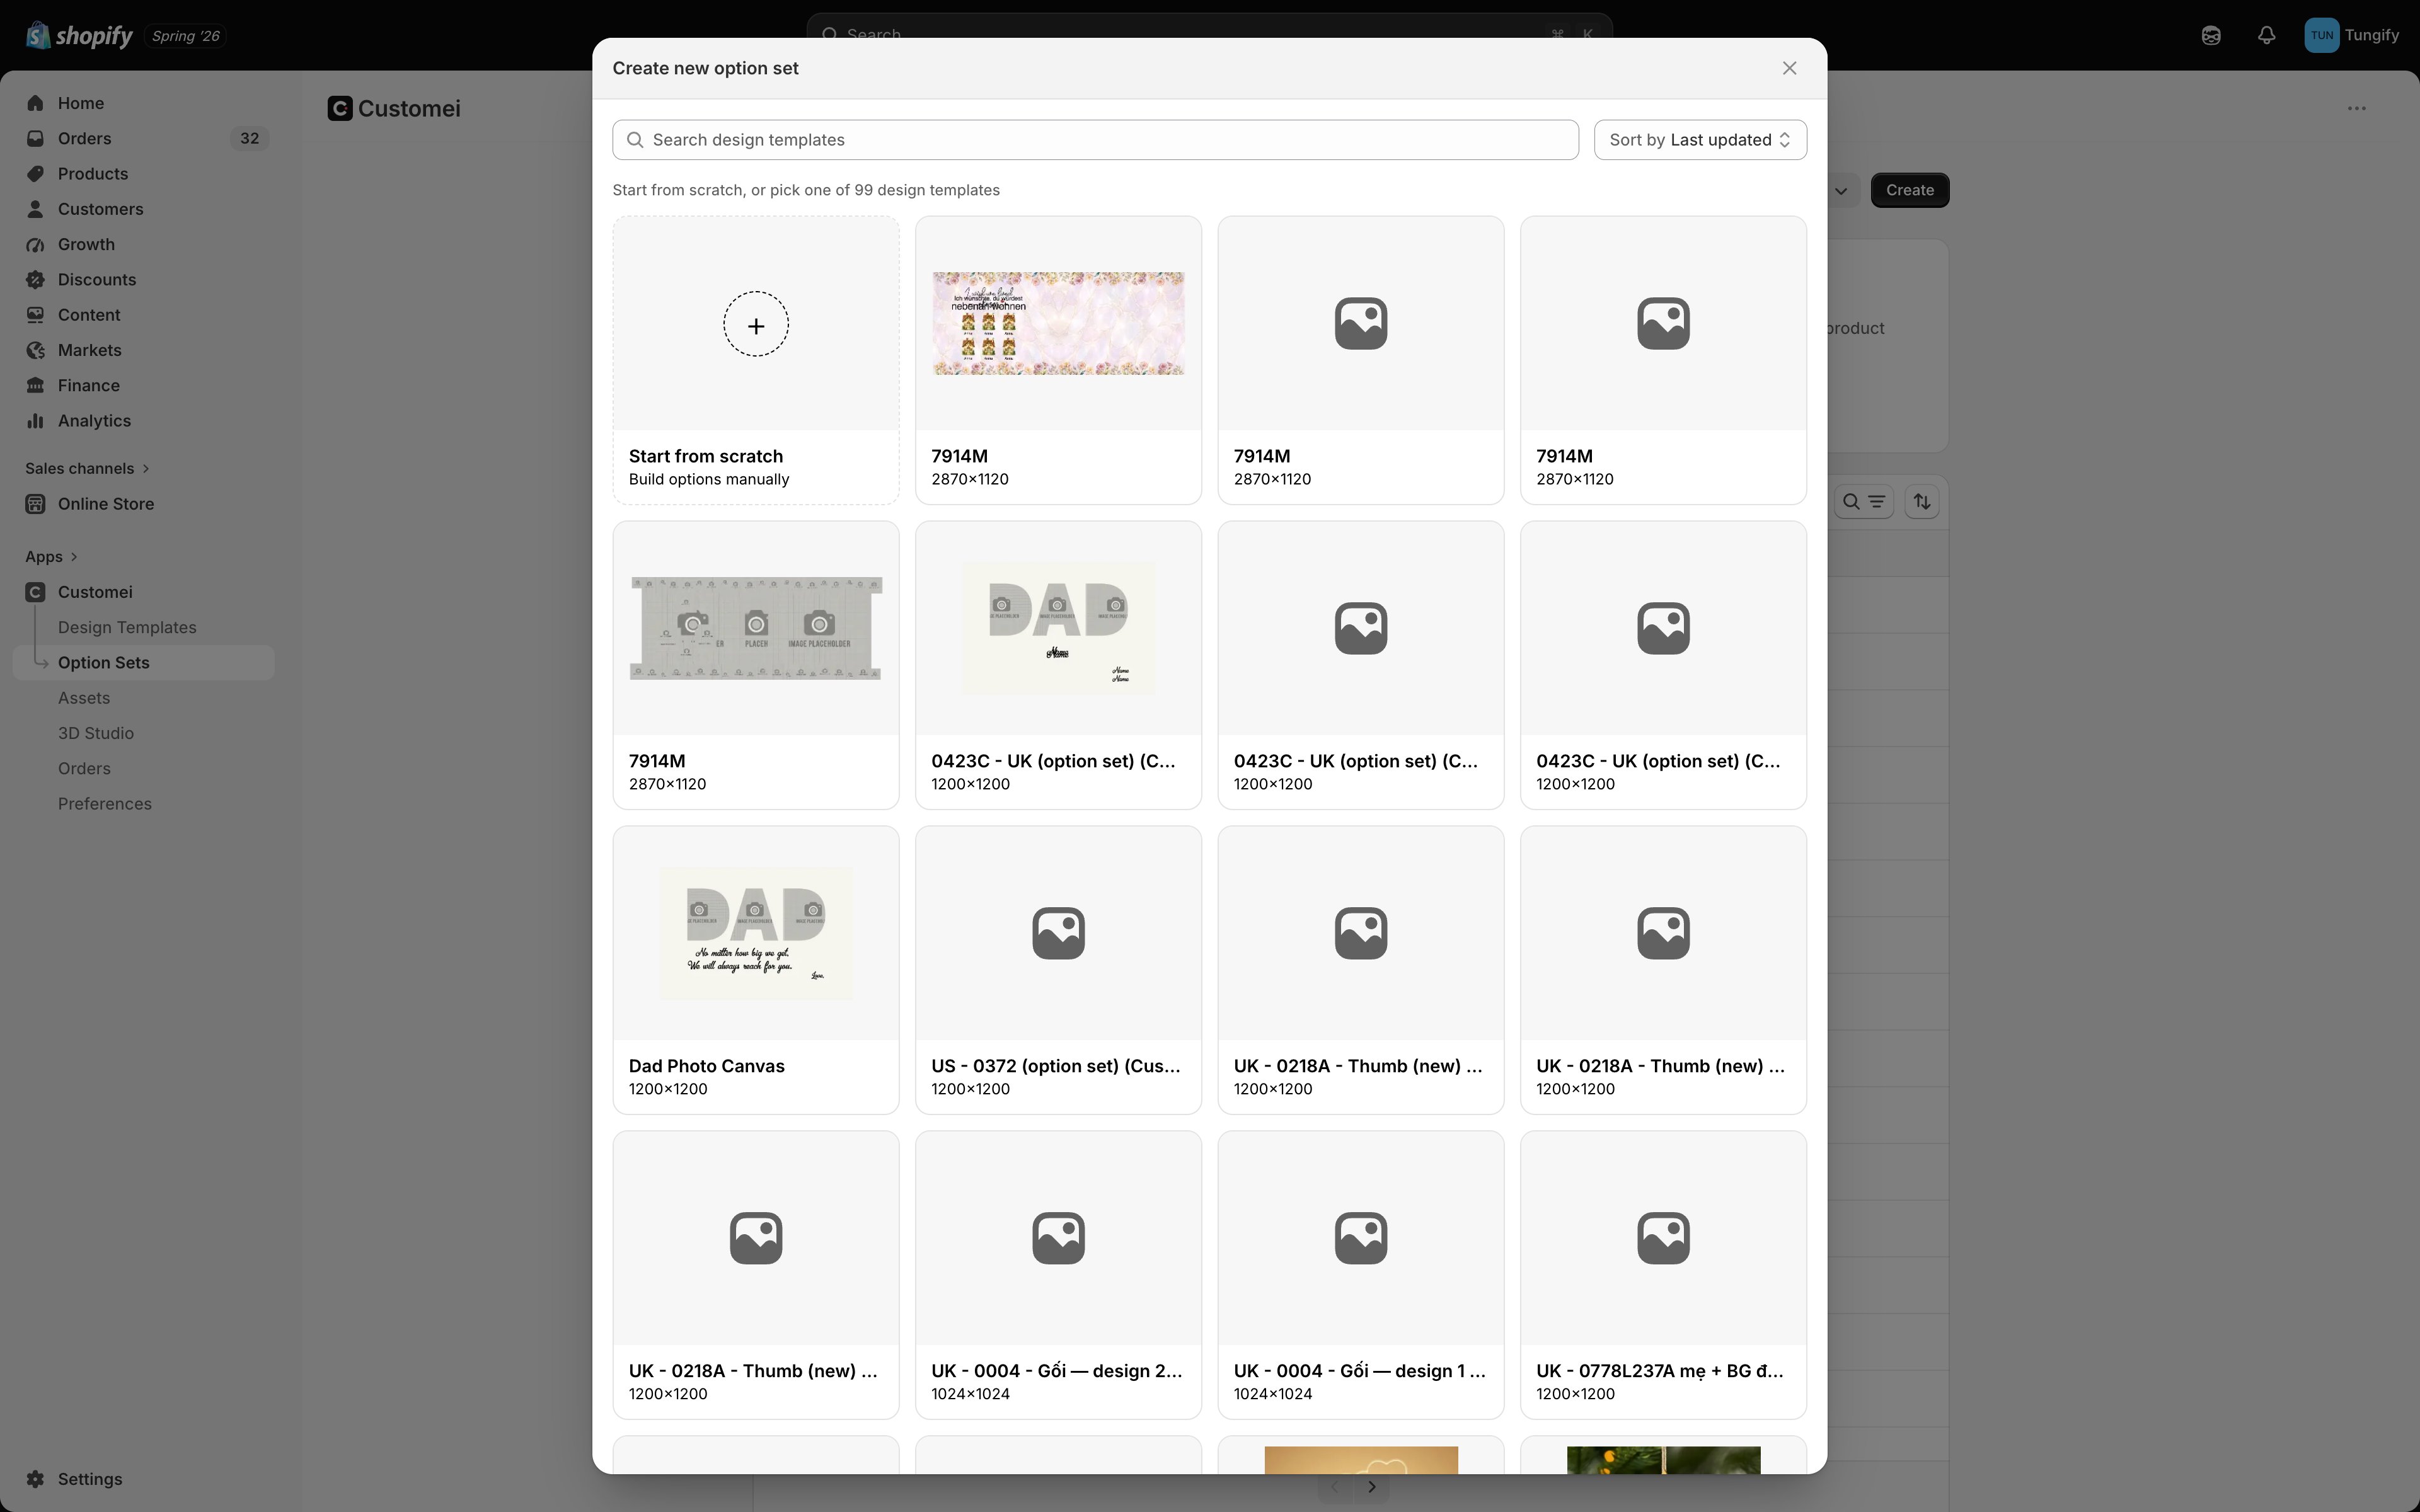 * **Start from scratch** gives you an empty option set and you add every question by hand. Right when your product needs questions that have nothing to do with artwork, like a gift note or a delivery date.
* **Pick a design template** and Customei reads the template and builds matching questions for you: a text box for every editable text layer, a picture chooser for every dynamic image. This is the fast route, and it is the one to take whenever a design template already exists.
The dialog counts how many templates you have and lets you search and sort them, so a long list is not a problem.
Clicking a template card creates the option set straight away. There is no confirm step, so click deliberately.
## Working with an existing one
Hover a row and a **⋯** button appears at its right.
* **Start from scratch** gives you an empty option set and you add every question by hand. Right when your product needs questions that have nothing to do with artwork, like a gift note or a delivery date.
* **Pick a design template** and Customei reads the template and builds matching questions for you: a text box for every editable text layer, a picture chooser for every dynamic image. This is the fast route, and it is the one to take whenever a design template already exists.
The dialog counts how many templates you have and lets you search and sort them, so a long list is not a problem.
Clicking a template card creates the option set straight away. There is no confirm step, so click deliberately.
## Working with an existing one
Hover a row and a **⋯** button appears at its right.
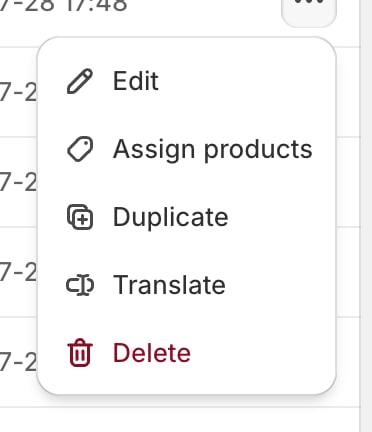 * **Edit** opens it. Clicking the name does the same thing.
* **Assign products** attaches it to the products that should show these questions.
* **Duplicate** copies the whole thing, questions, values, prices and all. The quickest way to make a mug version of your t-shirt option set.
* **Translate** opens the translations for its labels and values.
* **Delete** removes it. Shoppers stop seeing those options on every product it was attached to, so check the **Products** count first.
Name option sets after the product they serve, not after the design. When something looks wrong on a live product page, the list is where you start looking, and *Besties Since Canvas* beats *Option set 4* every time.
## Where to next
Add the questions and choose their types.
Make each answer change the artwork.
Get the option set in front of shoppers.
How option sets fit with design templates.
* **Edit** opens it. Clicking the name does the same thing.
* **Assign products** attaches it to the products that should show these questions.
* **Duplicate** copies the whole thing, questions, values, prices and all. The quickest way to make a mug version of your t-shirt option set.
* **Translate** opens the translations for its labels and values.
* **Delete** removes it. Shoppers stop seeing those options on every product it was attached to, so check the **Products** count first.
Name option sets after the product they serve, not after the design. When something looks wrong on a live product page, the list is where you start looking, and *Besties Since Canvas* beats *Option set 4* every time.
## Where to next
Add the questions and choose their types.
Make each answer change the artwork.
Get the option set in front of shoppers.
How option sets fit with design templates.