> ## Documentation Index
> Fetch the complete documentation index at: https://docs.customei.com/llms.txt
> Use this file to discover all available pages before exploring further.
# Manage your values
> Add, reorder, and rename the choices inside an option, and decide which one is pre-selected.
A **value** is one of the choices inside an option. If your option is "Choose a skin tone", each skin tone is a value. If it is "Ring size", each size is a value.
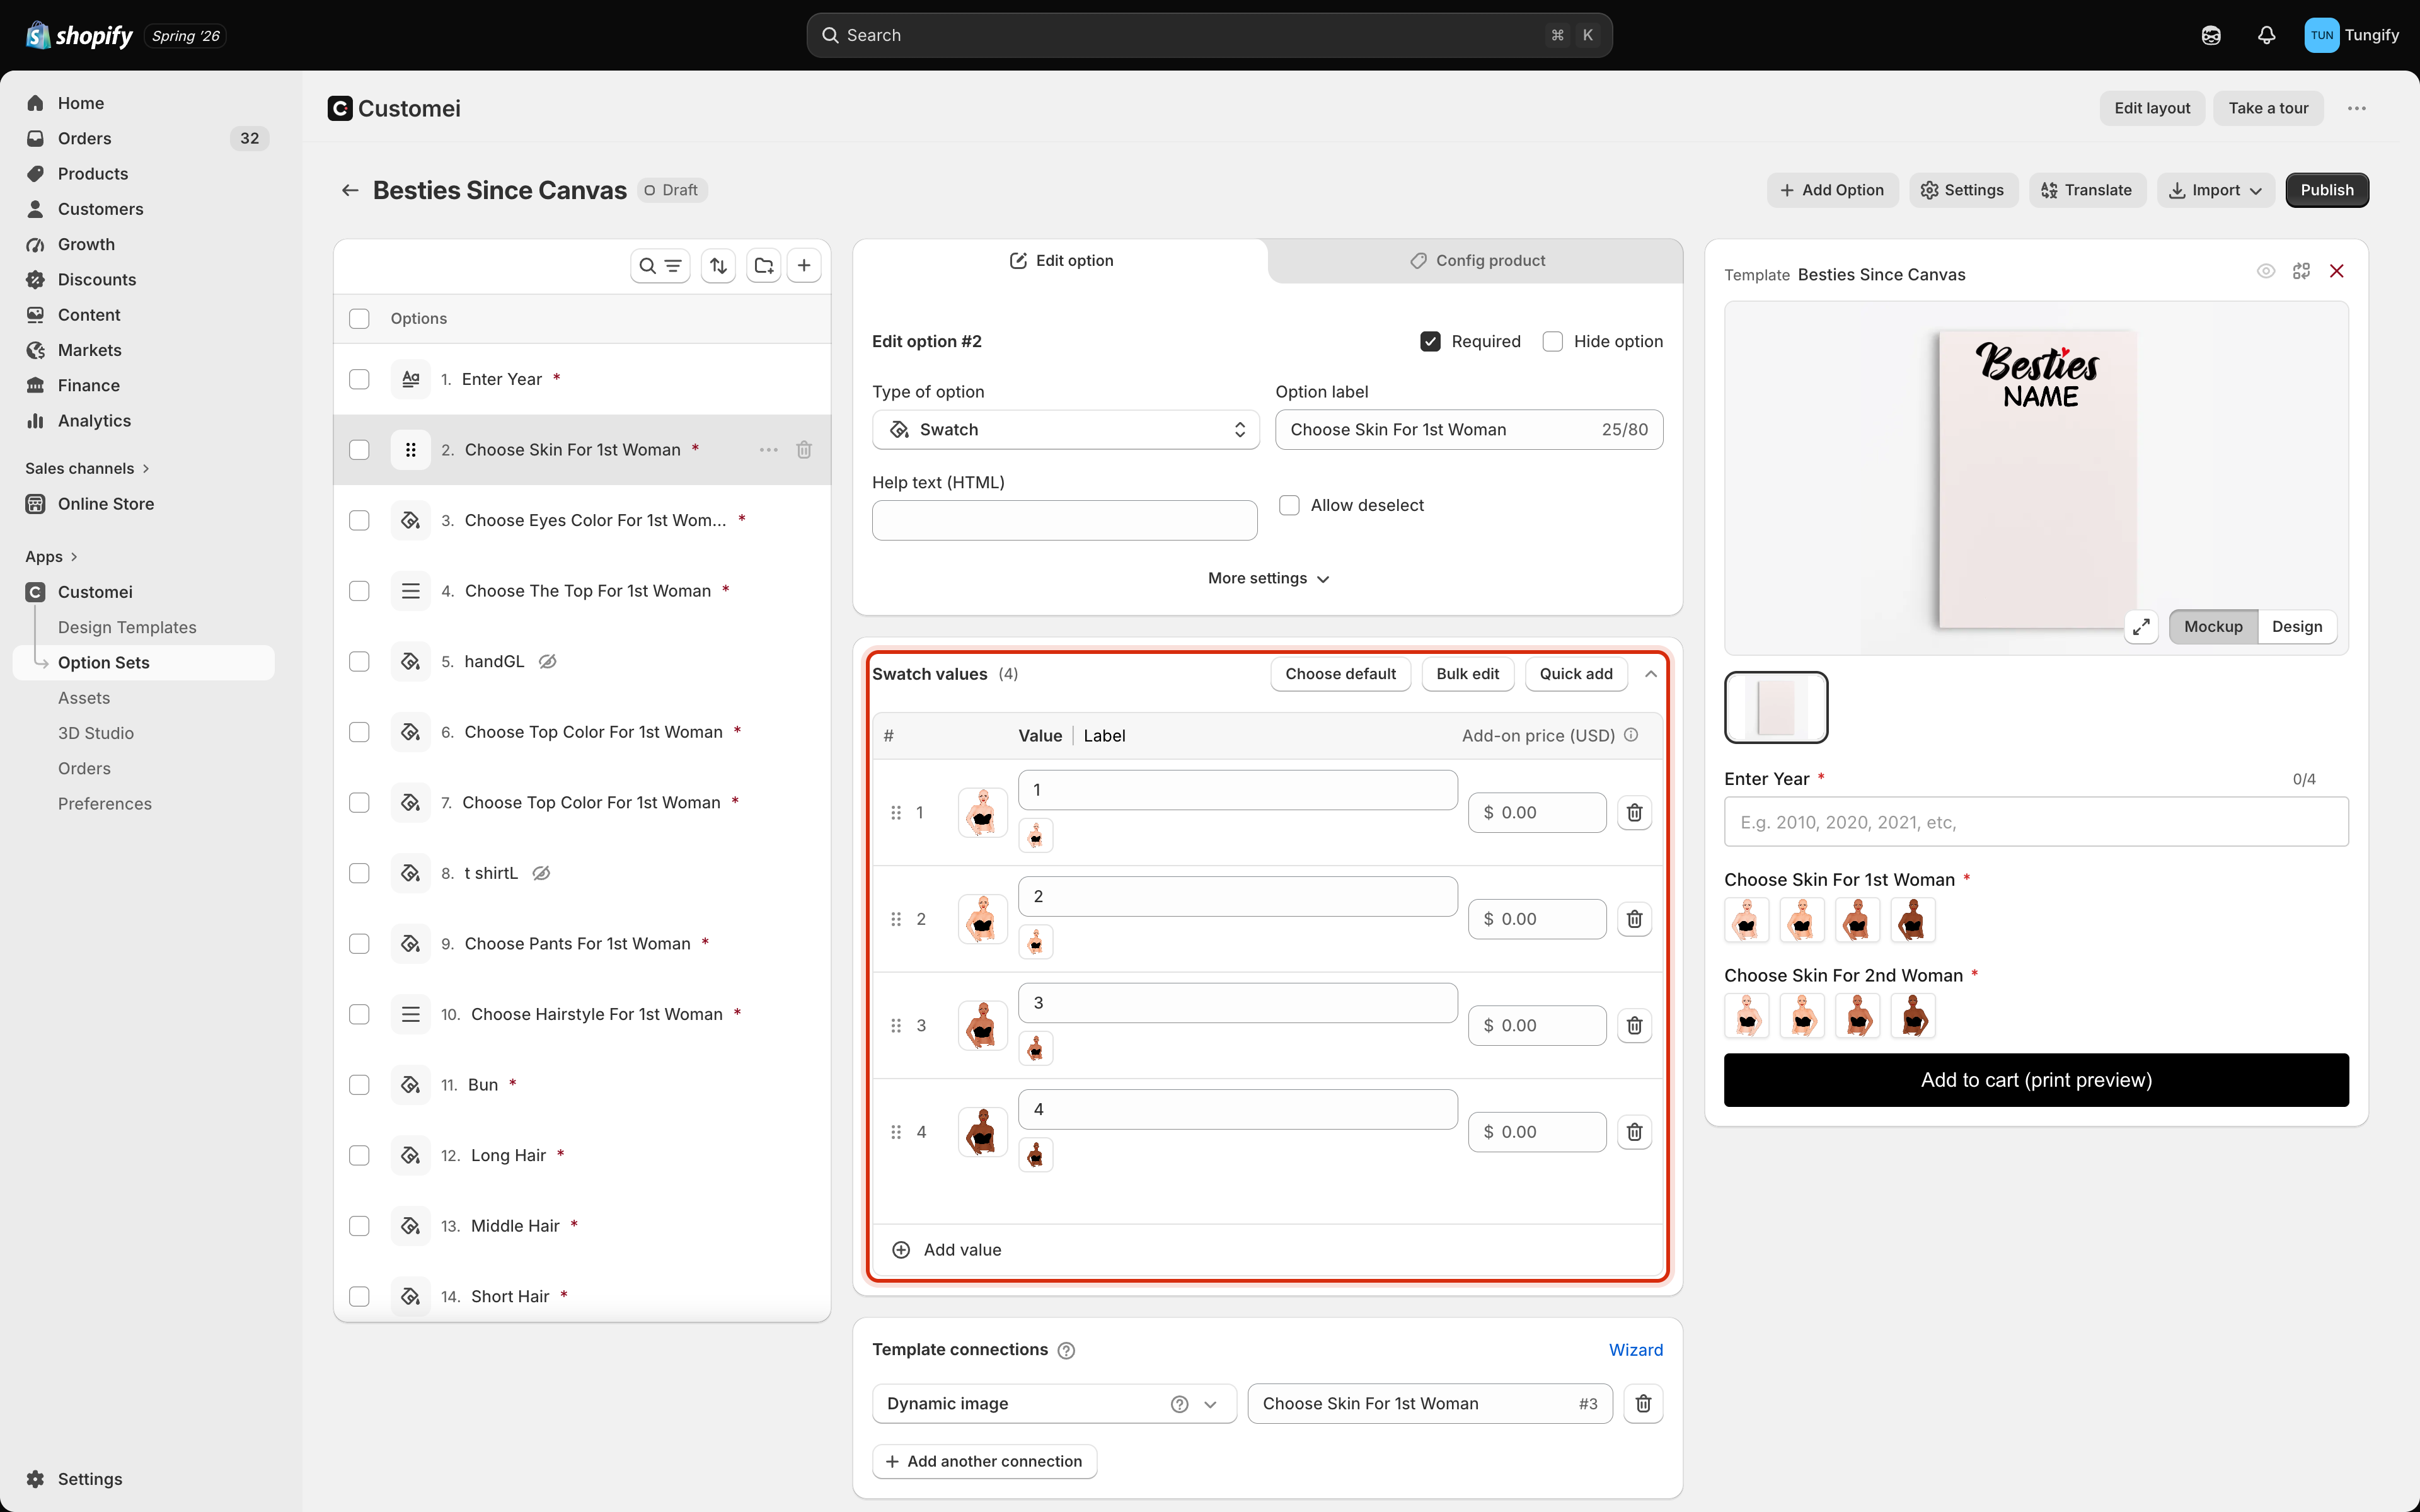
Select an option in the list and its values appear in the middle column.
 ## Adding and removing
**Add value** at the bottom of the list creates an empty row. The bin icon at the end of a row removes that value.
Removing a value that is already connected to your design breaks that connection. If a customer's choice pointed at that value, the layer it controlled no longer has anything to show. Check the **Template connections** card below the values before you delete.
## Reordering
Drag the handle at the left of a row to move a value up or down. The order here is the order the customer sees on your product page, so put the popular choices near the top where nobody has to scroll for them.
## Value and label are two different things
Each row has a **Value** and a **Label**, and they do different jobs.
* The **Value** is the internal name. It is what your design connects to, and it never changes once things are wired up.
* The **Label** is what the customer reads on your product page.
Keeping them separate is what lets you rename "1" into "Fair" for shoppers without breaking the connection to the layer it drives. If you leave the label empty, the customer sees the value instead.
Write labels the way a customer would say them out loud. "Rose gold" sells better than "RG-02", and it costs you nothing to keep the tidy internal name underneath.
## Choosing what is pre-selected
**Choose default** sets the value a customer starts on before they touch anything.
## Adding and removing
**Add value** at the bottom of the list creates an empty row. The bin icon at the end of a row removes that value.
Removing a value that is already connected to your design breaks that connection. If a customer's choice pointed at that value, the layer it controlled no longer has anything to show. Check the **Template connections** card below the values before you delete.
## Reordering
Drag the handle at the left of a row to move a value up or down. The order here is the order the customer sees on your product page, so put the popular choices near the top where nobody has to scroll for them.
## Value and label are two different things
Each row has a **Value** and a **Label**, and they do different jobs.
* The **Value** is the internal name. It is what your design connects to, and it never changes once things are wired up.
* The **Label** is what the customer reads on your product page.
Keeping them separate is what lets you rename "1" into "Fair" for shoppers without breaking the connection to the layer it drives. If you leave the label empty, the customer sees the value instead.
Write labels the way a customer would say them out loud. "Rose gold" sells better than "RG-02", and it costs you nothing to keep the tidy internal name underneath.
## Choosing what is pre-selected
**Choose default** sets the value a customer starts on before they touch anything.
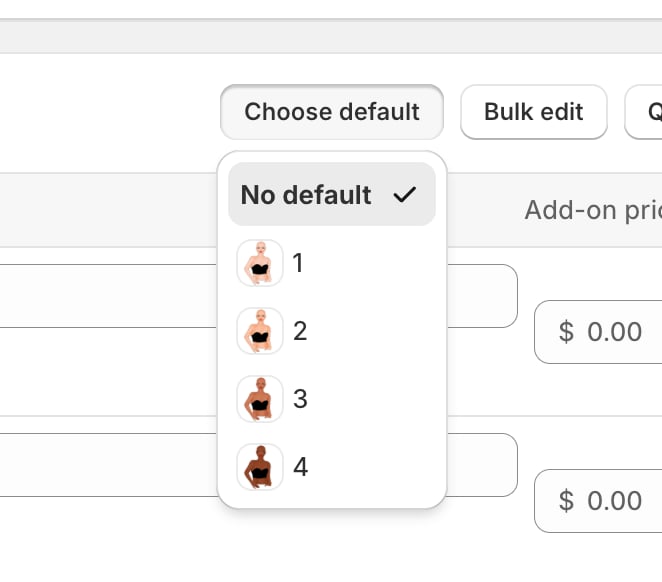 Pick a value to pre-select it, or pick **No default** to start with nothing chosen. Which one you want depends on the option:
* **Set a default** when there is an obvious common choice. It removes a decision and gets the shopper to the cart faster.
* **Use no default** when the choice is genuinely personal, or when picking for them risks an order they did not mean to place.
A value that carries an extra charge cannot be pre-selected. This is deliberate: it stops a customer starting on a price they never agreed to. See [Charge extra for a choice](/optionsets/value-price-add-ons).
## Values that come from your design
Some options are filled in from the design template rather than typed by you. Those rows are locked, and hovering one tells you they are synced from a design template and cannot be edited here.
That is working as intended. The design is the source of the list, so change it there and the option follows. It keeps the choices on your product page and the layers in your template from drifting apart.
## Where to next
Paste in a long list instead of adding rows one at a time.
Add a surcharge to a specific value.
Only ask what is relevant.
Point a value at a layer in your design.
Pick a value to pre-select it, or pick **No default** to start with nothing chosen. Which one you want depends on the option:
* **Set a default** when there is an obvious common choice. It removes a decision and gets the shopper to the cart faster.
* **Use no default** when the choice is genuinely personal, or when picking for them risks an order they did not mean to place.
A value that carries an extra charge cannot be pre-selected. This is deliberate: it stops a customer starting on a price they never agreed to. See [Charge extra for a choice](/optionsets/value-price-add-ons).
## Values that come from your design
Some options are filled in from the design template rather than typed by you. Those rows are locked, and hovering one tells you they are synced from a design template and cannot be edited here.
That is working as intended. The design is the source of the list, so change it there and the option follows. It keeps the choices on your product page and the layers in your template from drifting apart.
## Where to next
Paste in a long list instead of adding rows one at a time.
Add a surcharge to a specific value.
Only ask what is relevant.
Point a value at a layer in your design.