> ## Documentation Index
> Fetch the complete documentation index at: https://docs.customei.com/llms.txt
> Use this file to discover all available pages before exploring further.
# Option sets
> The questions your customers answer on the product page, and where their answers land on your design.
An **option set** is the list of questions a shopper fills in before adding your product to their cart. *Enter your name.* *Pick a colour.* *Upload a photo.*
Each question is called an **option**. Each option can be linked to a layer on your [design template](/templates/overview), so the answer changes the artwork straight away.
 ## Reading the list
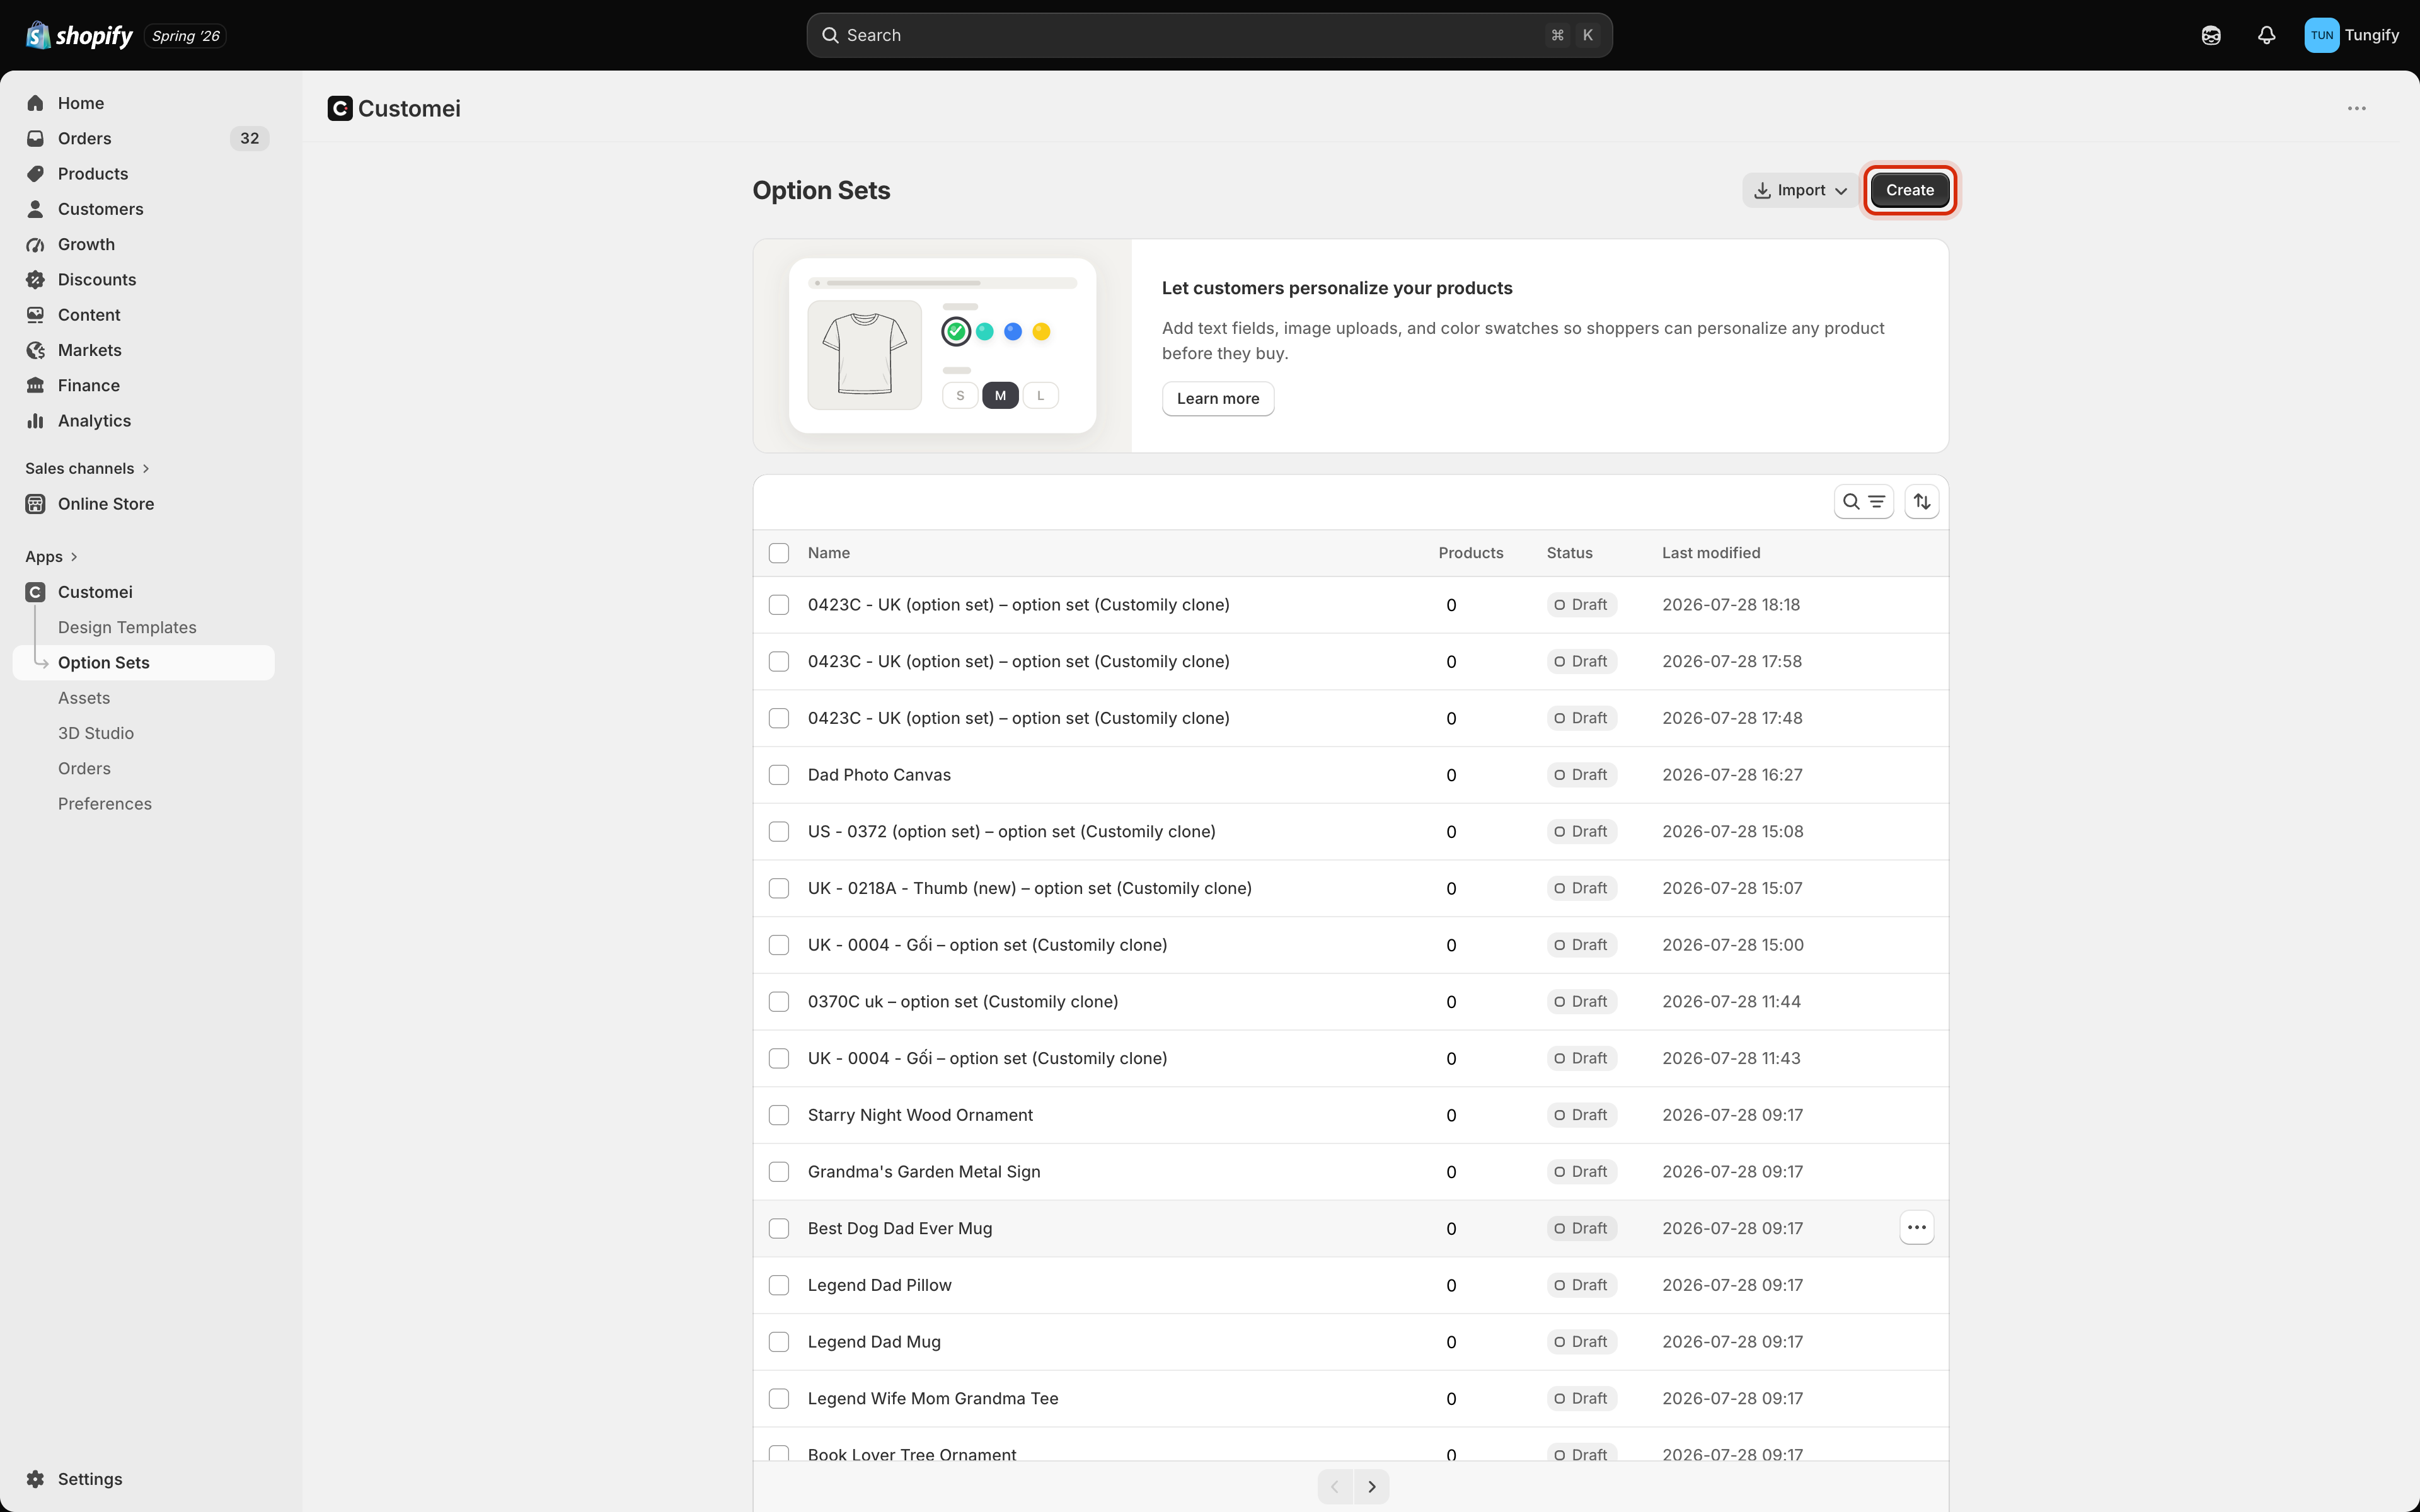
Two labels sit in the **Status** column, and they mean different things.
| Label | Meaning |
| ---------------------- | ------------------------------------------------------------------------------------------------------- |
| **Draft** | Not on your storefront yet. Nobody can see it. |
| **Published** | Live. Shoppers see these options on the product page. |
| **Needs publishing** | Live, but you've changed something since. Shoppers still see the older version until you publish again. |
| **Incomplete** | Some options still need finishing, usually a missing connection to a design layer. |
| **Partially complete** | Most options are set up, but not all of them. |
The **Products** column shows how many Shopify products this option set is attached to. A `0` means it isn't on any product yet.
## Two ways to start
Click **Create** and you get a choice.
## Reading the list
Two labels sit in the **Status** column, and they mean different things.
| Label | Meaning |
| ---------------------- | ------------------------------------------------------------------------------------------------------- |
| **Draft** | Not on your storefront yet. Nobody can see it. |
| **Published** | Live. Shoppers see these options on the product page. |
| **Needs publishing** | Live, but you've changed something since. Shoppers still see the older version until you publish again. |
| **Incomplete** | Some options still need finishing, usually a missing connection to a design layer. |
| **Partially complete** | Most options are set up, but not all of them. |
The **Products** column shows how many Shopify products this option set is attached to. A `0` means it isn't on any product yet.
## Two ways to start
Click **Create** and you get a choice.
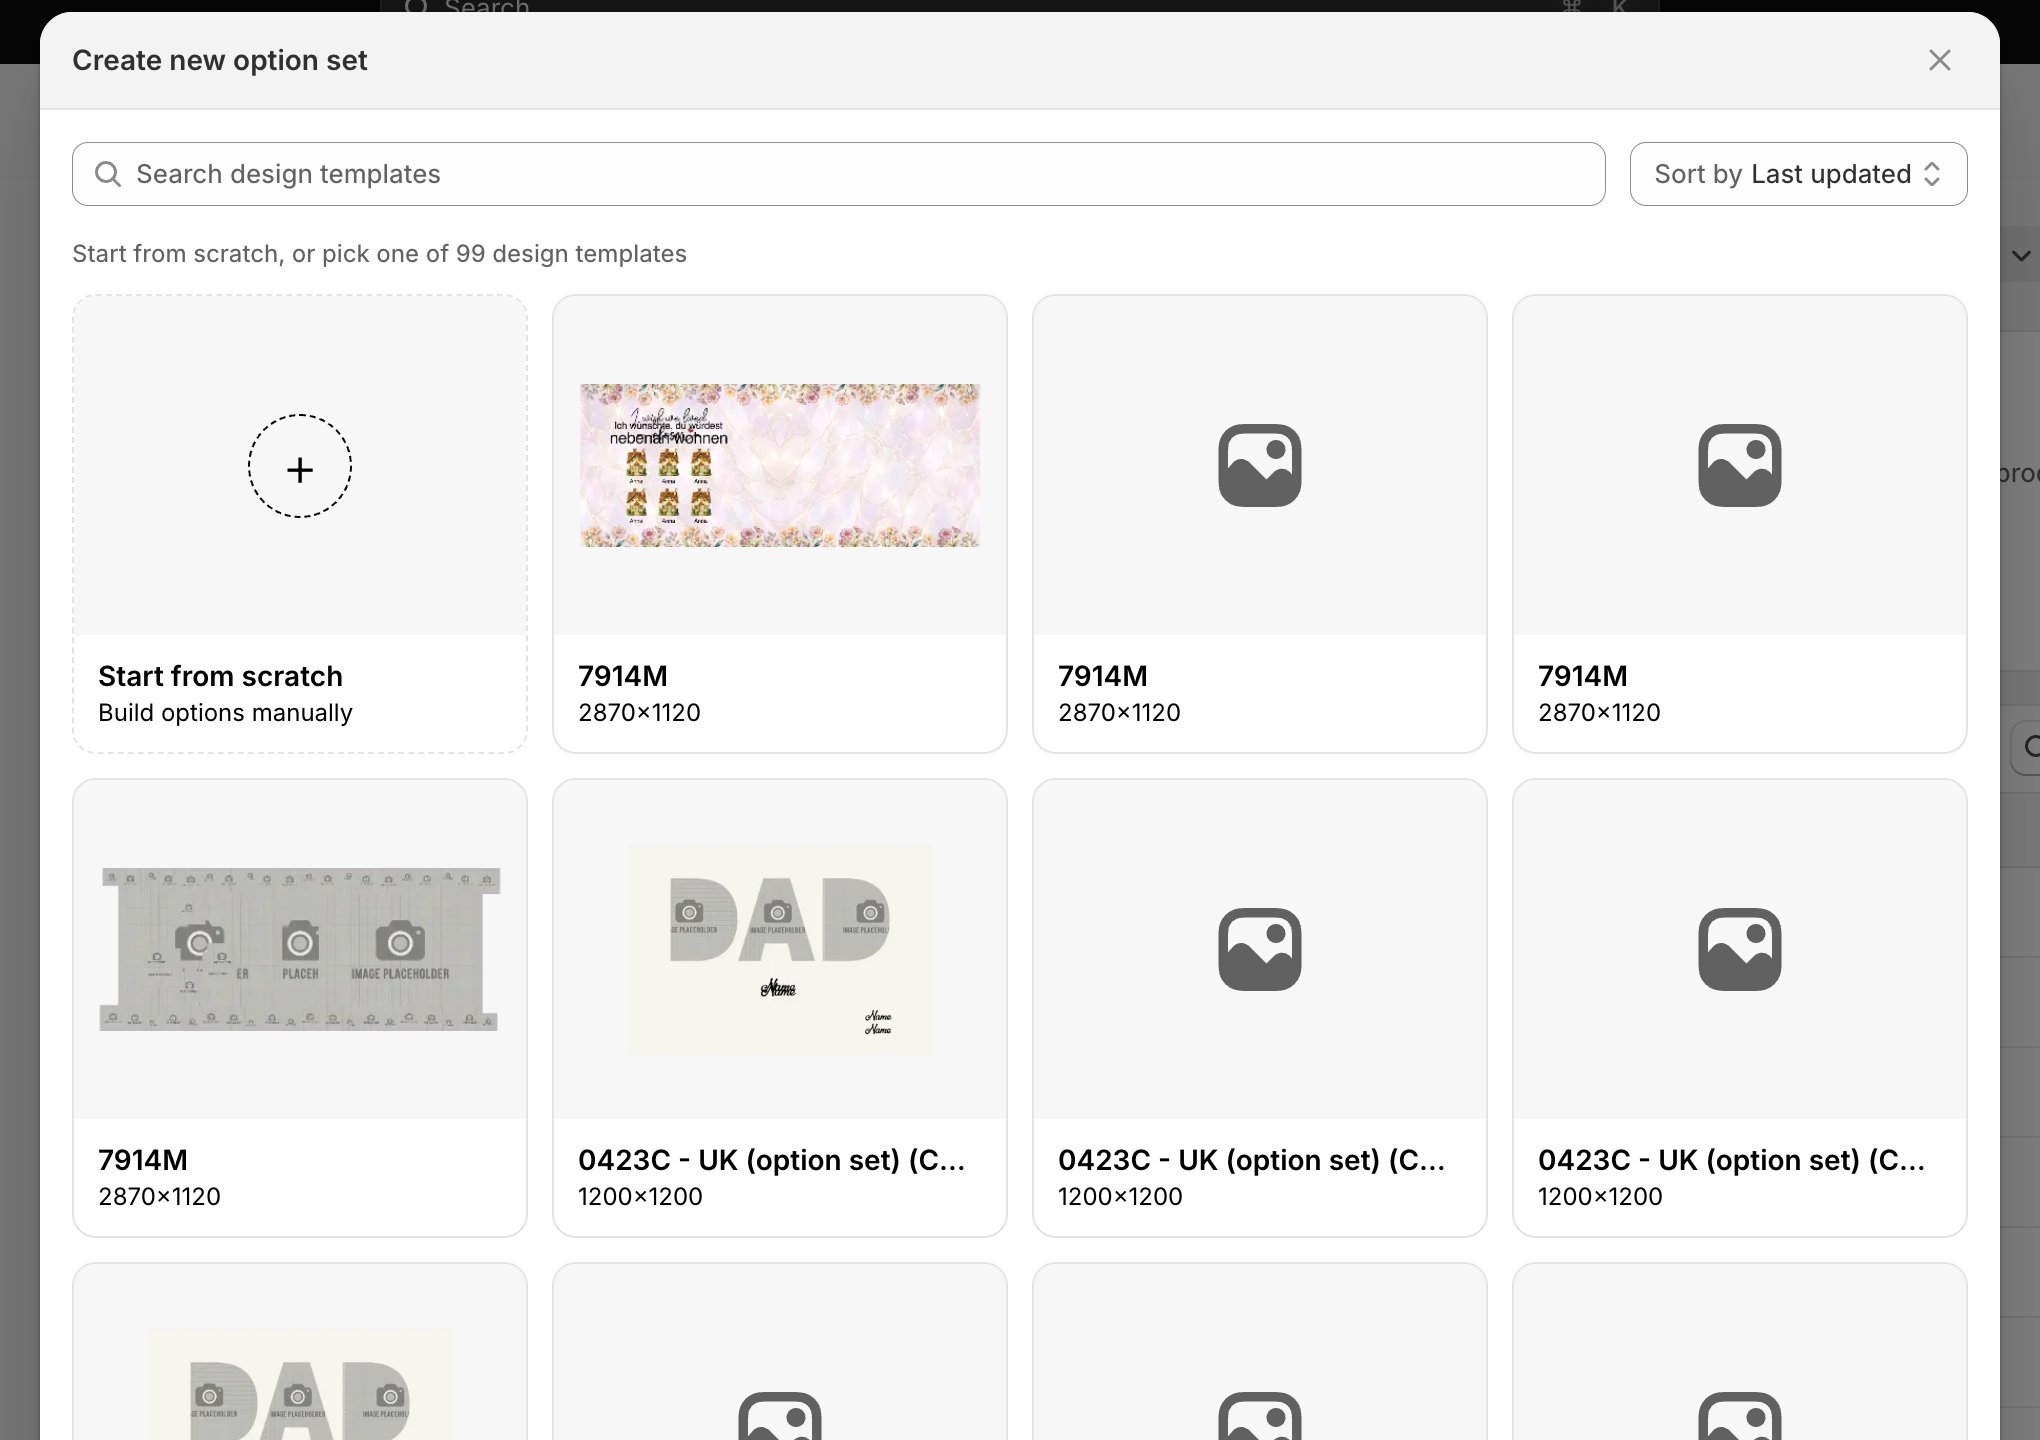 Pick one of your templates and Customei writes the first draft of the options for you, based on the layers in that design. This is the faster path and the one we recommend.
An empty option set. You add every option and link it to a layer yourself.
Starting from a template takes a few seconds while Customei reads through the layers and builds a matching option for each one. You'll see a brief loading state before the options appear.
## Inside the editor
Open any option set and you get three panels.
Pick one of your templates and Customei writes the first draft of the options for you, based on the layers in that design. This is the faster path and the one we recommend.
An empty option set. You add every option and link it to a layer yourself.
Starting from a template takes a few seconds while Customei reads through the layers and builds a matching option for each one. You'll see a brief loading state before the options appear.
## Inside the editor
Open any option set and you get three panels.
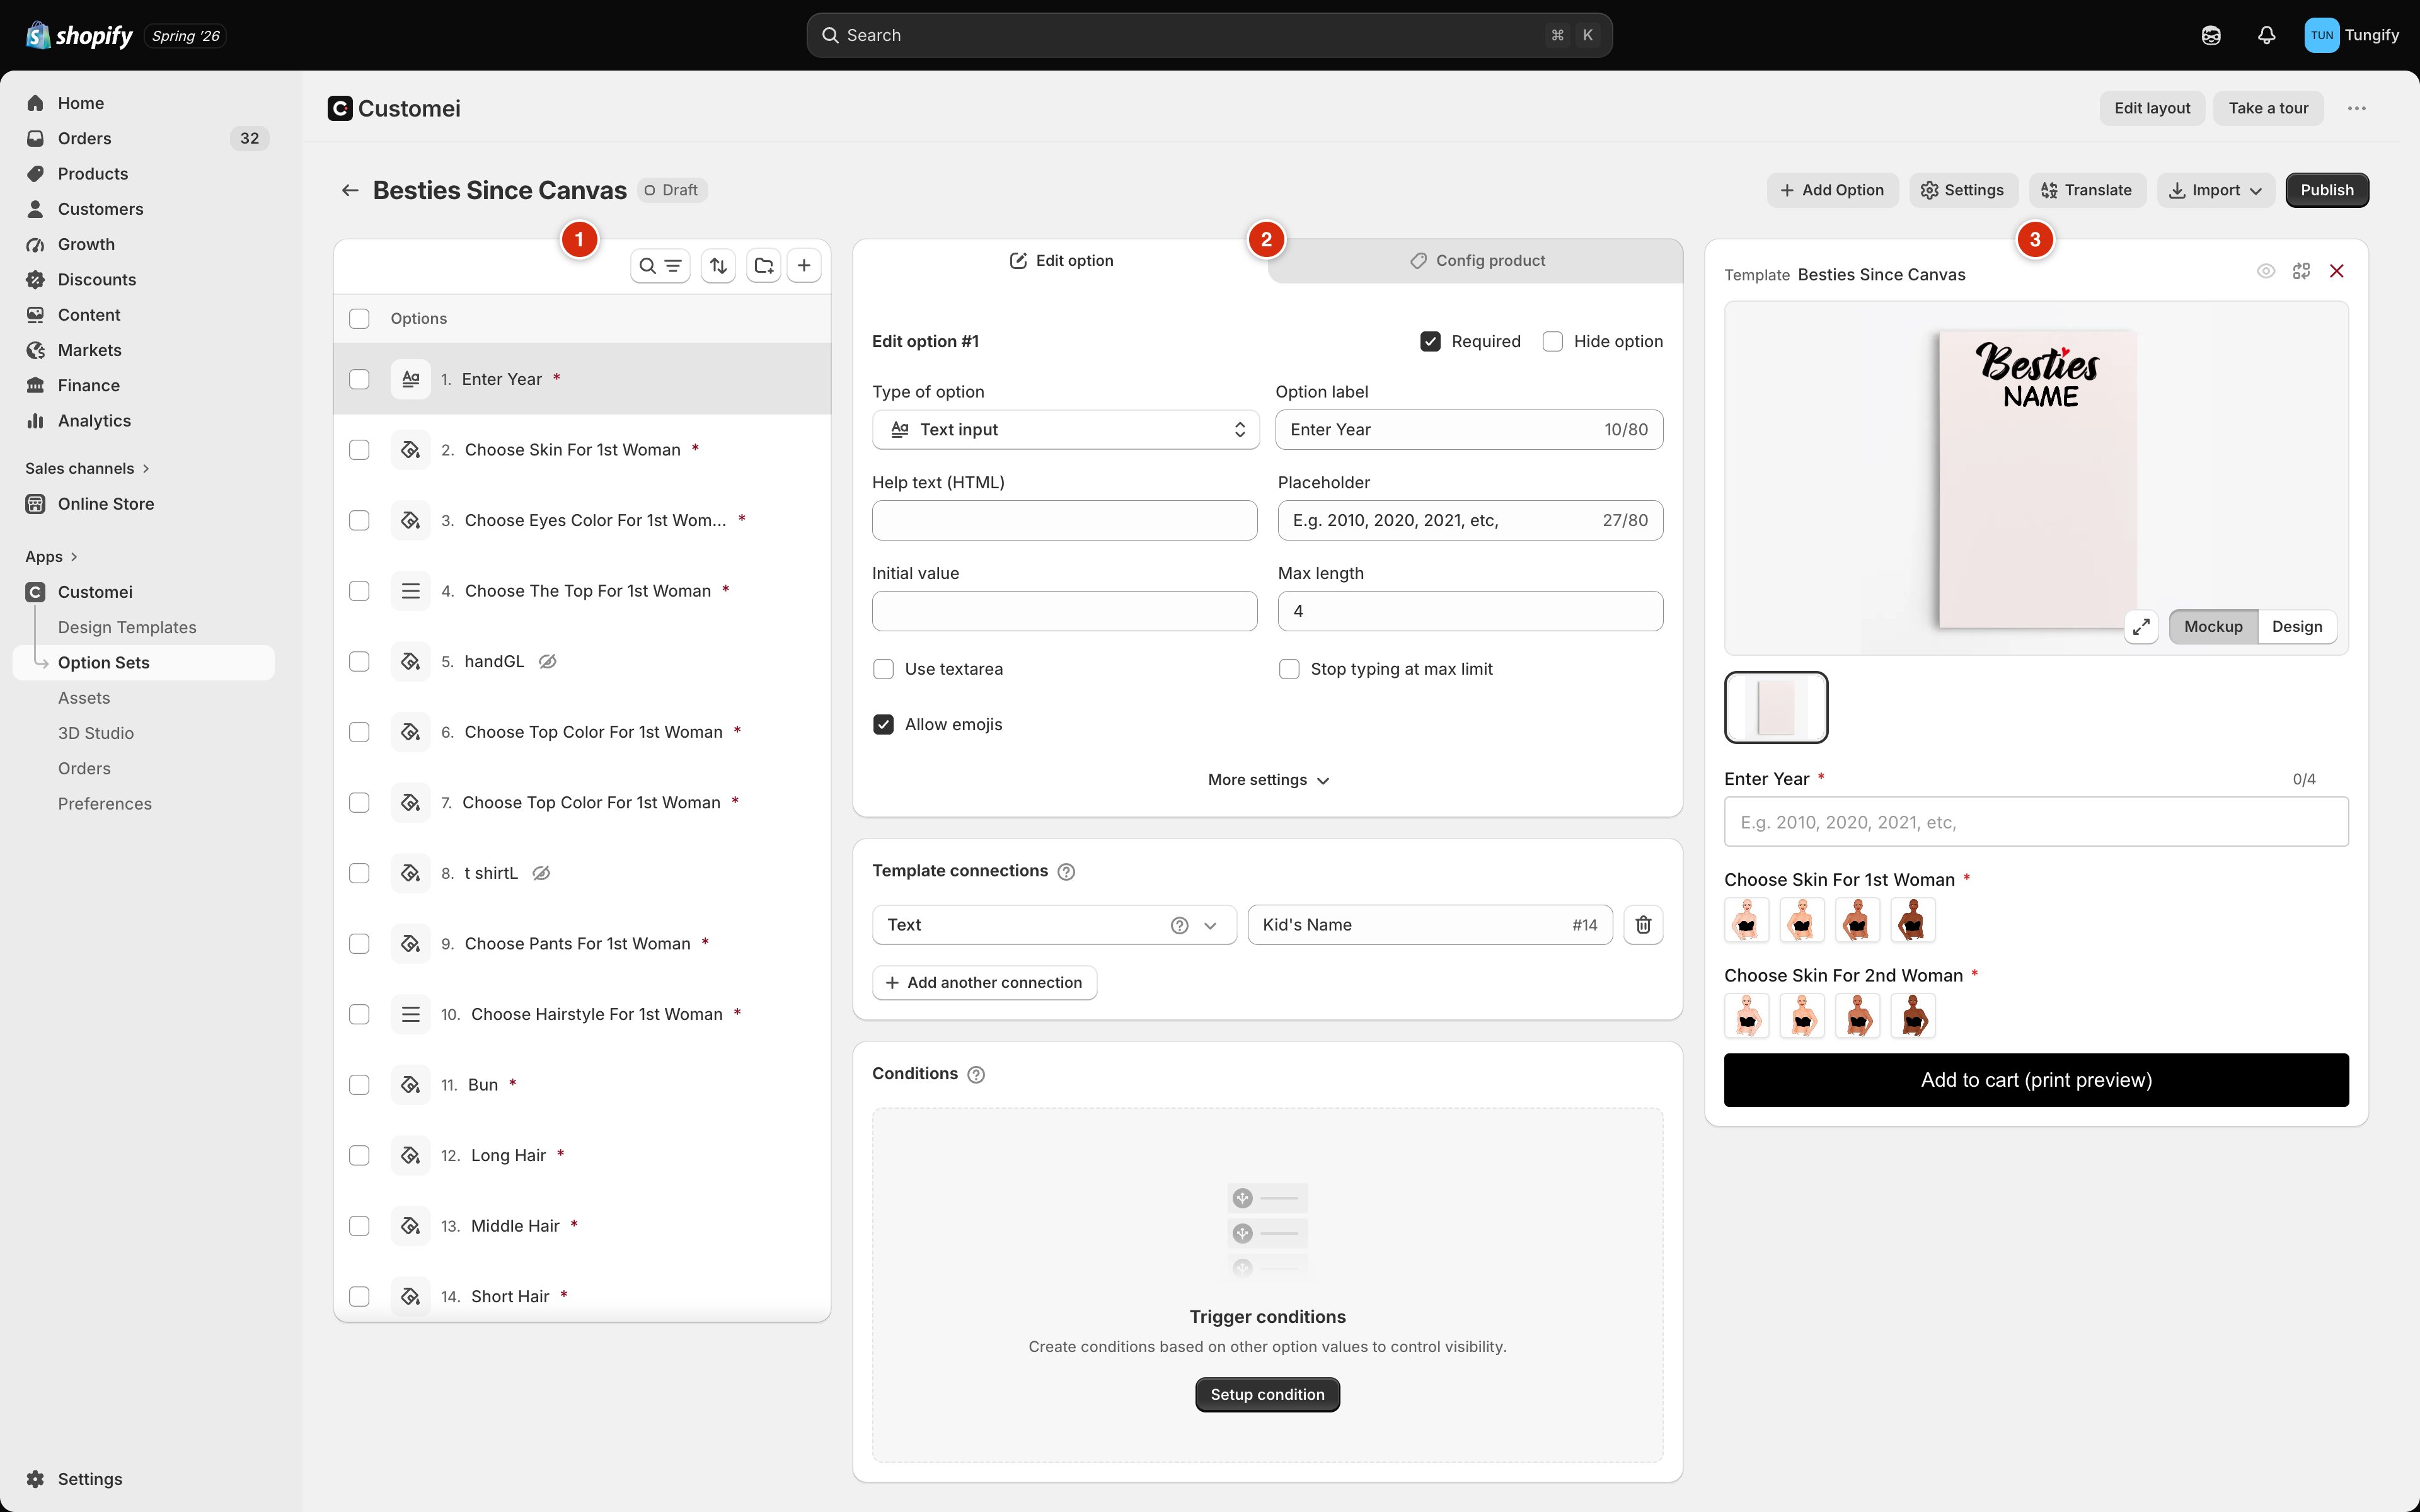 Every option, numbered in the order a shopper meets them. Drag to reorder, tick the boxes to act on several at once, and use the icons at the top to search, sort, group, or add.
Everything about the option you've selected: its type, its label, its values, what it changes on the design, and when it should be shown. The **Config product** tab beside it is where you attach this option set to your products.
Your design with the real option form underneath it, exactly as a shopper would see it. Switch between **Mockup** (on the product photo) and **Design** (the flat artwork) to check your work.
**Take a tour** in the header runs a short guided walkthrough of these panels inside the app.
## Where to next
Add options, pick their types, and fill in the choices.
Make an answer change the artwork.
The artwork side of the pair.
Put your option set on a product page.
Every option, numbered in the order a shopper meets them. Drag to reorder, tick the boxes to act on several at once, and use the icons at the top to search, sort, group, or add.
Everything about the option you've selected: its type, its label, its values, what it changes on the design, and when it should be shown. The **Config product** tab beside it is where you attach this option set to your products.
Your design with the real option form underneath it, exactly as a shopper would see it. Switch between **Mockup** (on the product photo) and **Design** (the flat artwork) to check your work.
**Take a tour** in the header runs a short guided walkthrough of these panels inside the app.
## Where to next
Add options, pick their types, and fill in the choices.
Make an answer change the artwork.
The artwork side of the pair.
Put your option set on a product page.