> ## Documentation Index
> Fetch the complete documentation index at: https://docs.customei.com/llms.txt
> Use this file to discover all available pages before exploring further.
# Check your work in the preview
> Use the preview pane to answer your own questions the way a shopper would, and to check the print file before you publish.
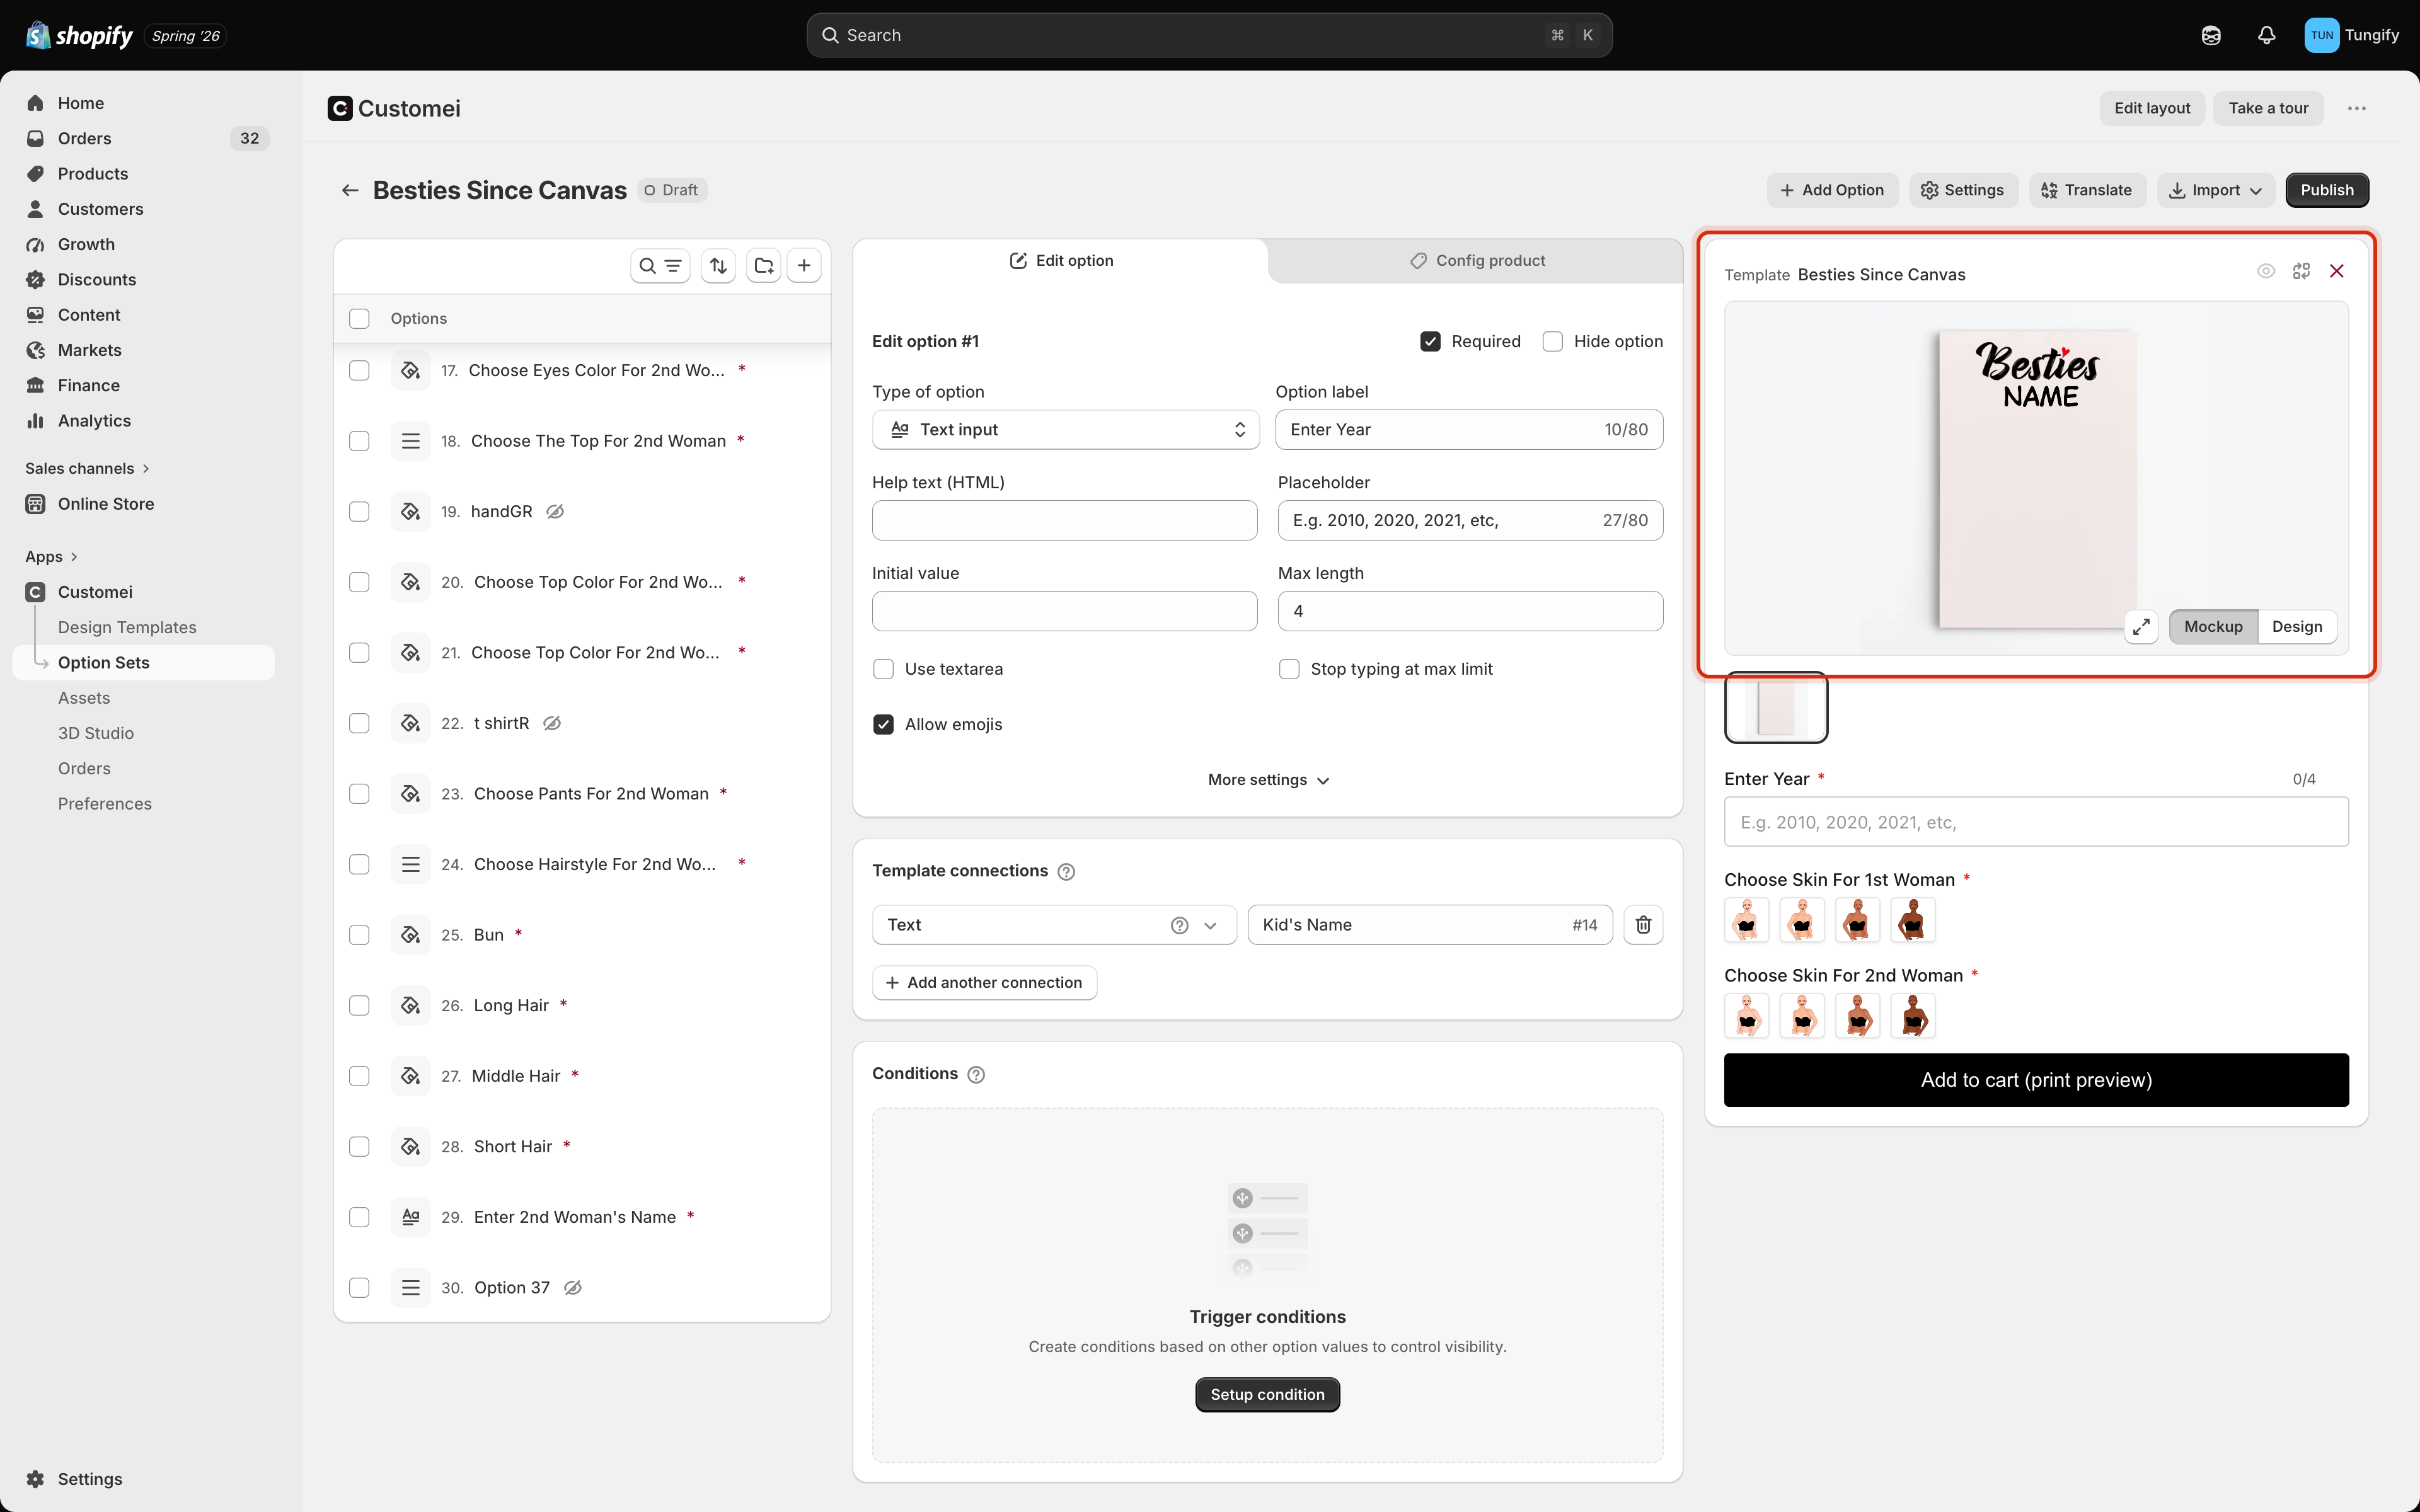
The right-hand pane of the option-set editor is a working copy of your product page. Every question you add appears there, and every answer you type changes the picture above it. Use it before you publish, every time.
 ## The two views
The **Mockup / Design** toggle switches what the picture shows.
| View | What you see |
| ---------- | ------------------------------------------------------------ |
| **Mockup** | Your artwork on the product photo, the way a shopper sees it |
| **Design** | The artwork on its own, flat, the way it prints |
Check both. **Mockup** tells you whether the product looks appealing; **Design** tells you whether the artwork is right. A name that looks fine wrapped onto a mug can still be off-centre on the flat design.
## The two views
The **Mockup / Design** toggle switches what the picture shows.
| View | What you see |
| ---------- | ------------------------------------------------------------ |
| **Mockup** | Your artwork on the product photo, the way a shopper sees it |
| **Design** | The artwork on its own, flat, the way it prints |
Check both. **Mockup** tells you whether the product looks appealing; **Design** tells you whether the artwork is right. A name that looks fine wrapped onto a mug can still be off-centre on the flat design.
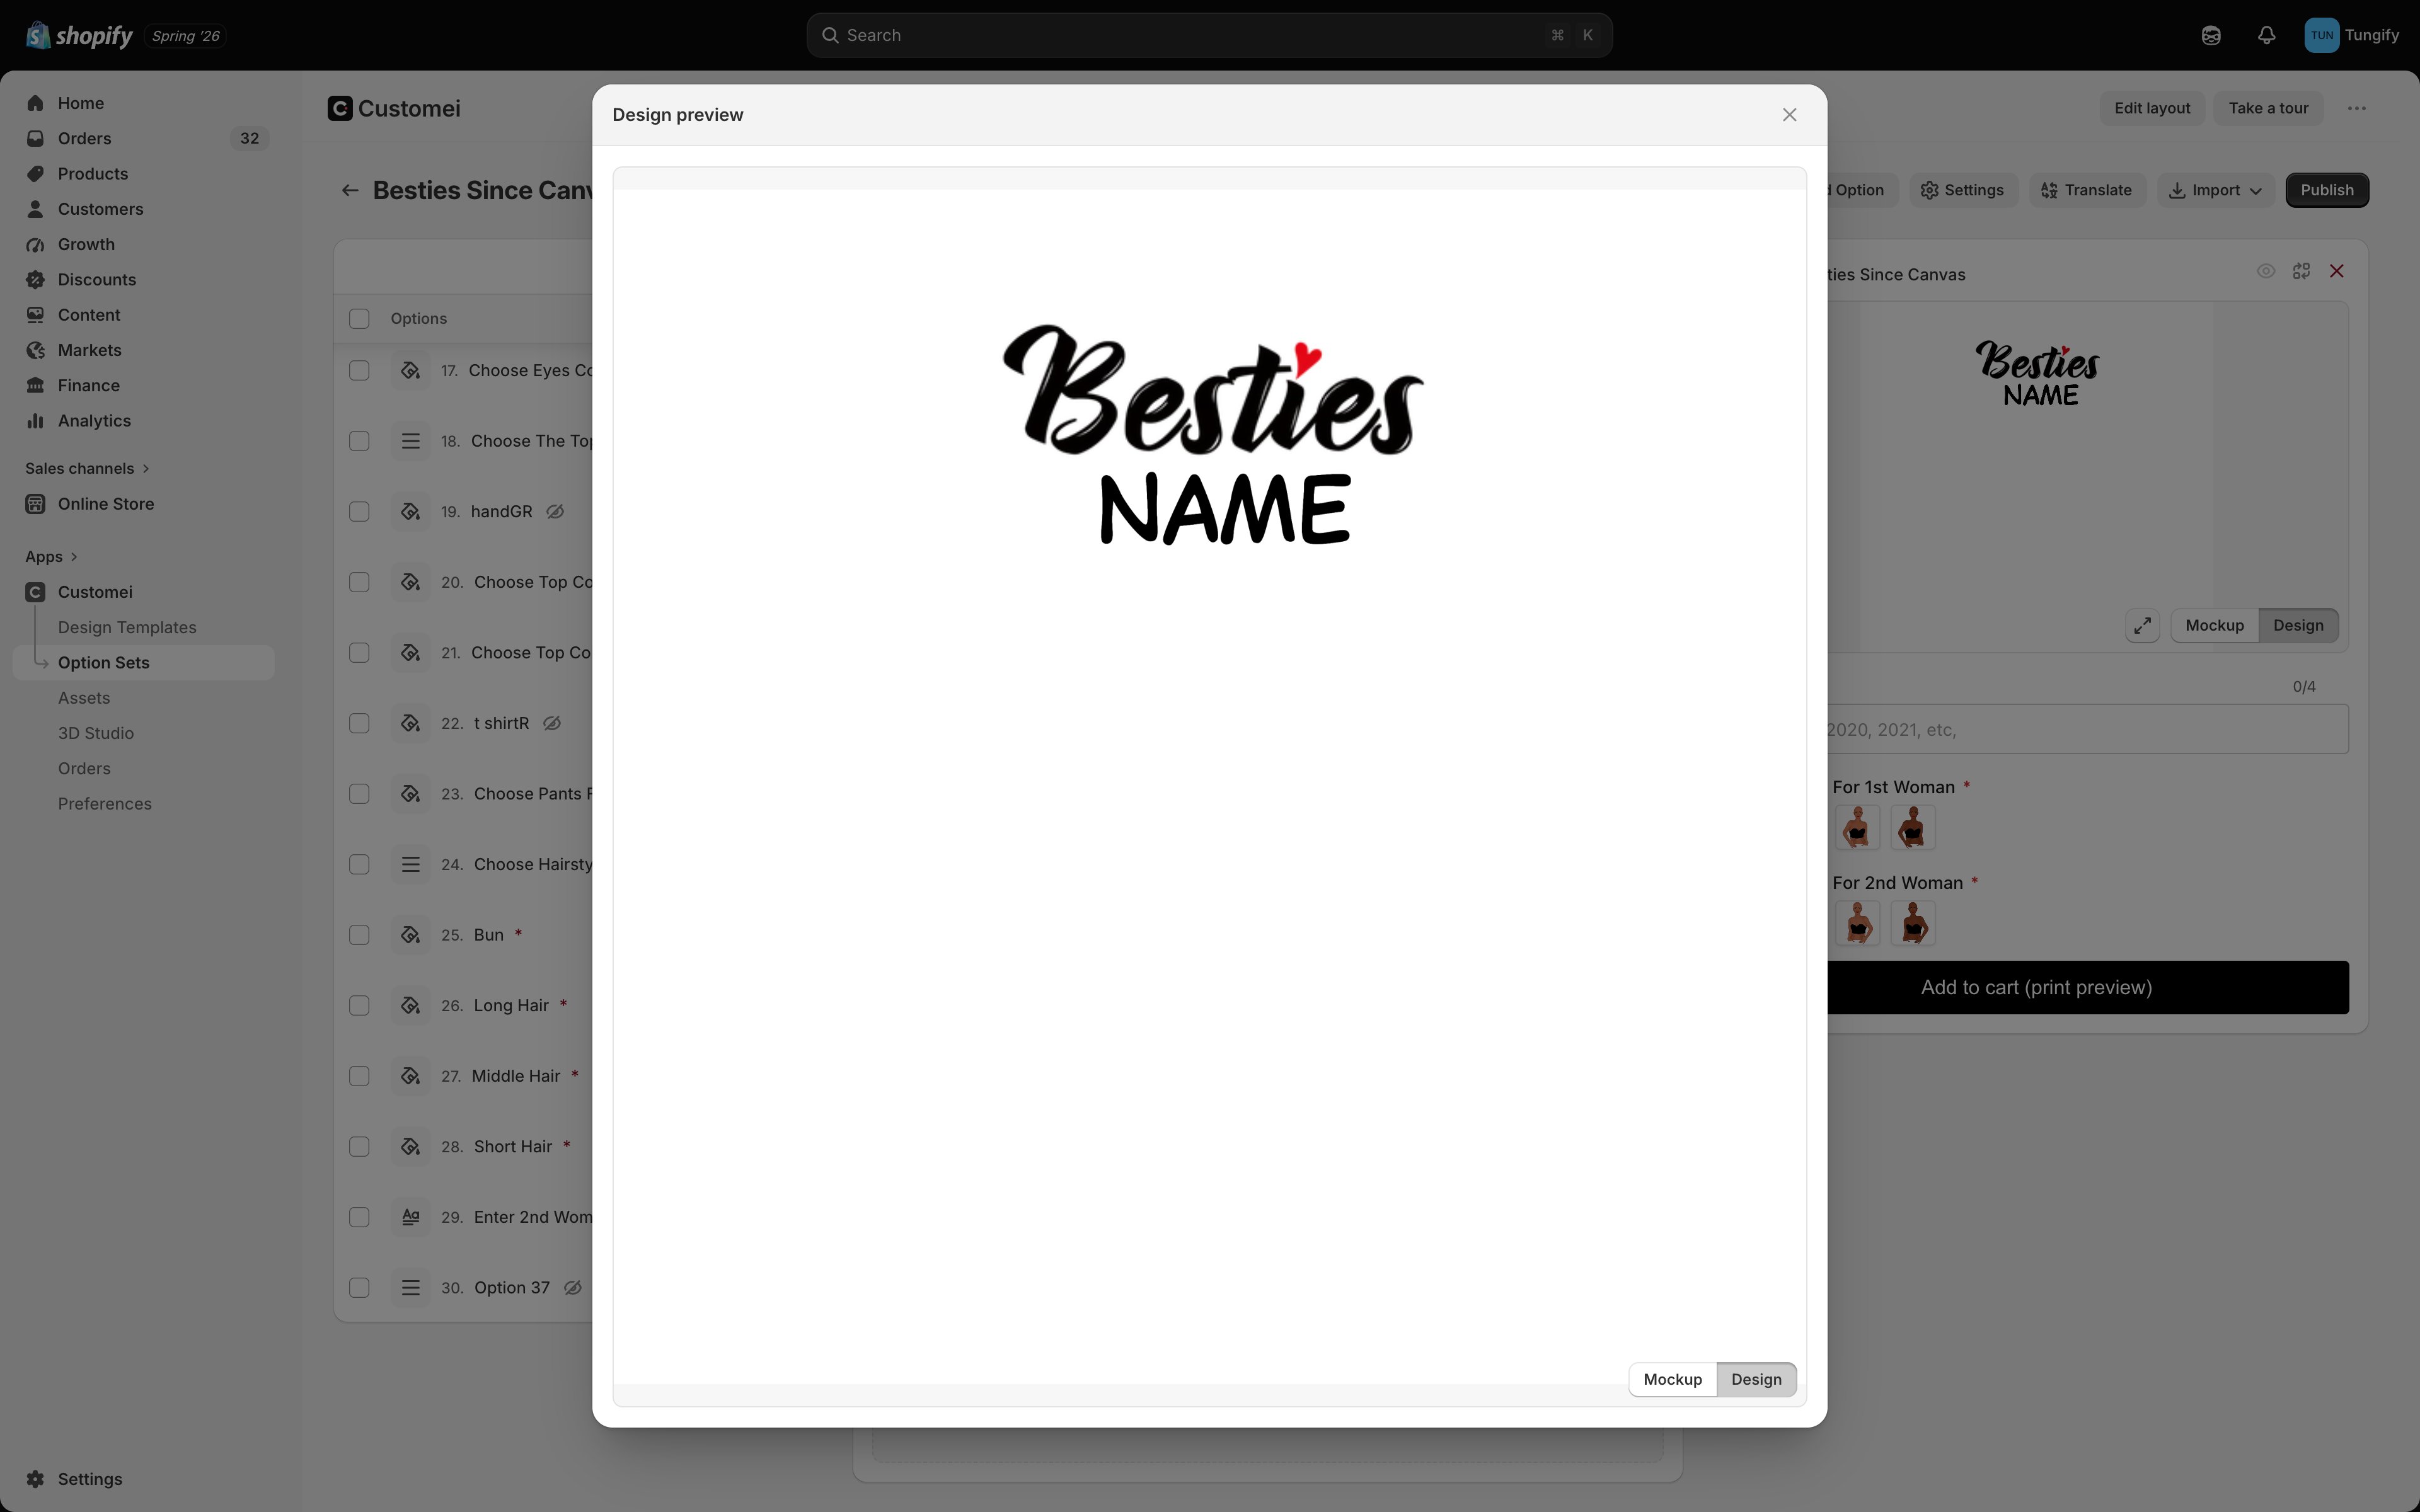 Click the expand icon for the larger window above. If your template has several preview frames, the thumbnail strip under the picture switches between them.
## Answer your own questions
Fill the form in the preview the way a shopper would. Type a long name, pick the choice you expect to be least popular, leave an optional question empty. Things you will catch in a minute:
* text that overflows the space you designed for
* a choice that changes nothing, because its connection points at the wrong layer
* a question that shows when it shouldn't, because a condition matches the label instead of the value
* a required question you forgot, blocking the cart
Test with the worst case, not the neat one. Your own name usually fits; *Bartholomew* often doesn't.
## Check the print file
**Add to cart (print preview)** at the bottom of the form does not sell anything. It builds the print file from your answers and shows it to you. It is the same file that reaches you when a real order comes in.
Do this once before publishing a new option set. It is the only check that covers the whole chain: your questions, their connections, and the design template behind them.
If the print preview looks wrong while the mockup looks right, the problem is in the design template, not in your options. Open the template and check the layer the option connects to.
## The pane header
Four small controls sit beside the template name at the top of the pane.
| Control | What it does |
| -------------------- | ------------------------------------------------ |
| **Eye** | Opens the live preview in a new window |
| **Connections icon** | Jumps to the layer connections for this template |
| **Expand** | The larger picture window shown above |
| **X** | Detaches the template from this option set |
Detaching the template with the **X** leaves the option set collecting answers with nothing to draw them on: no preview, and no print file. Only do it when you mean to swap templates. See [connect to a template](/optionsets/connect-to-a-template).
## Where to next
Once the preview looks right, publish it.
Fix an answer that changes nothing.
Click the expand icon for the larger window above. If your template has several preview frames, the thumbnail strip under the picture switches between them.
## Answer your own questions
Fill the form in the preview the way a shopper would. Type a long name, pick the choice you expect to be least popular, leave an optional question empty. Things you will catch in a minute:
* text that overflows the space you designed for
* a choice that changes nothing, because its connection points at the wrong layer
* a question that shows when it shouldn't, because a condition matches the label instead of the value
* a required question you forgot, blocking the cart
Test with the worst case, not the neat one. Your own name usually fits; *Bartholomew* often doesn't.
## Check the print file
**Add to cart (print preview)** at the bottom of the form does not sell anything. It builds the print file from your answers and shows it to you. It is the same file that reaches you when a real order comes in.
Do this once before publishing a new option set. It is the only check that covers the whole chain: your questions, their connections, and the design template behind them.
If the print preview looks wrong while the mockup looks right, the problem is in the design template, not in your options. Open the template and check the layer the option connects to.
## The pane header
Four small controls sit beside the template name at the top of the pane.
| Control | What it does |
| -------------------- | ------------------------------------------------ |
| **Eye** | Opens the live preview in a new window |
| **Connections icon** | Jumps to the layer connections for this template |
| **Expand** | The larger picture window shown above |
| **X** | Detaches the template from this option set |
Detaching the template with the **X** leaves the option set collecting answers with nothing to draw them on: no preview, and no print file. Only do it when you mean to swap templates. See [connect to a template](/optionsets/connect-to-a-template).
## Where to next
Once the preview looks right, publish it.
Fix an answer that changes nothing.