

This option · does this · to this layerOptions where the customer picks from a list need one more step, because each choice needs its own picture or colour:
This choice · uses this pictureEverything on this page is one of those two sentences.
Step 1. Check which design template you’re working against
An option set can only connect to layers in the design template it uses. That template is named at the top of the preview panel, on the right of the editor.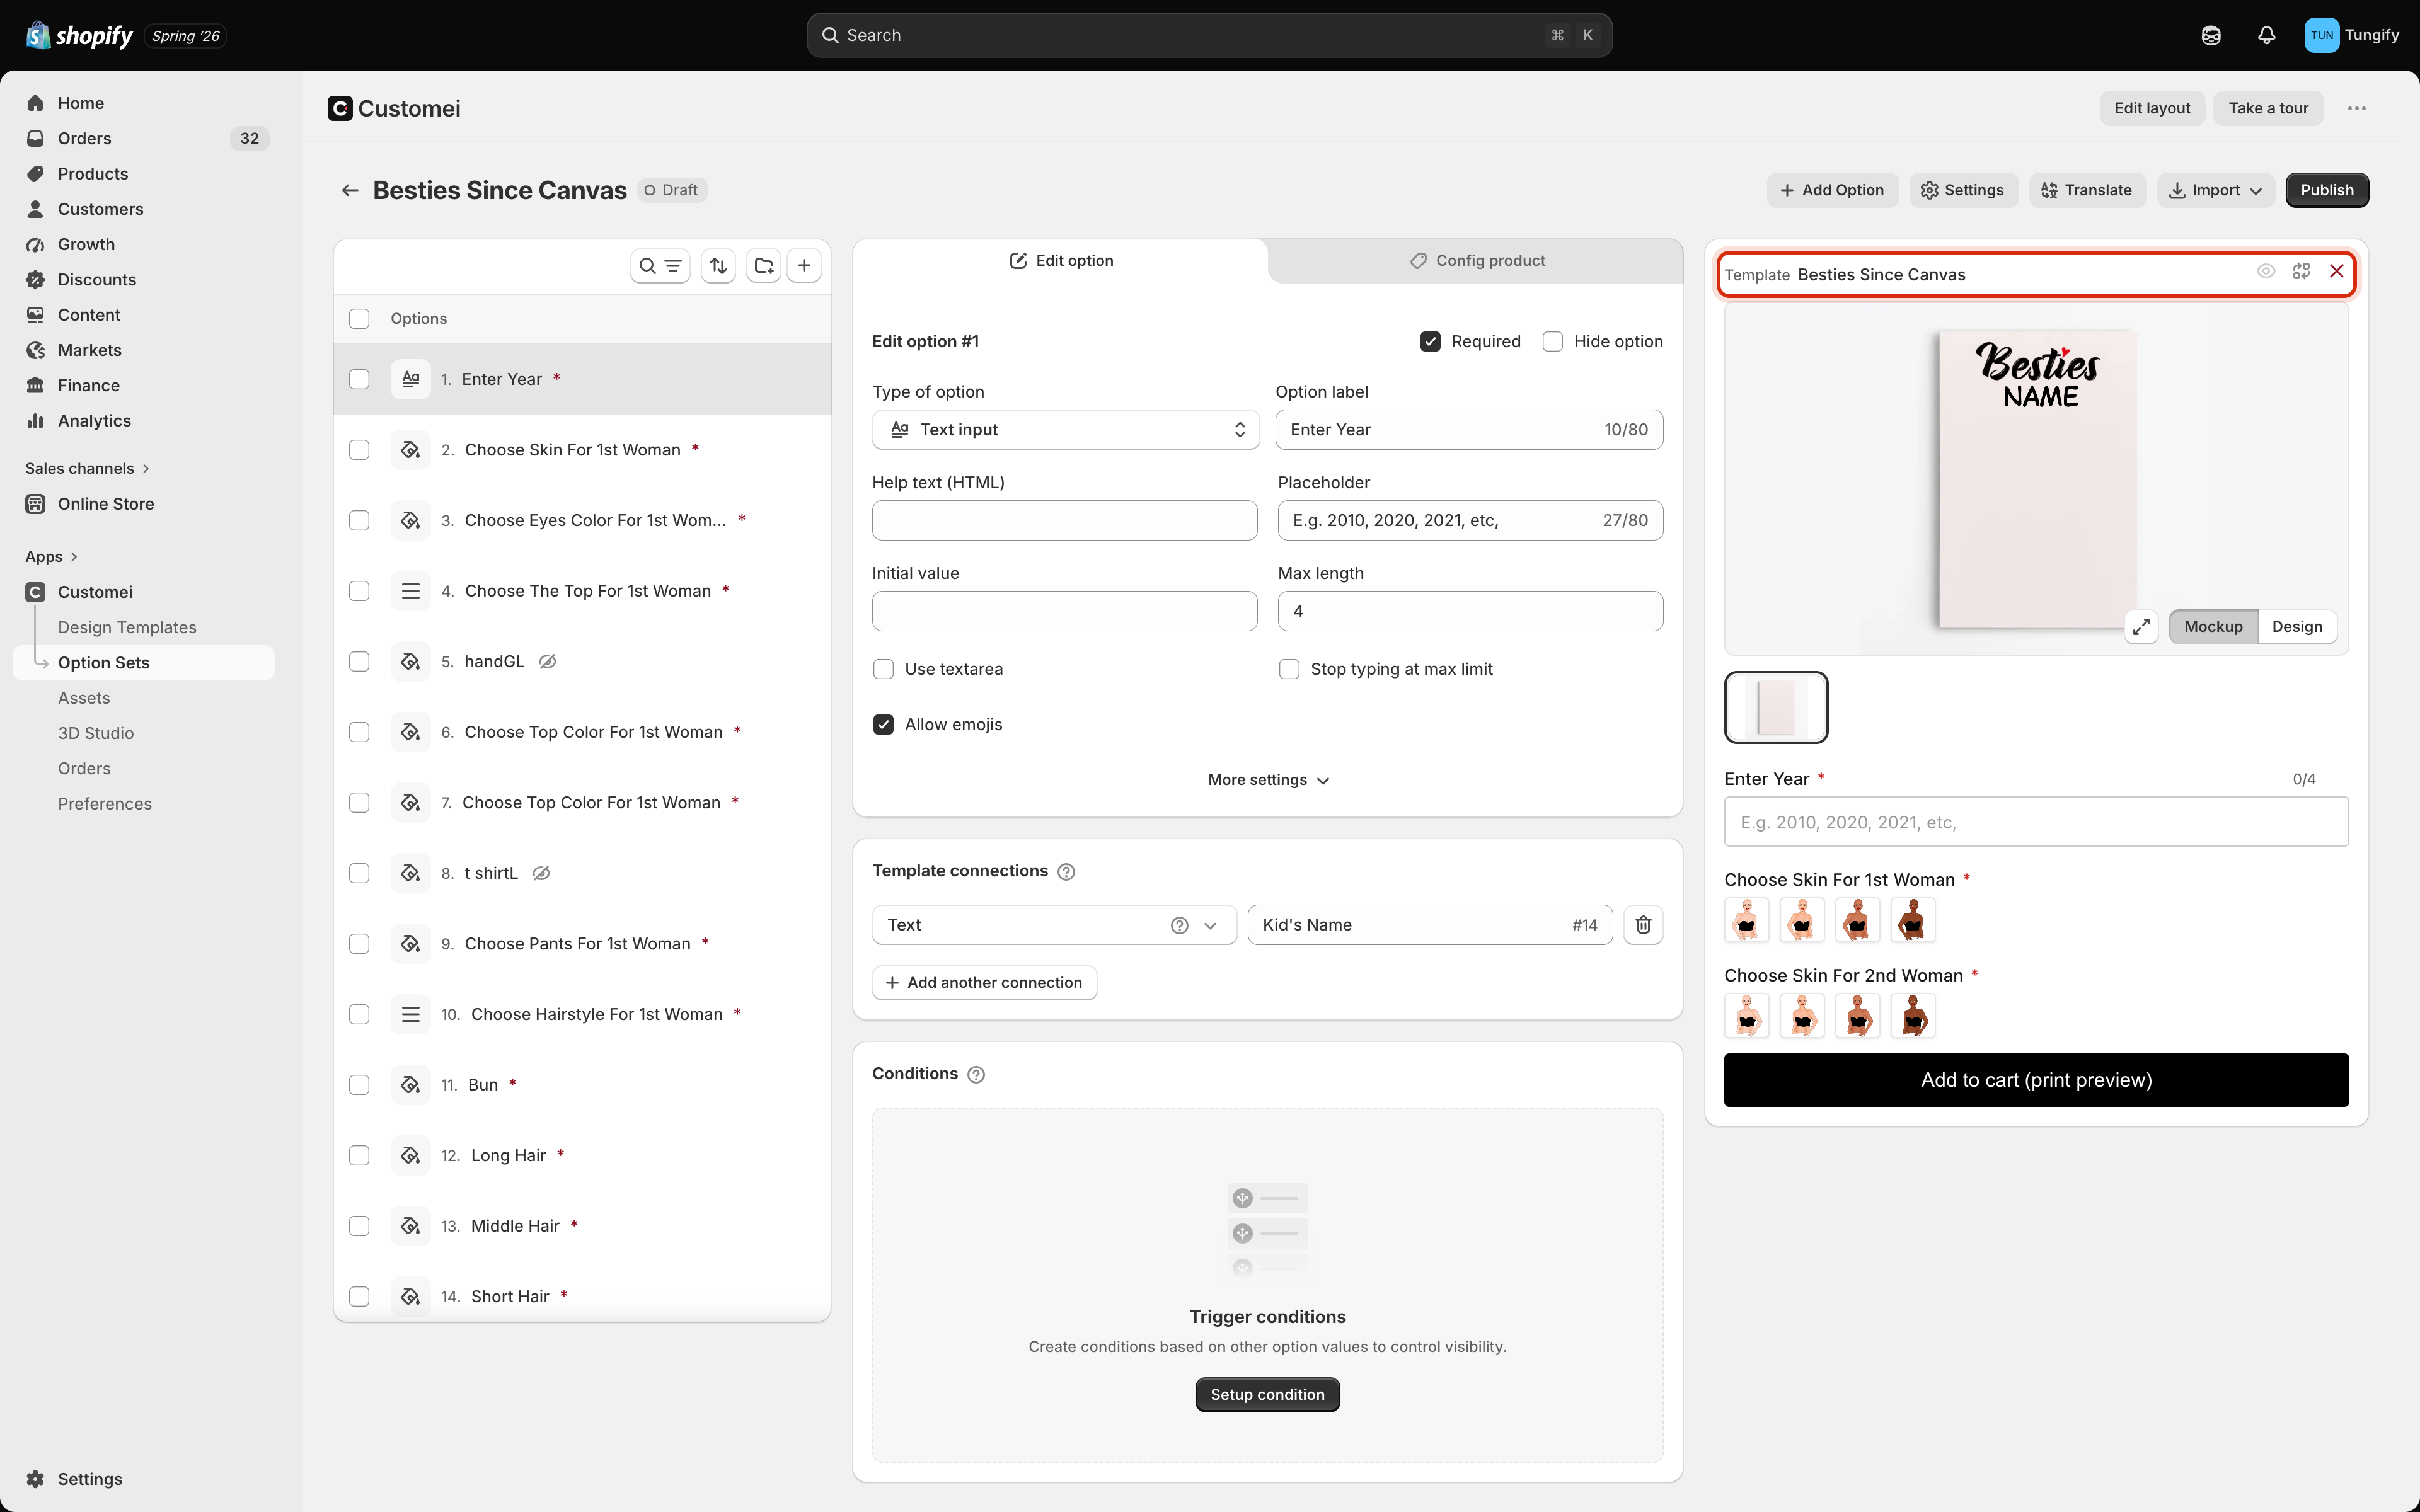
The preview panel header names the design template this option set uses.
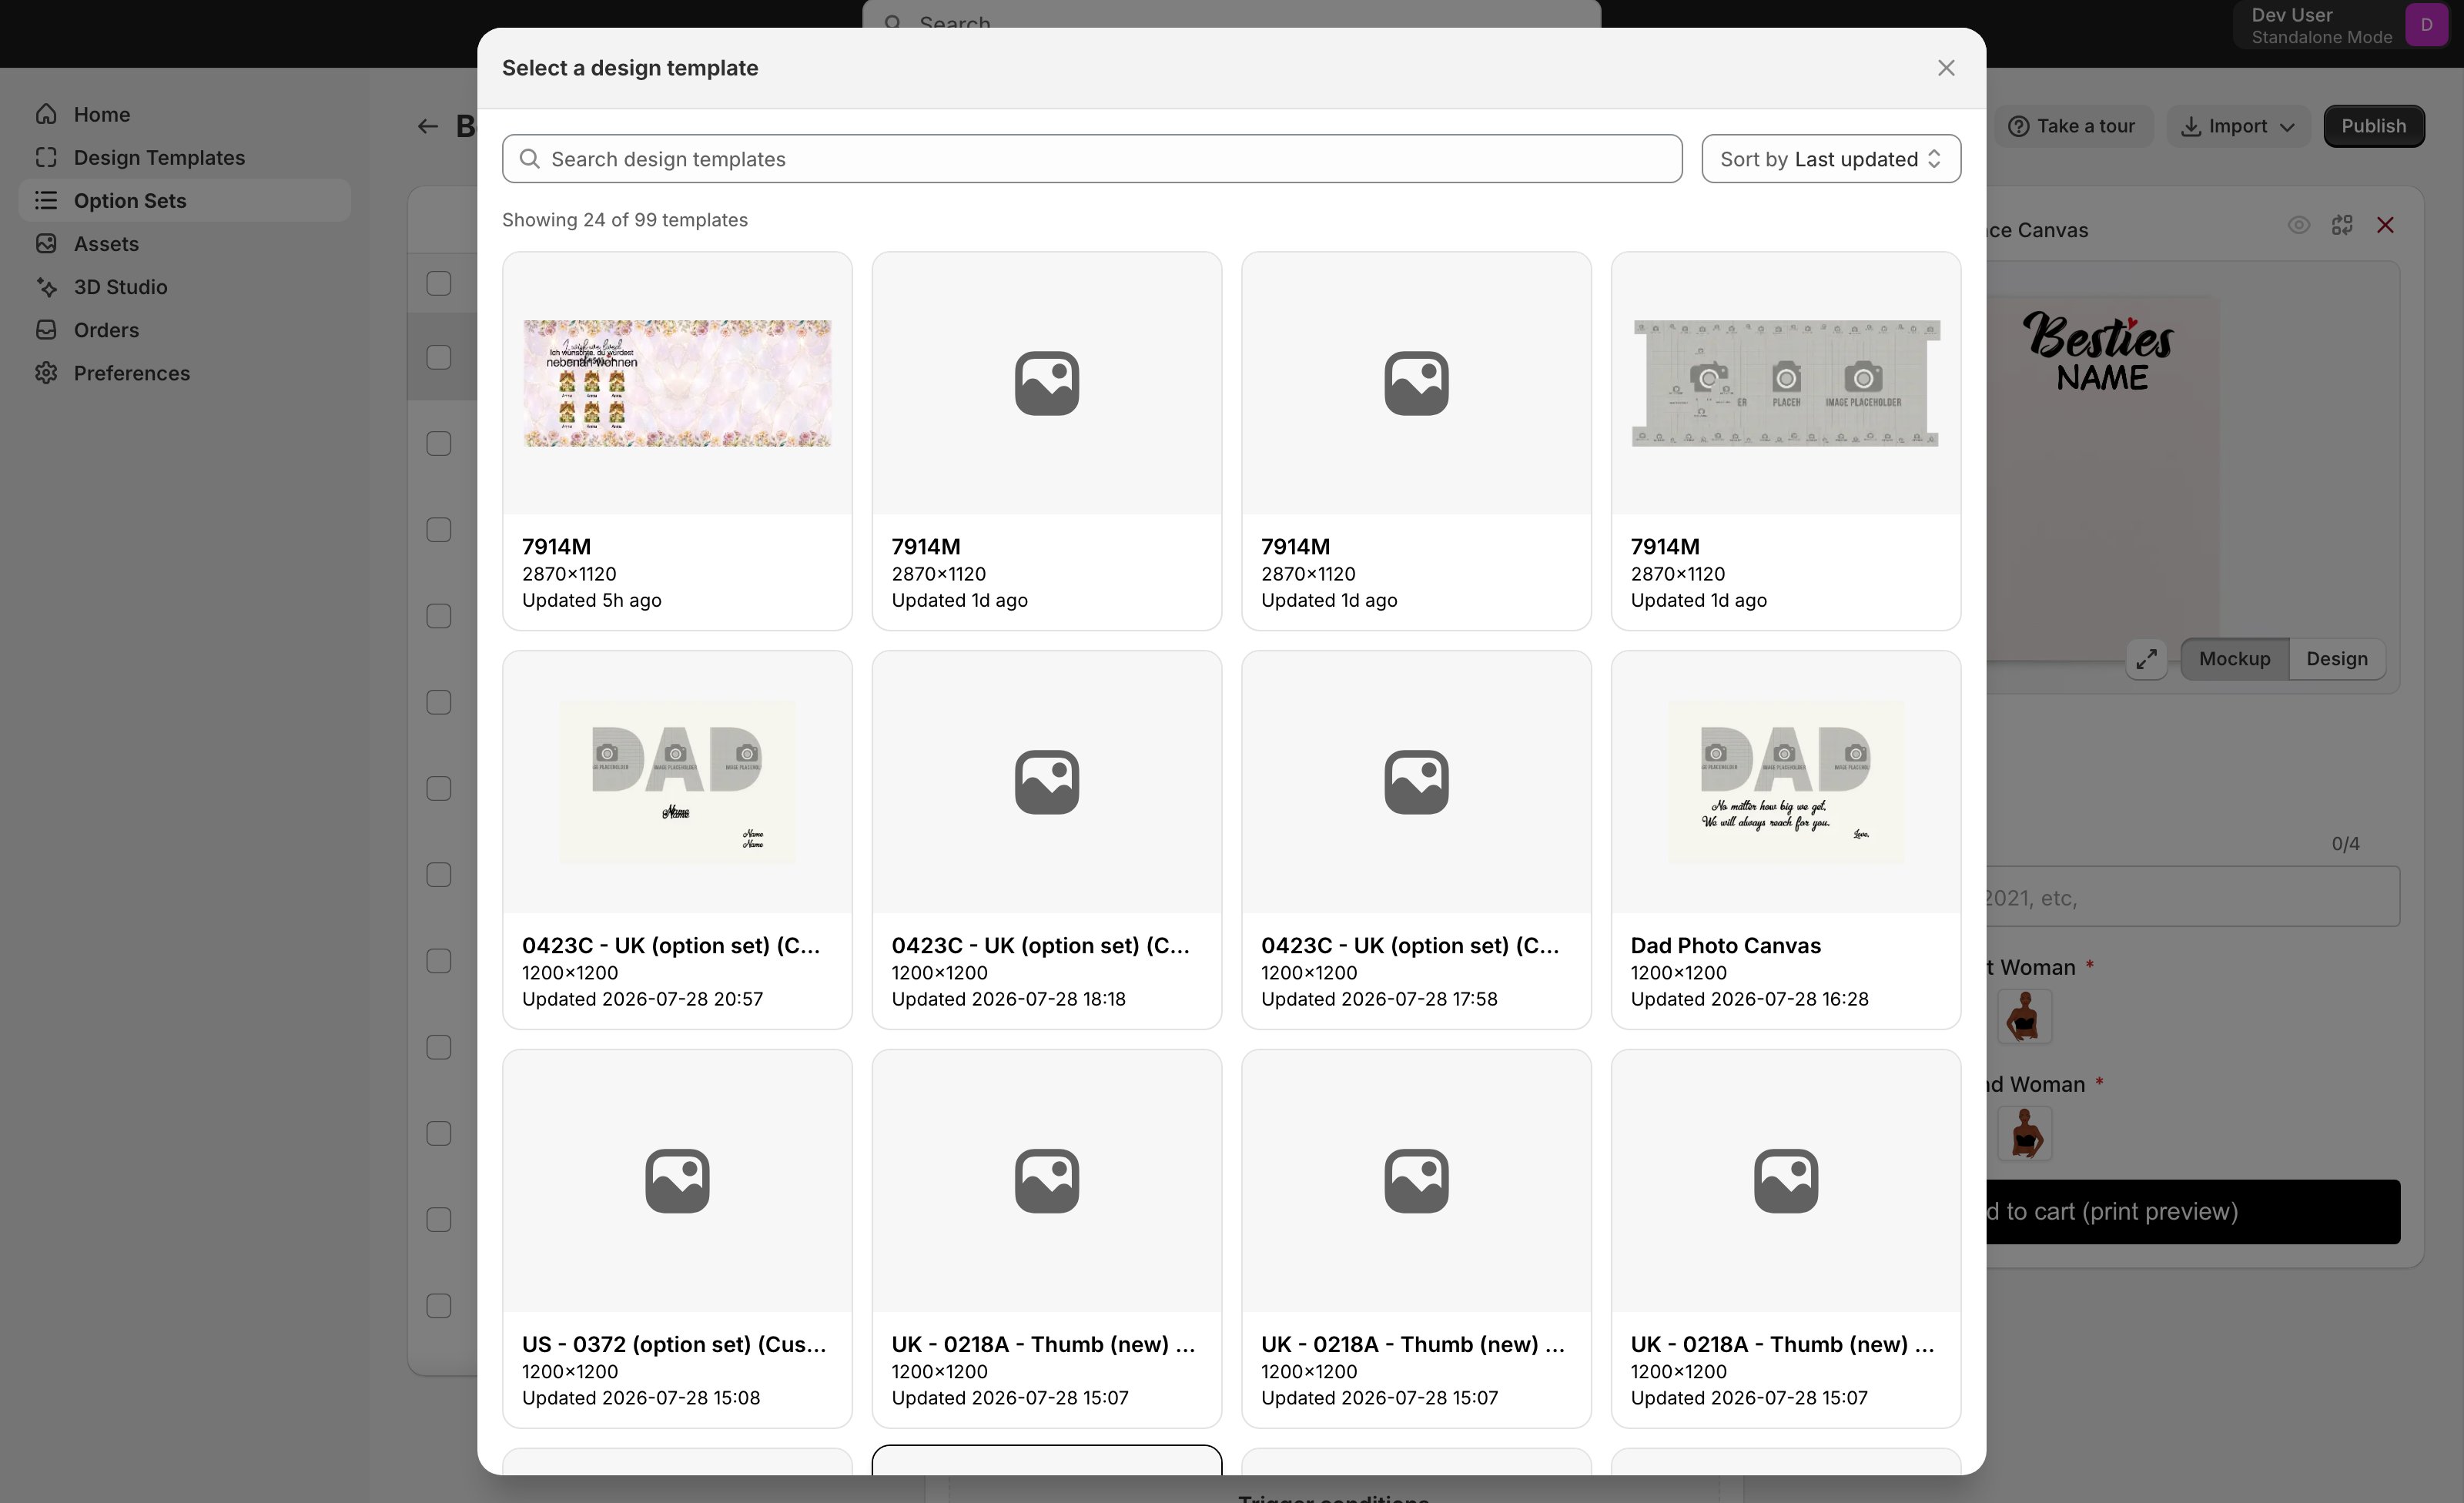
The template picker. Search by name, then click a card to use it.
Step 2. Find the layer number
Open your design template and look at the Layers panel. Every layer has a number.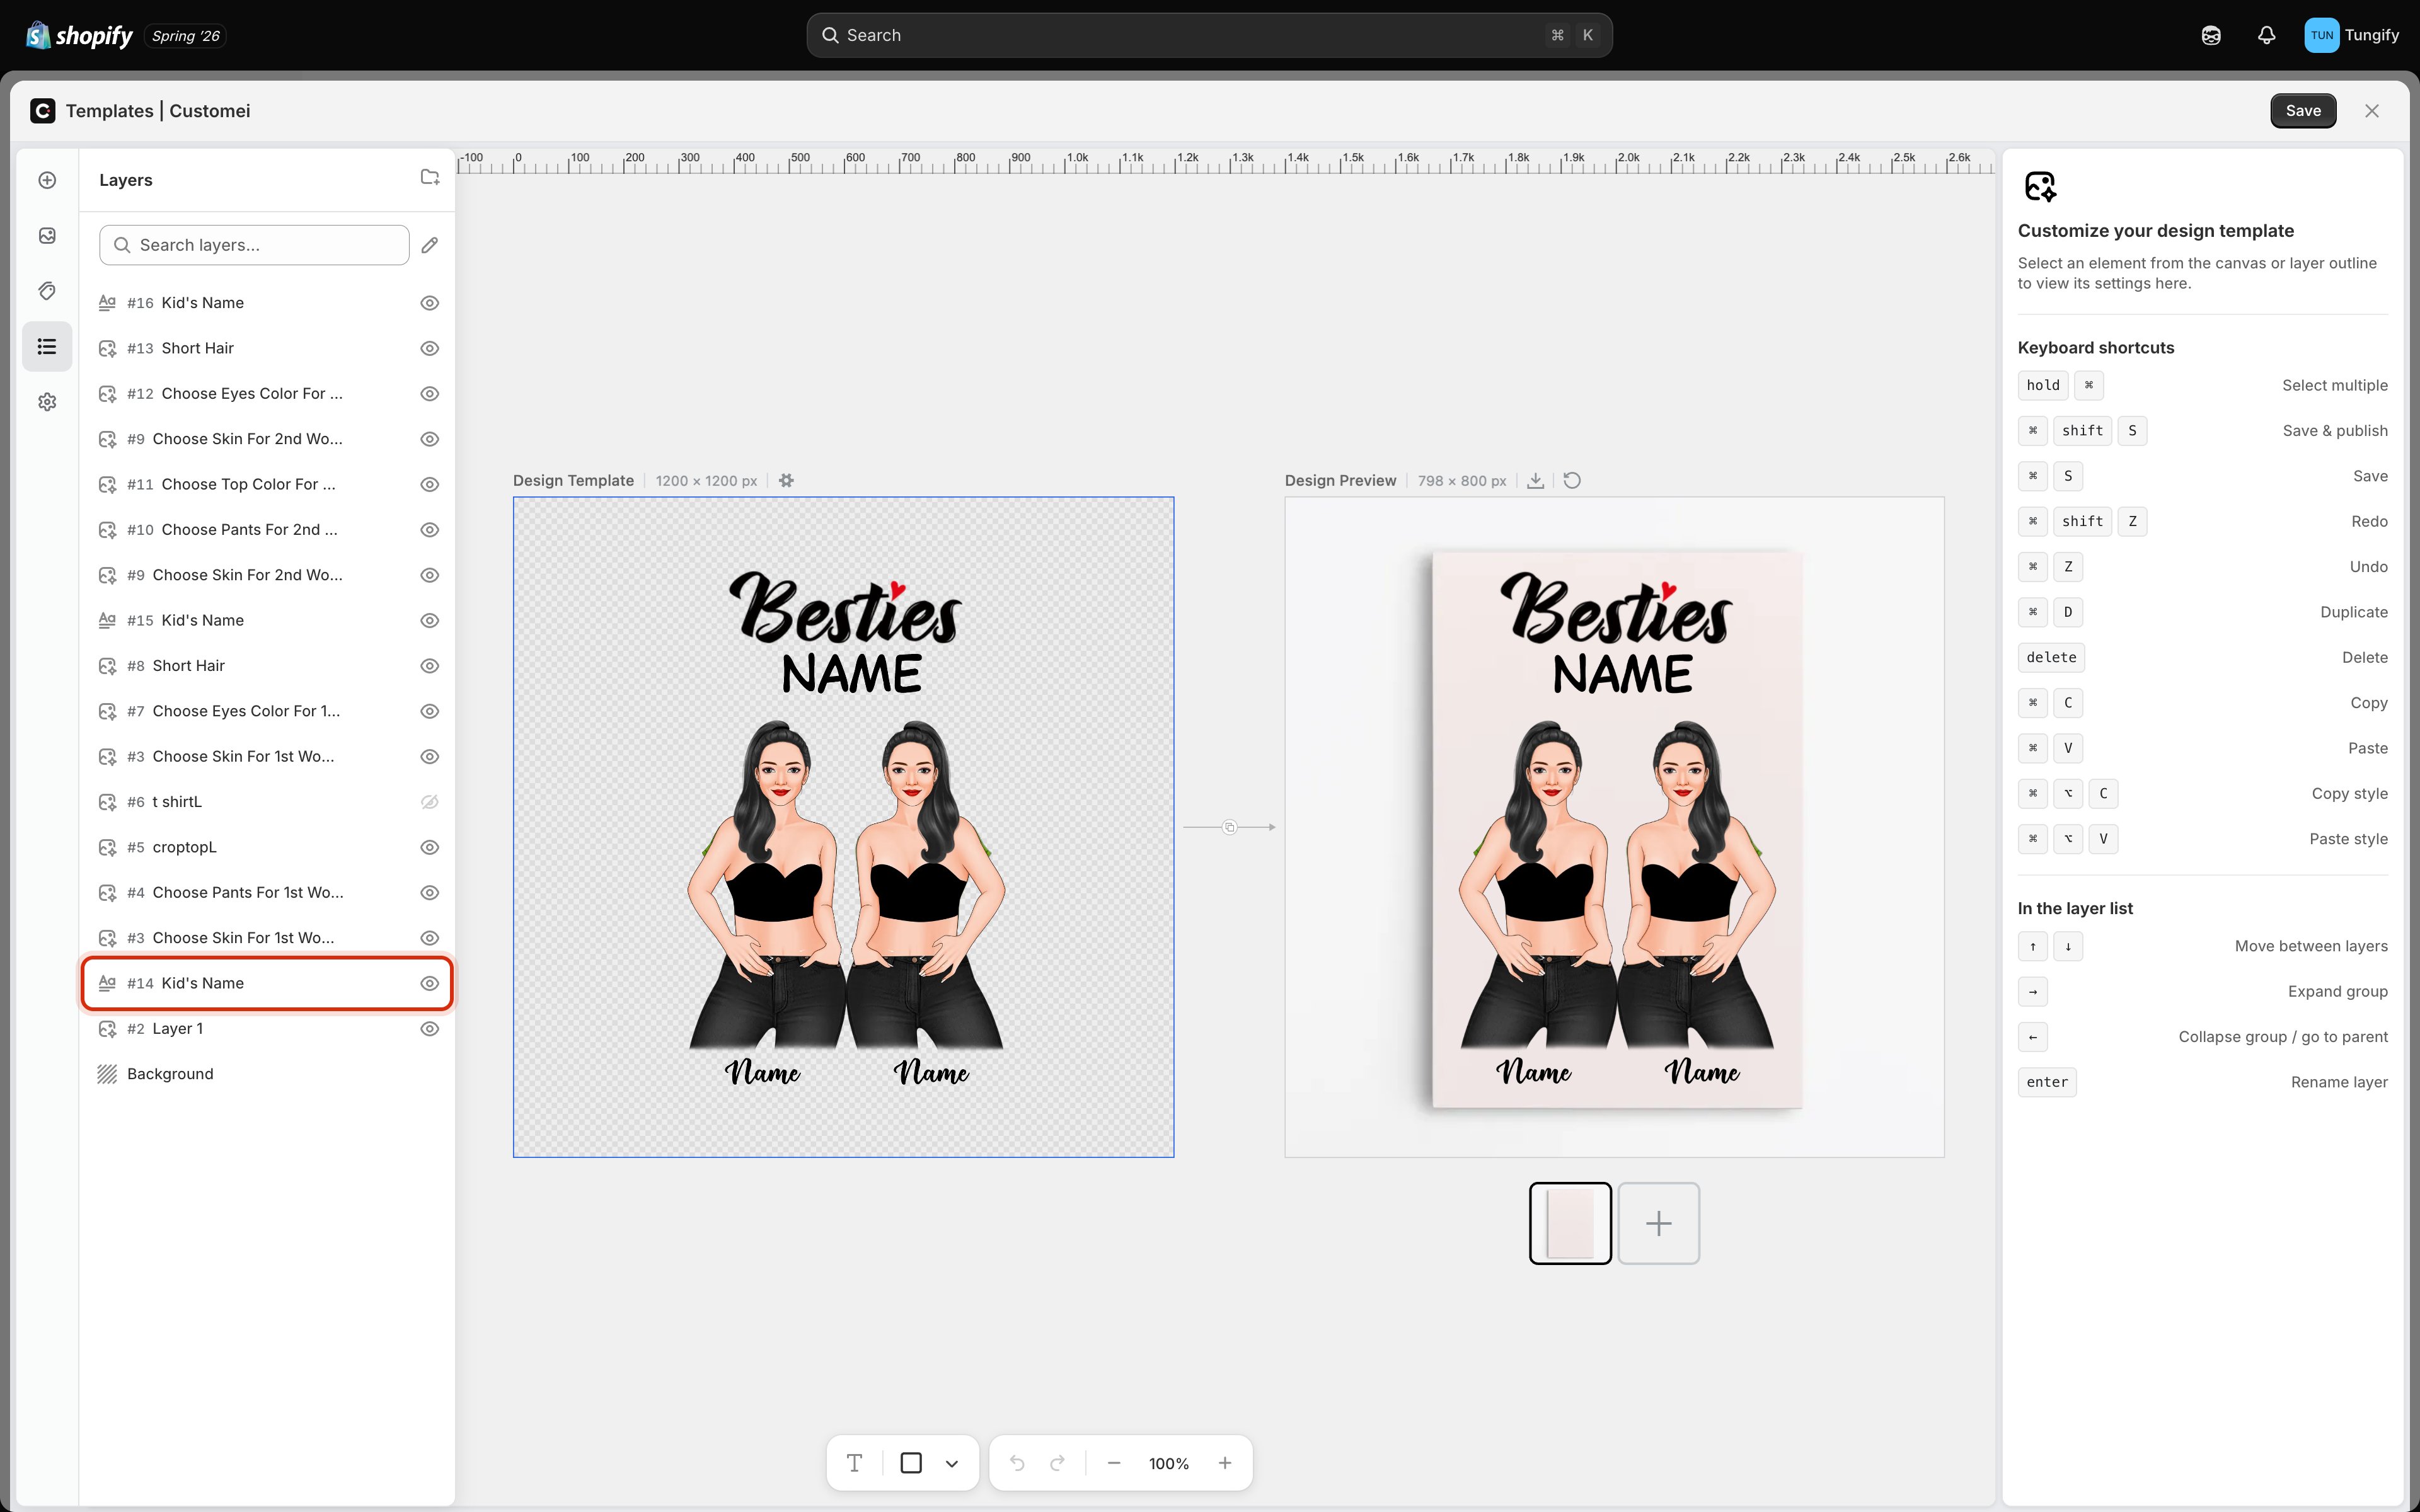
Layer #14 is the text layer named Kid's Name. That number is what you connect to.
Step 3. Add the connection
Select an option and scroll to Template connections. A brand new option has nothing wired up yet.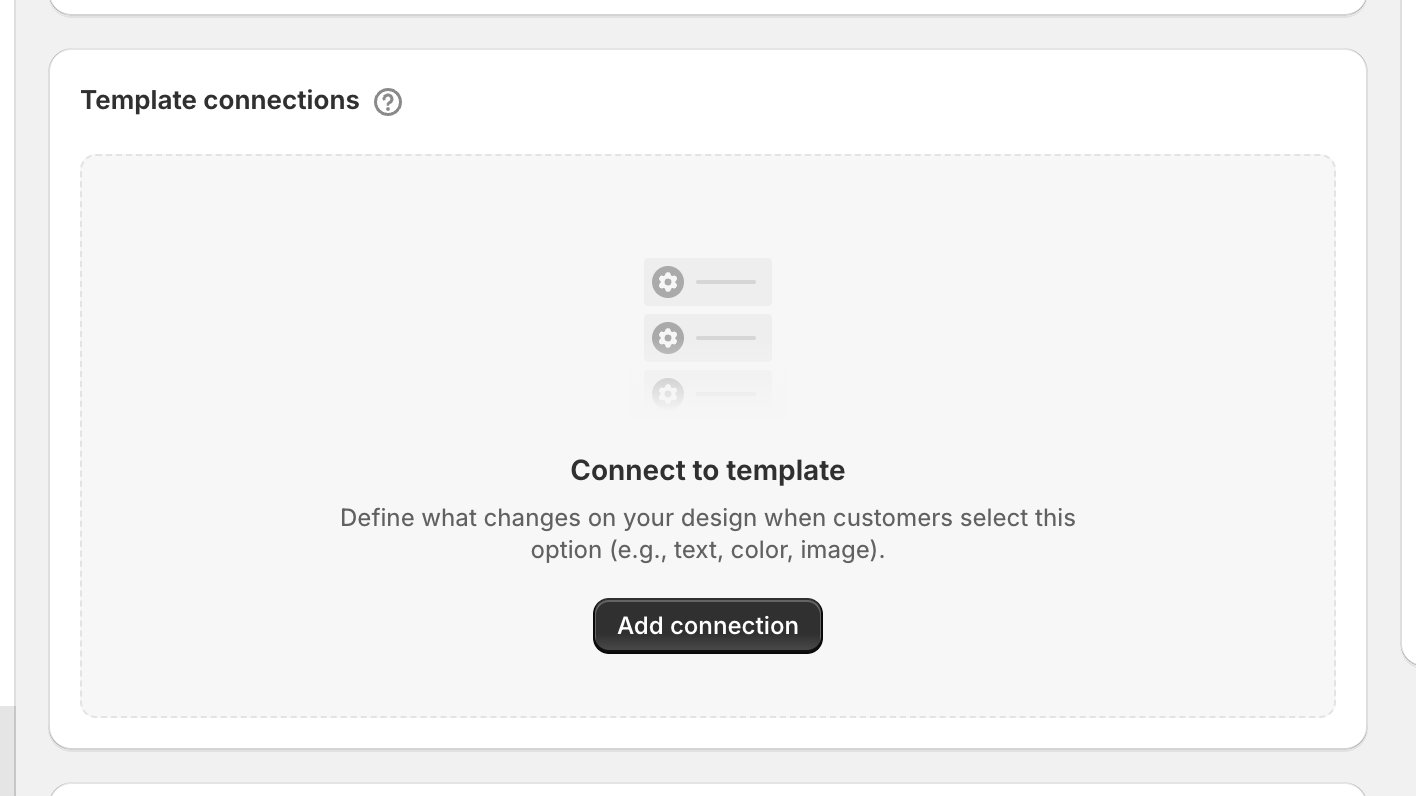
Nothing connected yet. Add connection starts the first one.
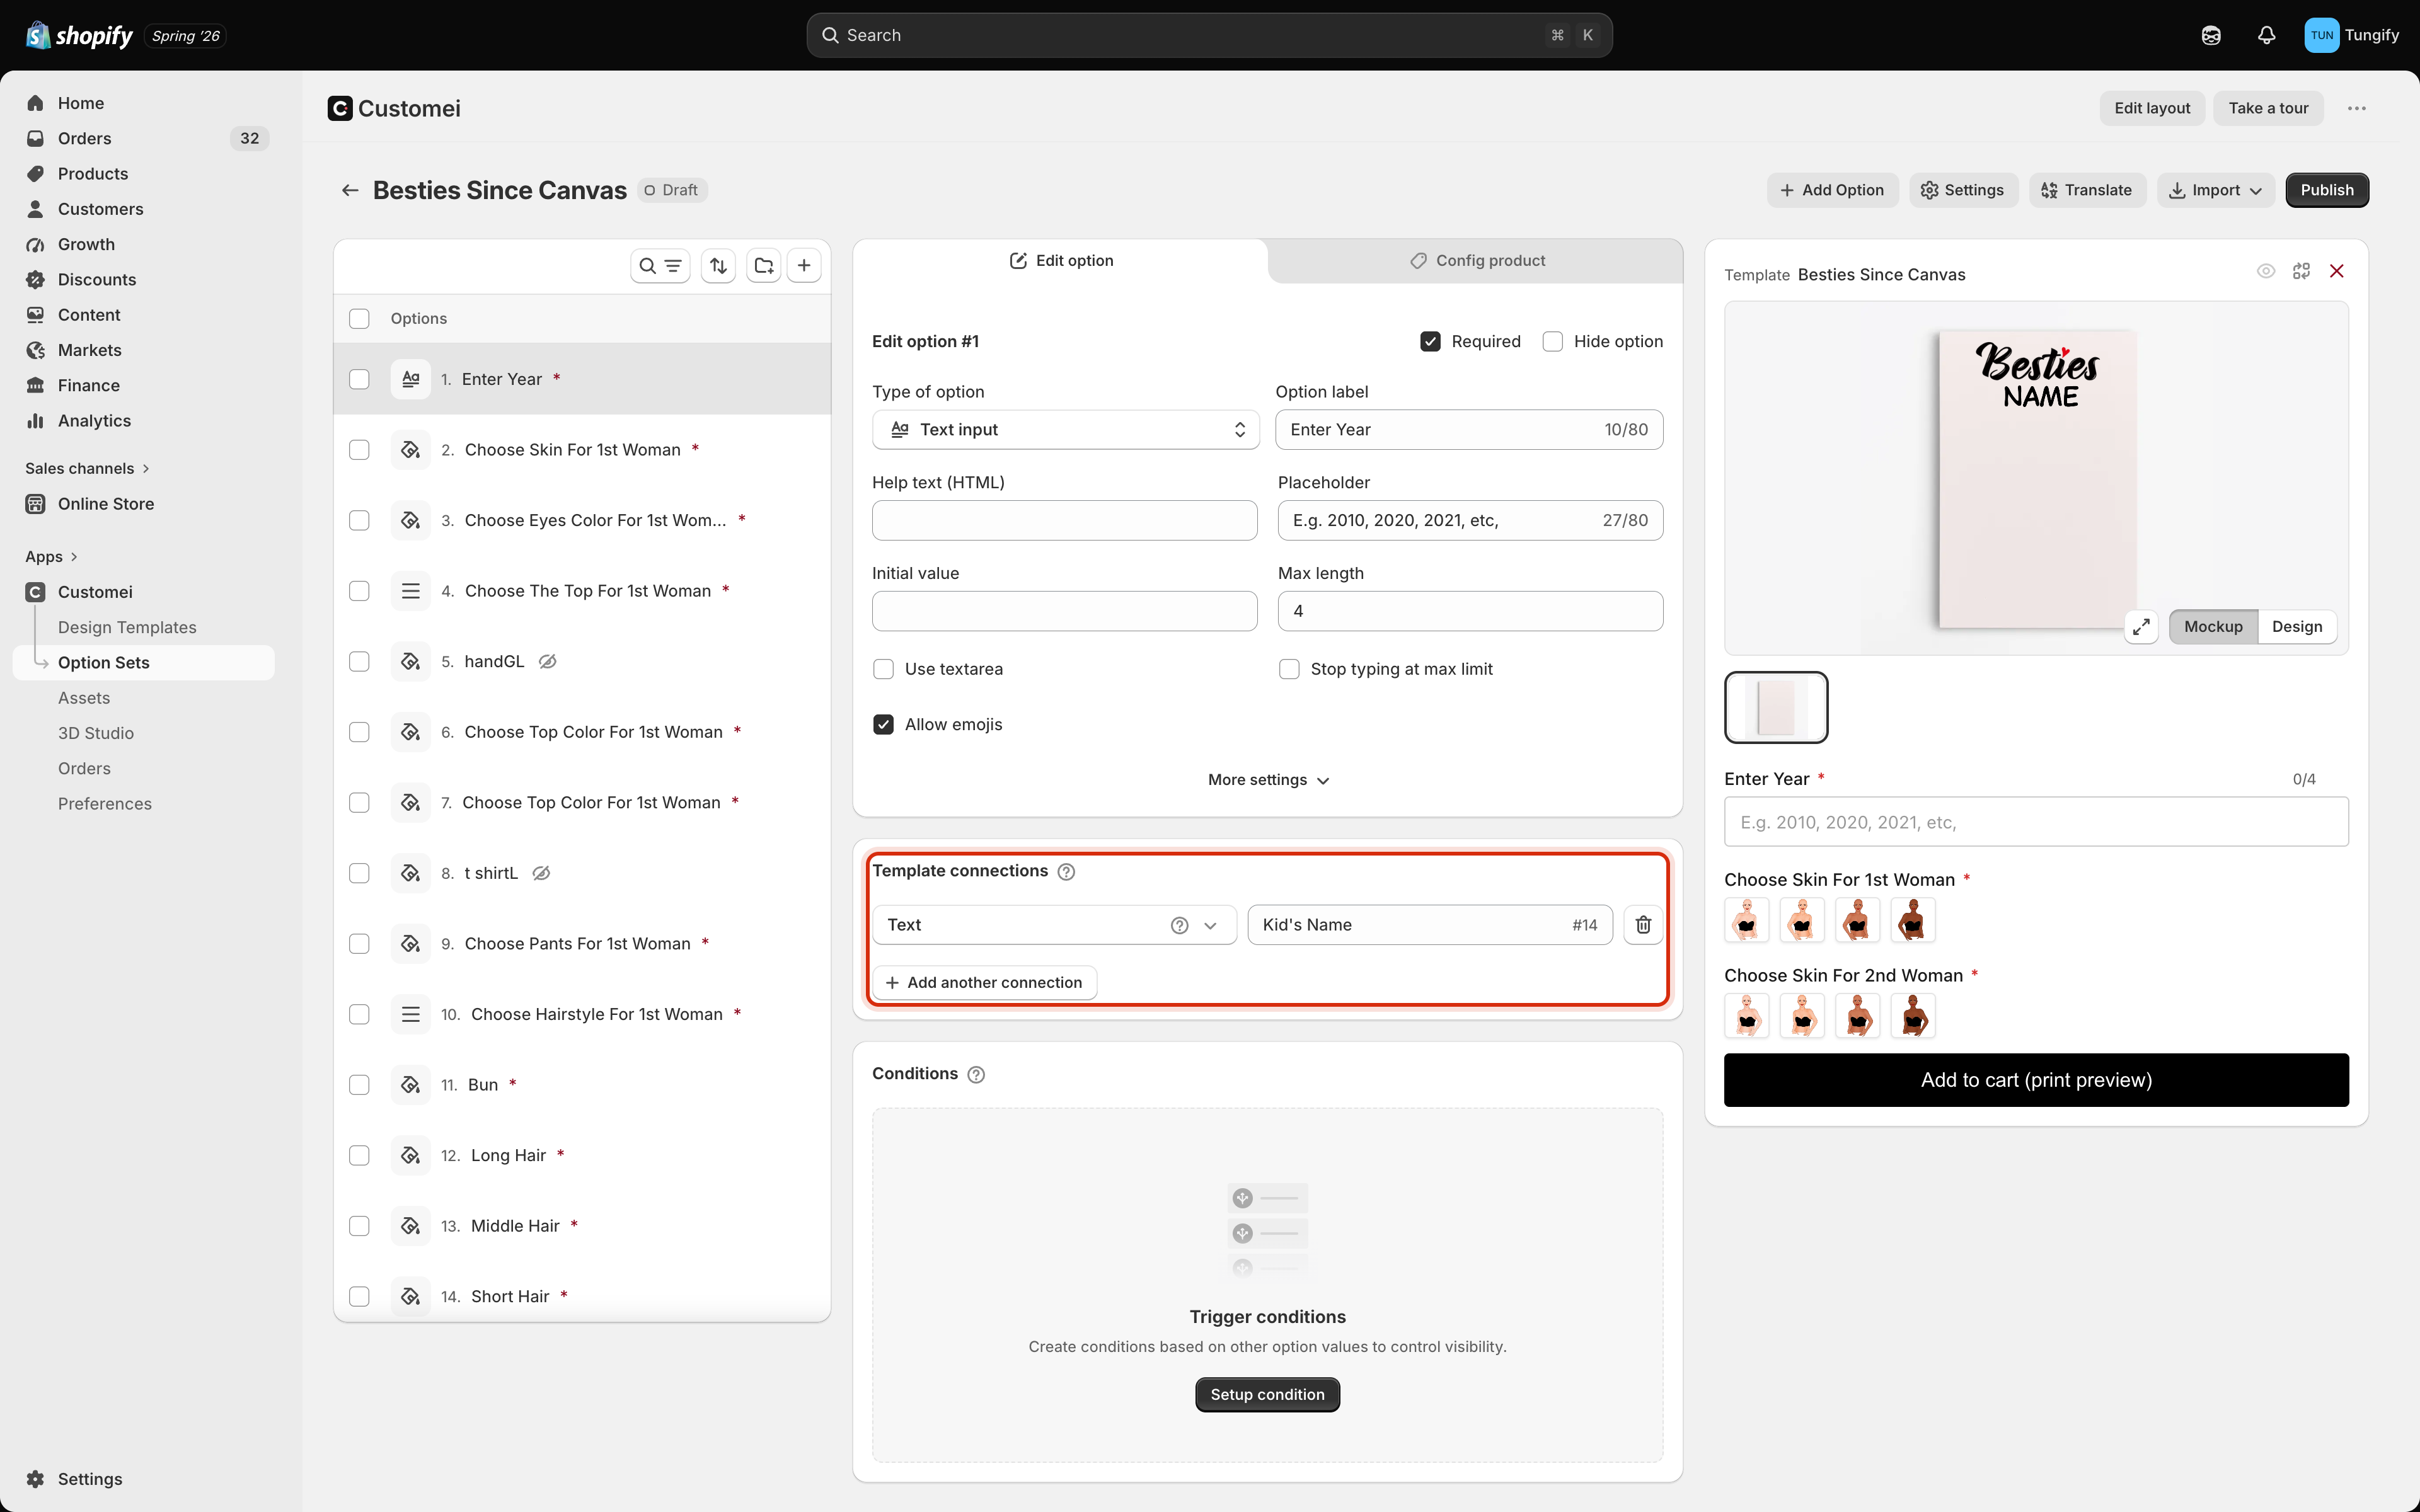
Enter Year writes the customer's text onto layer #14.
- The left box is what happens: Text, Dynamic image, Text colour, and so on.
- The right box is which layer it happens to. Start typing a name or number and pick from the list.
2026, the words on that layer become 2026.
A few things to know about the row:
- The small
#14at the end of the layer box confirms which layer you landed on. Hover it to see the layer’s name. - The bin button removes the row. Add more rows with Add another connection, for example a colour swatch that recolours both the wording and the border.
- With two or more rows, a drag handle appears so you can put them in a sensible order.
- The ? beside the action plays a short animation of what that action does to a design. It’s the quickest way to choose between two that sound similar.
Only the layers that make sense are offered
Customei filters the layer box down to layers the action can actually change, so you can’t point Text at a photo by accident.What each action changes
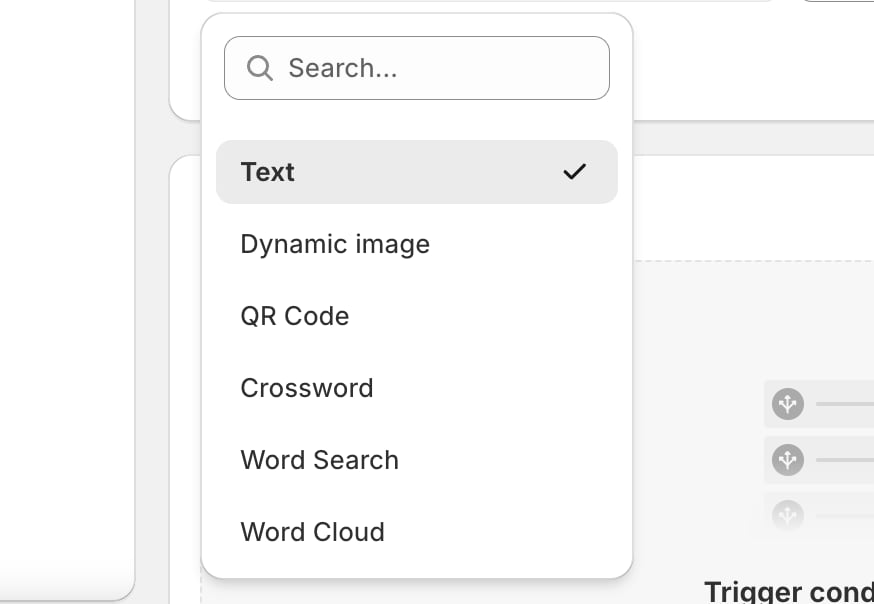
The action list for a text option. Only the actions that make sense for typing are offered.
Which option type offers which
Step 4. Give each choice its own picture
This is the step most people miss. On an option where the customer picks from a list, the connection says what changes and where. It doesn’t say which picture belongs to which choice. That’s set per choice.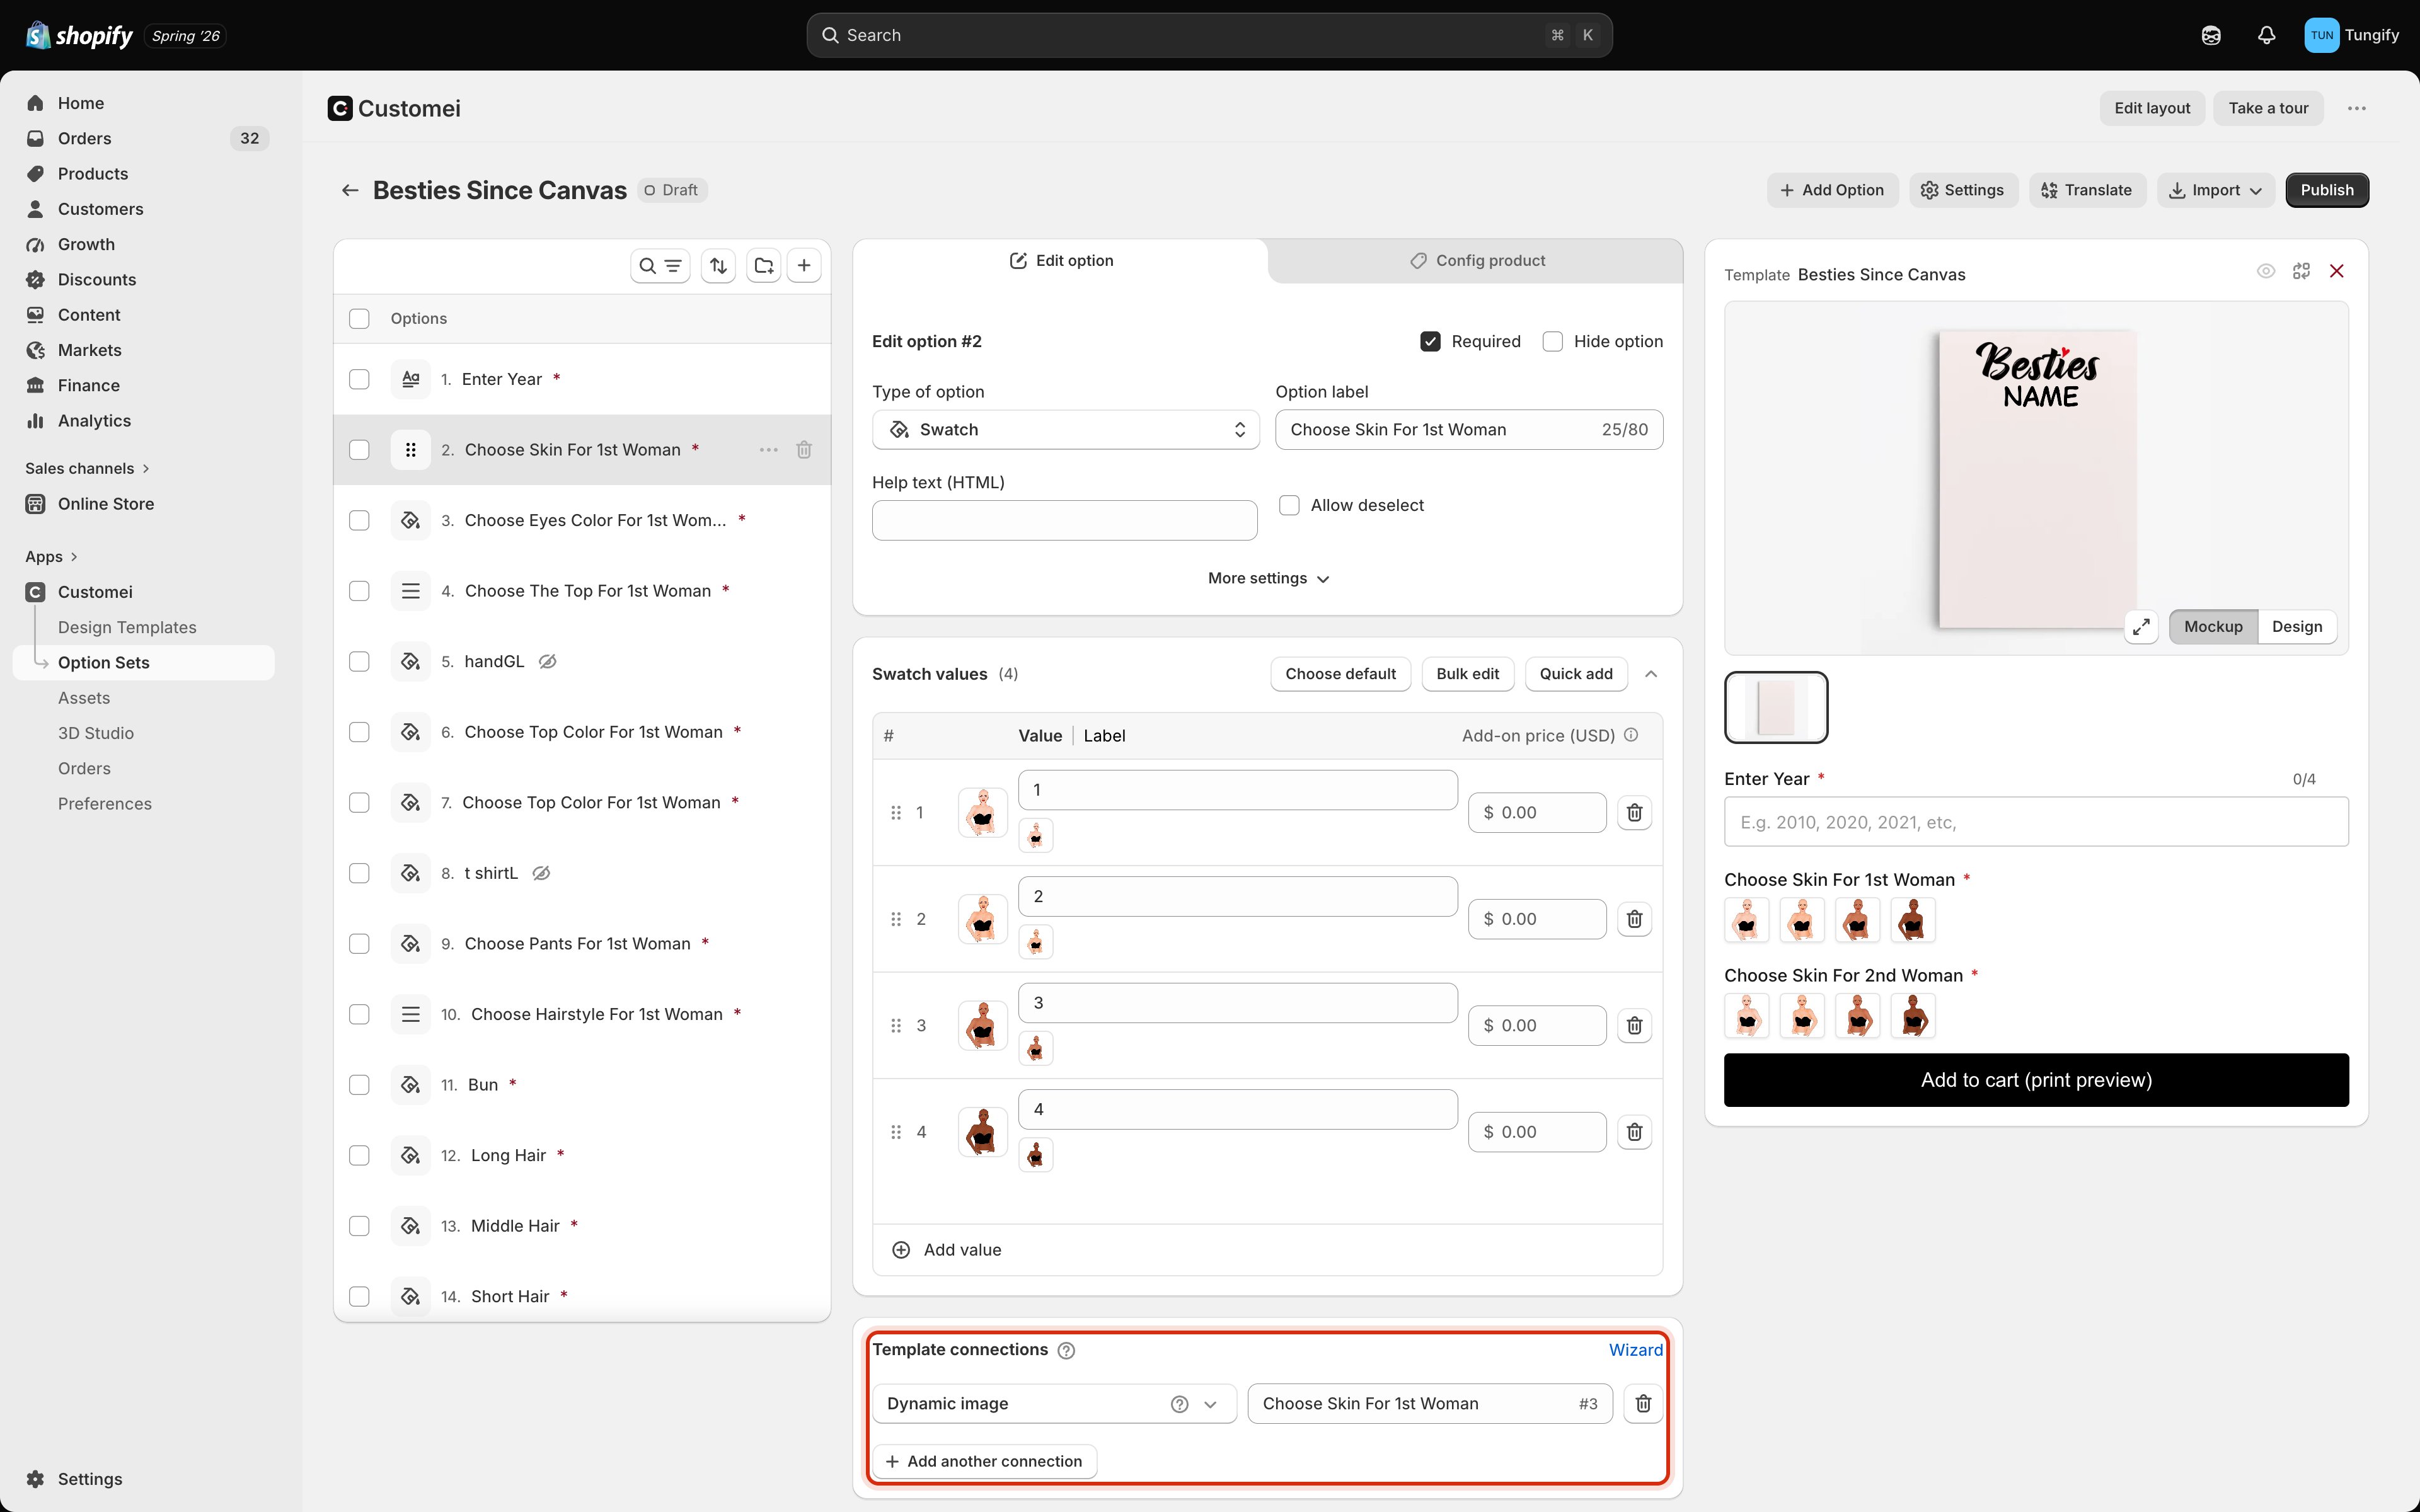
A swatch option connected to Dynamic image on layer #3.
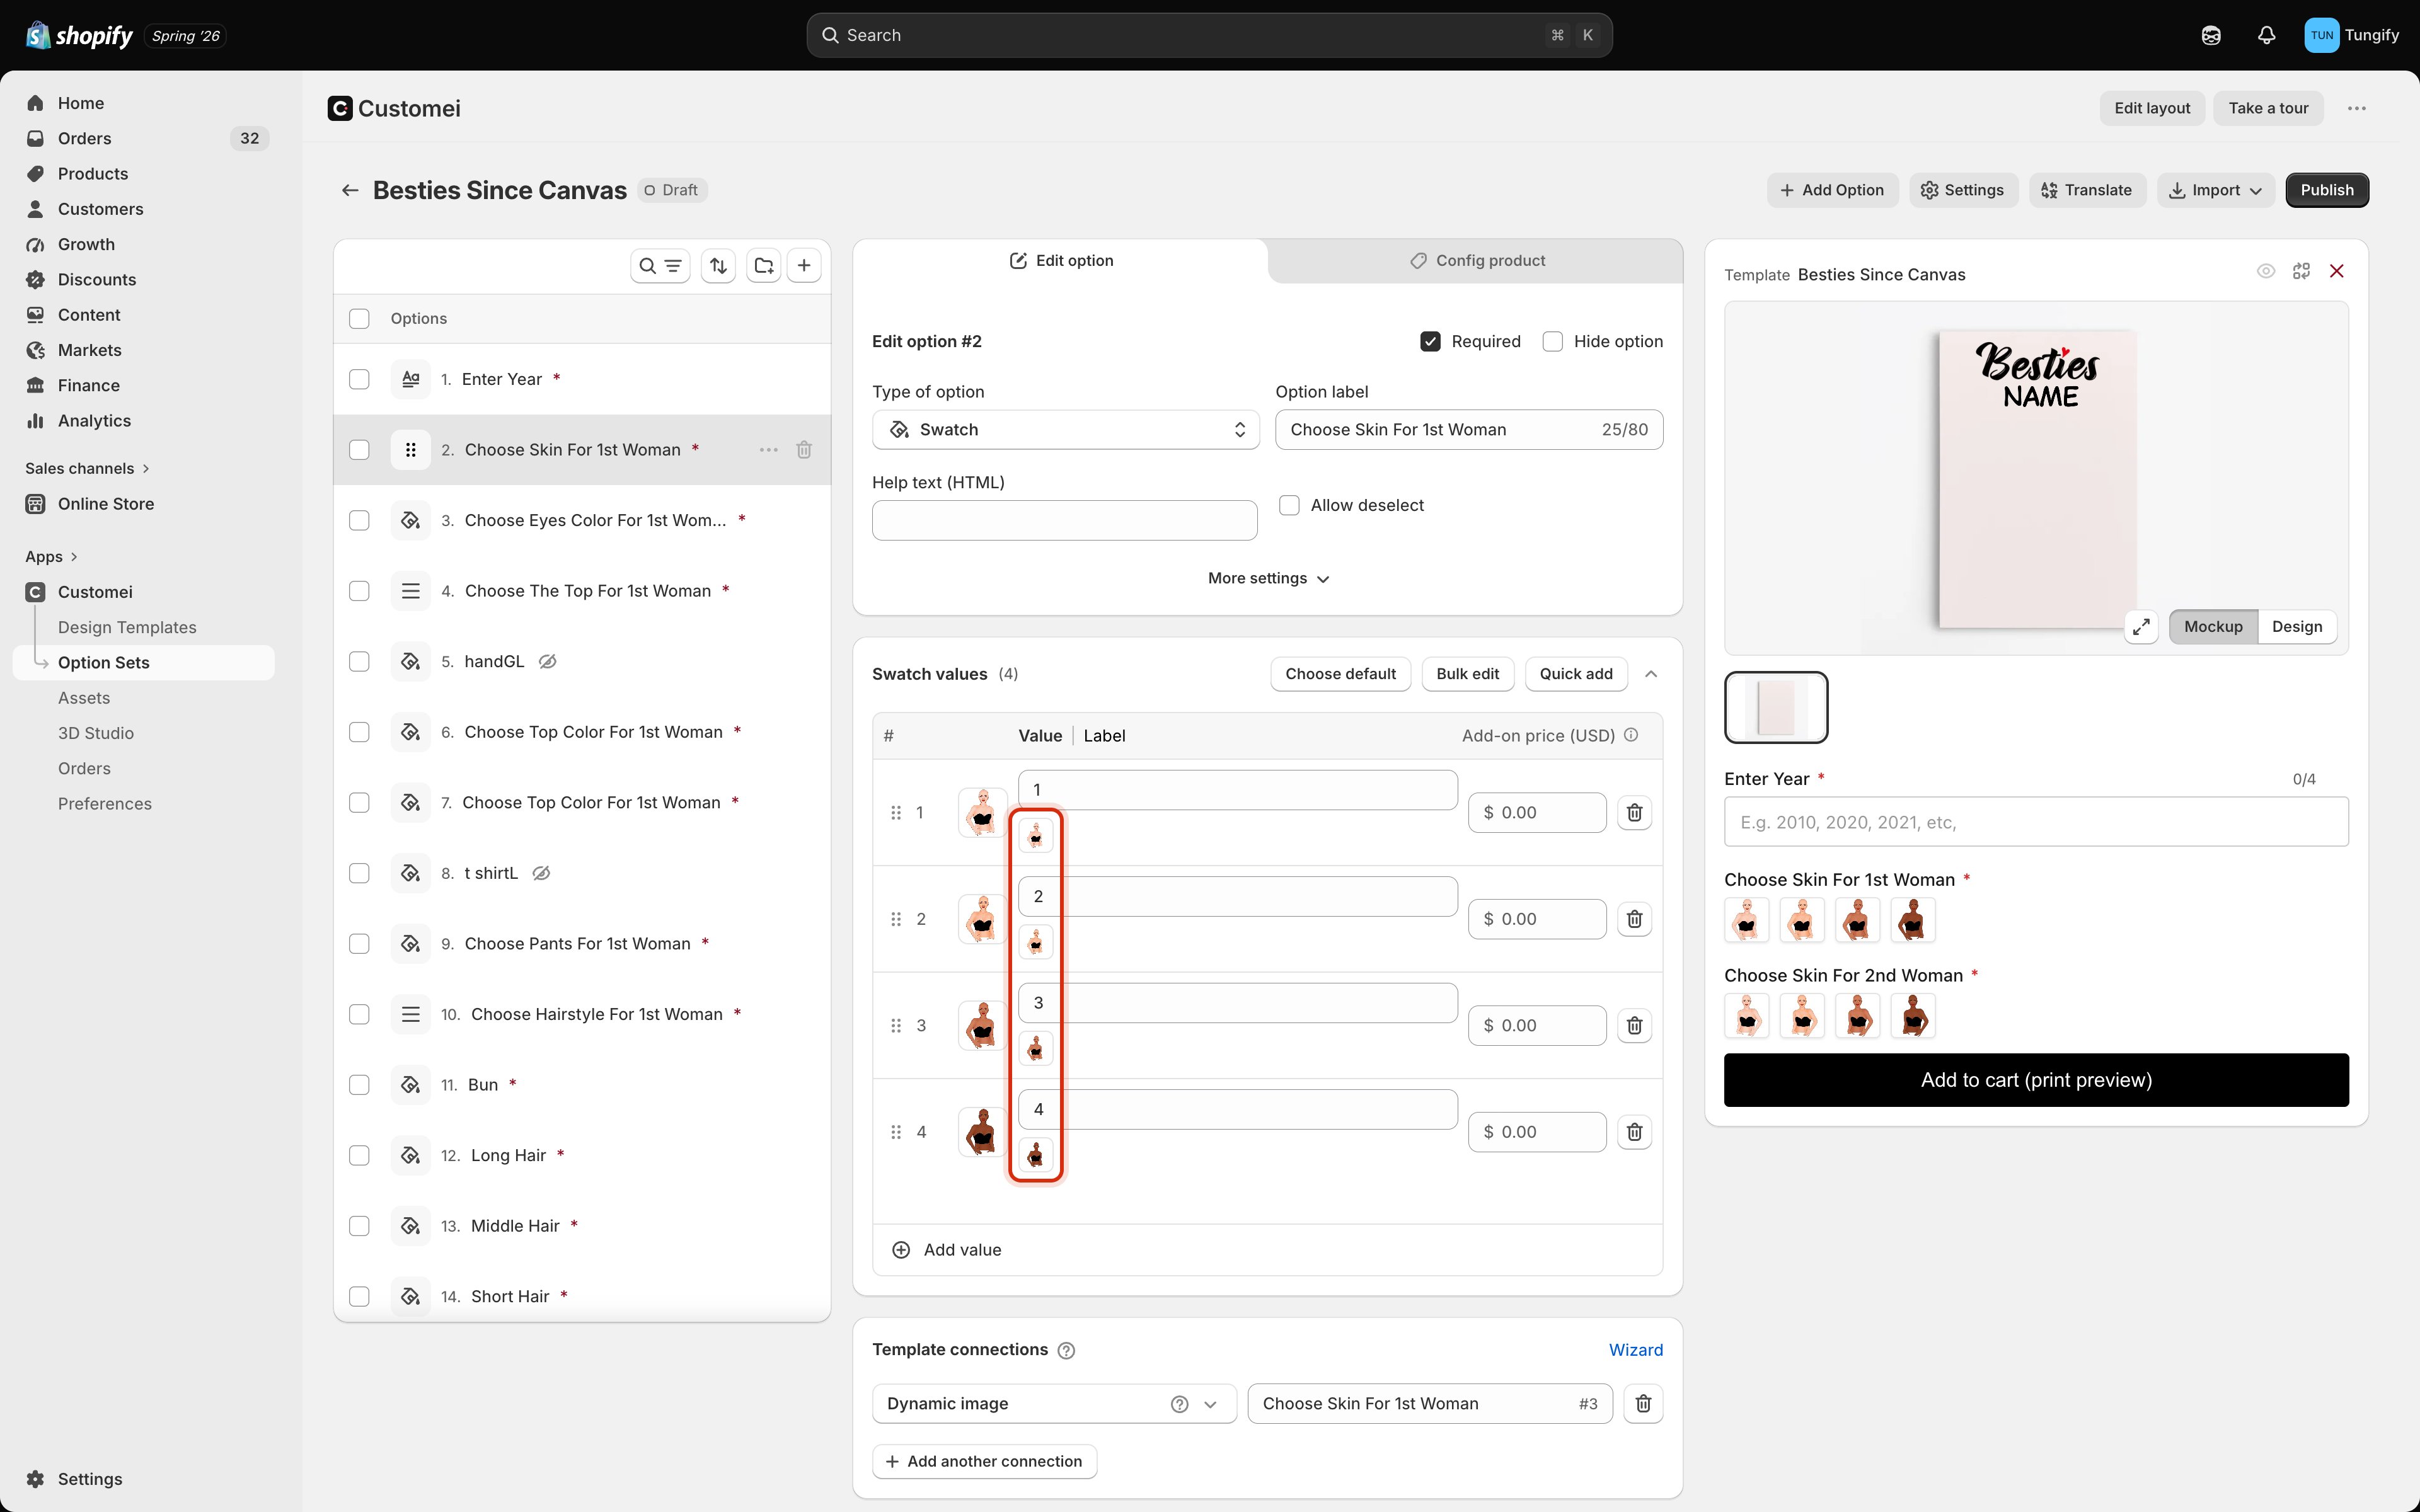
One small square per connection, on every choice. These four already have their picture.
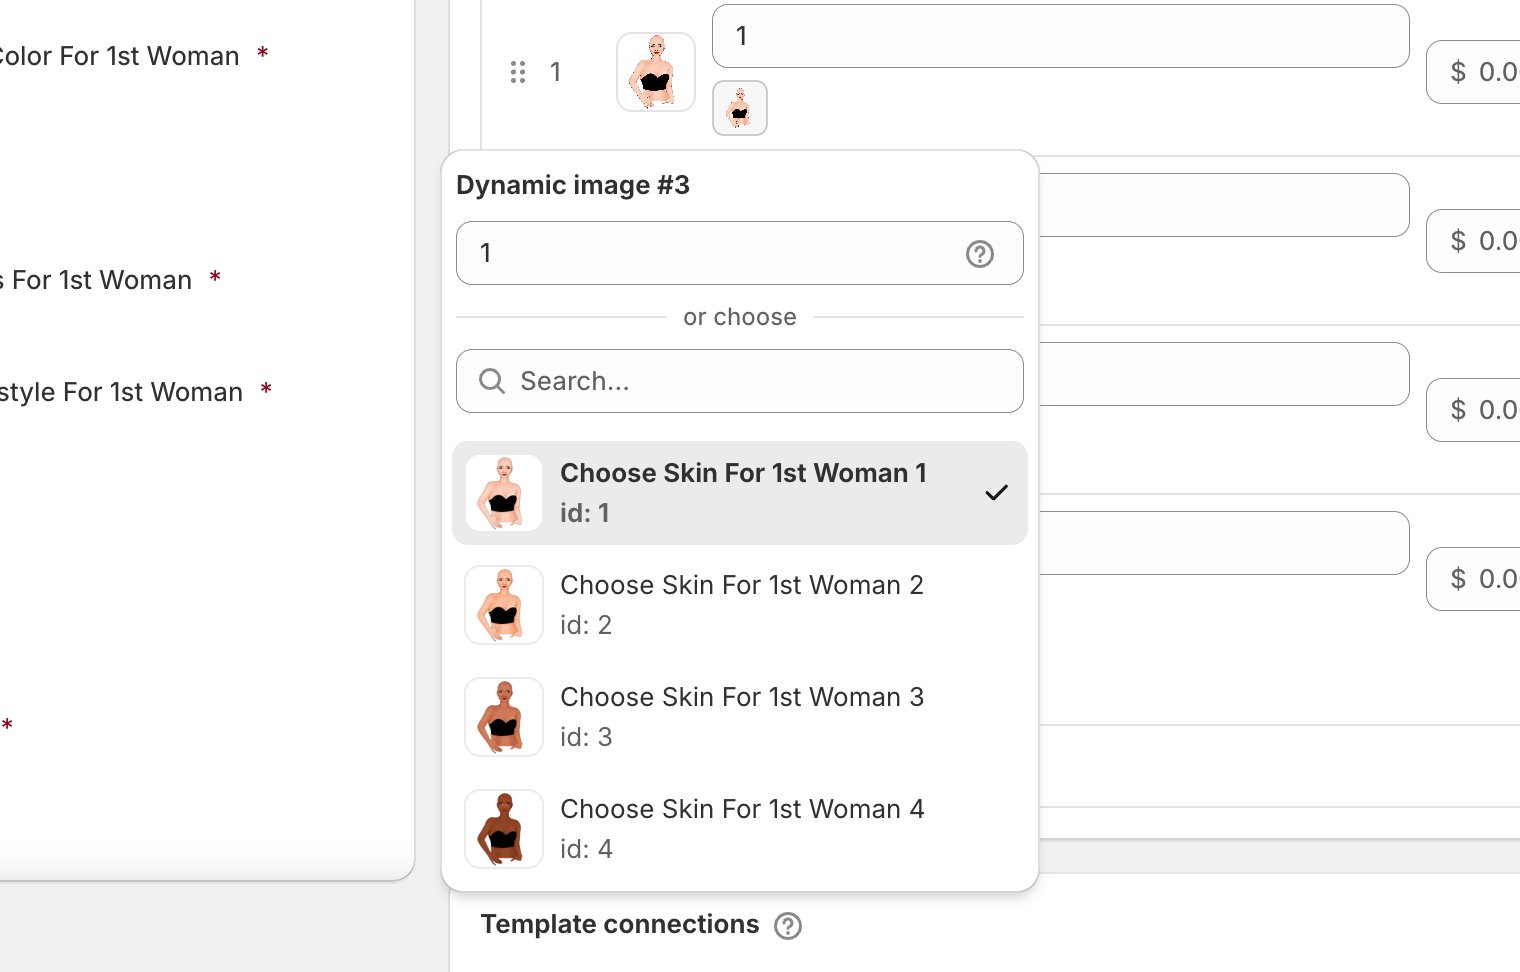
Picking the picture that belongs to this choice. The tick marks the one in use.
- No layer linked to this function. Select a target layer first. Finish the connection row before setting the choices.
- No options configured. Add a library or manual options in the template editor. The layer has no folder of images or fonts behind it yet. Link one in the template, then come back.
Fill the whole grid in one pass
Setting a dozen choices one square at a time gets old fast. Wizard, at the top right of the Template connections card, opens every choice and every connection as a single grid.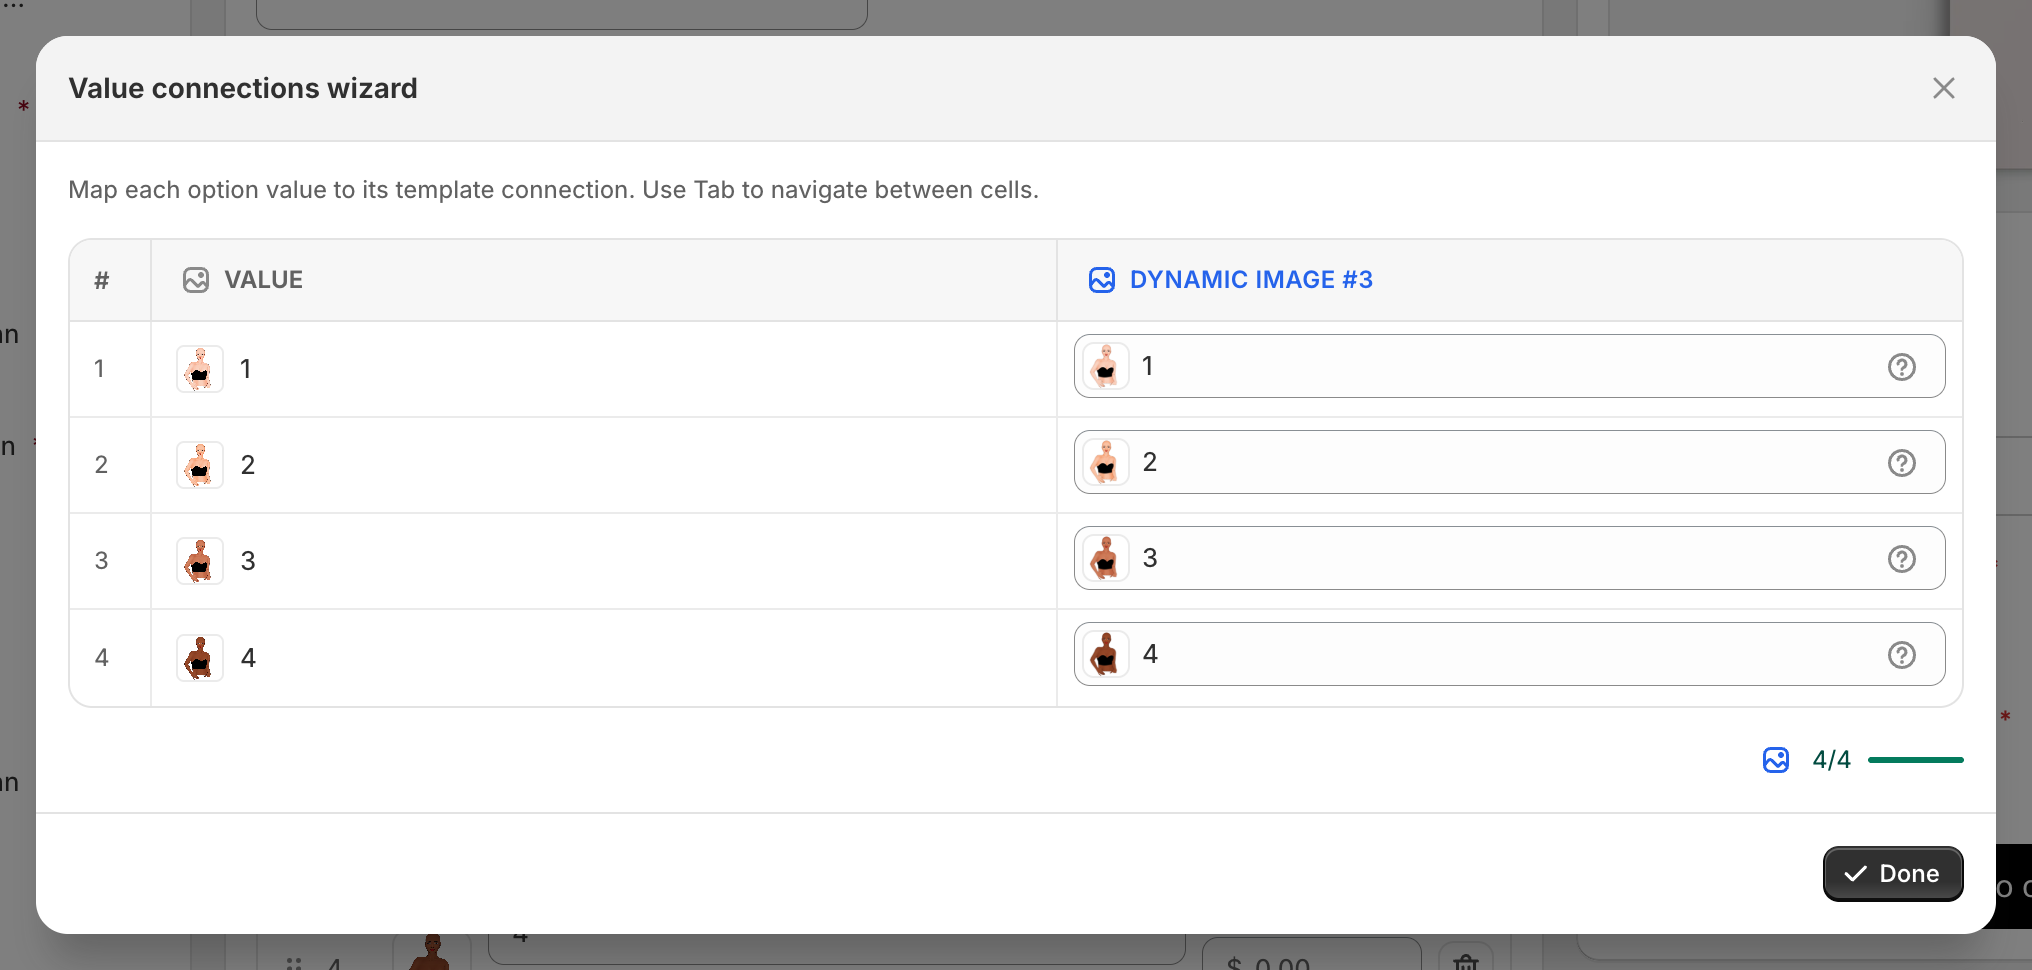
The Value connections wizard. One row per choice, one column per connection, and a counter that says how far you've got.
- Each column is one of your connections, labelled with the action and the layer, such as Dynamic image #3.
- Press Tab to move from cell to cell.
- The counters at the bottom show how many choices you’ve filled per column, and turn green when a column is complete.
- Done closes the grid. Nothing is saved until you use the save bar at the top of the page.
Uploads, whole-design swaps, and showing or hiding groups
Four connections behave a little differently.Customer upload
Switch design template
Group visibility
Add product
When two layers share the same number
Layer numbers can repeat inside one template, which happens a lot in designs copied from elsewhere. Customei doesn’t stop and ask. It picks the first layer of the right kind and pins the connection to it, then shows a small green link beside the number. Click that link to see every layer sharing the number, with its kind, and choose a different one. Do that whenever the preview updates the wrong part of the design.Let the design template update your options for you
Connections point from an option to a layer. There’s also a link running the other way: a design template can keep this option set’s options up to date on its own. Click Settings in the header to see it.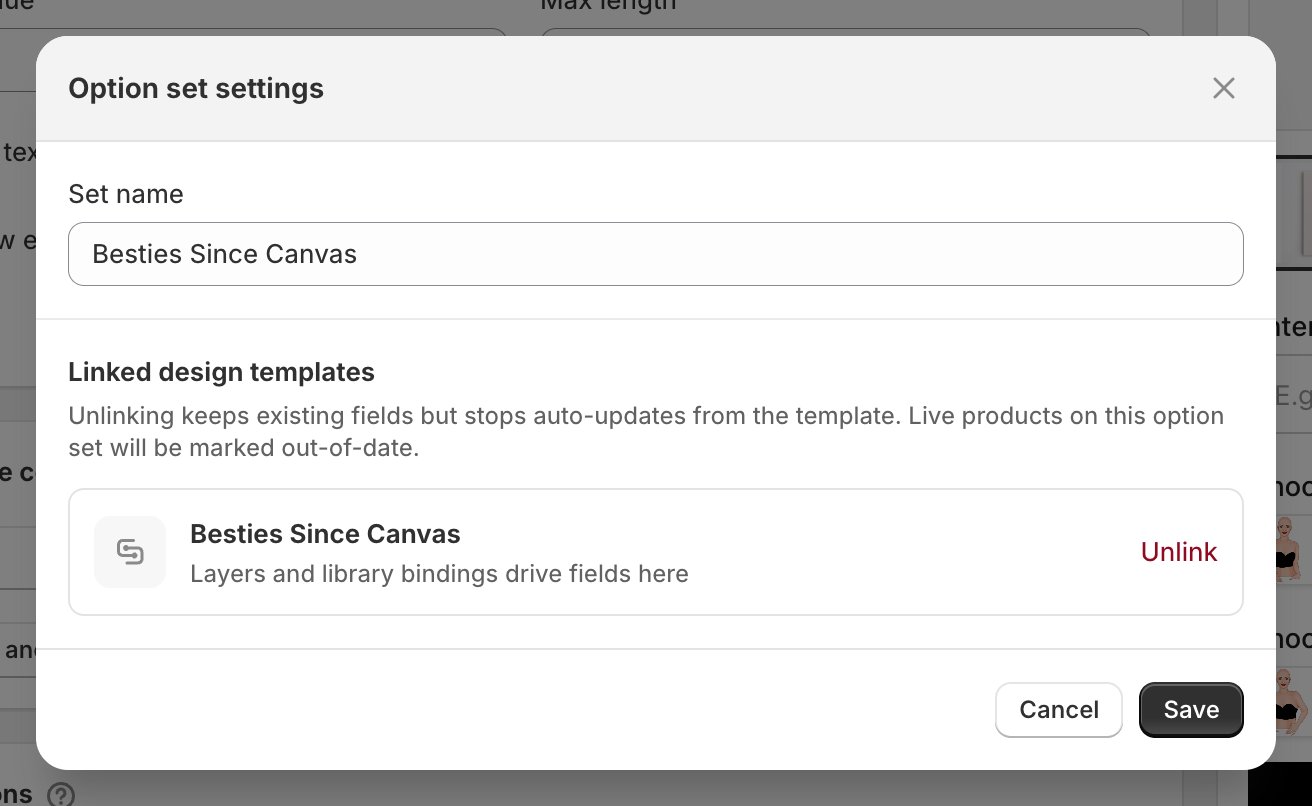
Settings shows which design template feeds this option set, and lets you cut the link.
When nothing changes in the preview
Work down this list. It’s almost always one of these.The option has no connection
The choices have no pictures
The connection points at the wrong layer
#4 when you meant #14.Two layers share the same number
The layer is hidden
You haven't saved