

Where the settings are
Click a Design Preview frame, with nothing on it selected, and the settings appear in the right-hand panel.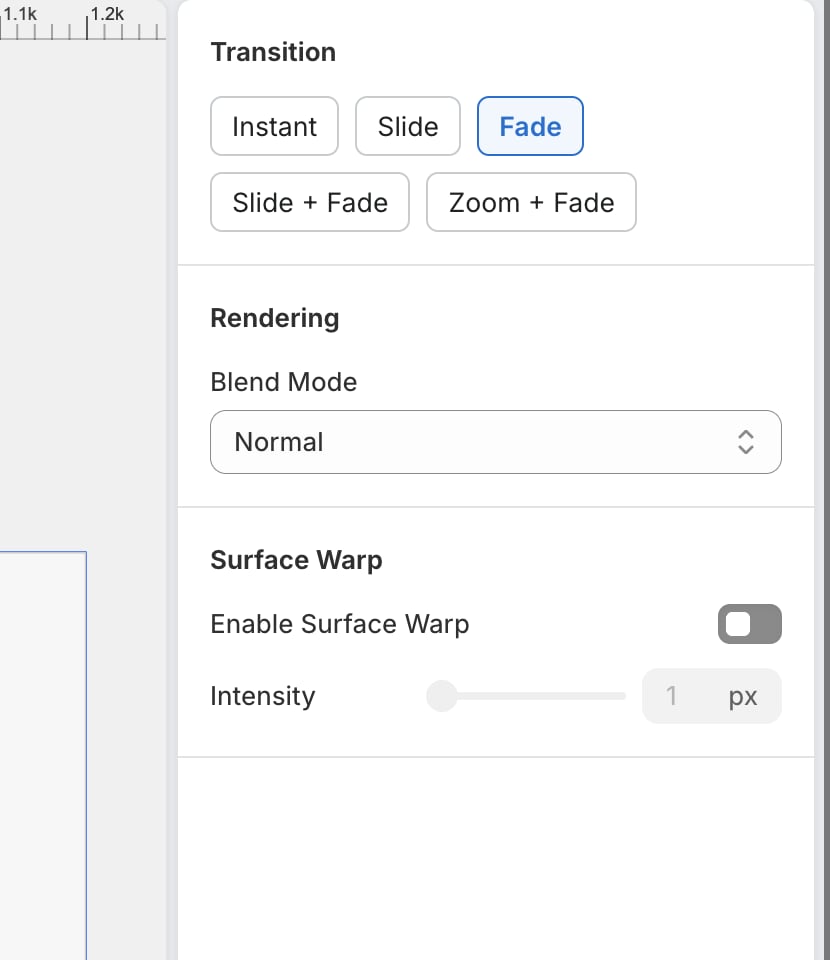
The settings for the preview frame you clicked into.
Rendering and Surface Warp are saved per preview frame, so each product photo can be treated differently. Transition is one choice for the whole template.
Rendering: blend mode
Blend Mode decides how your artwork mixes with the photo underneath.
Multiply is the one worth learning. On a white mug or a heather t-shirt it lets the fabric texture and the shadow in a fold come through the ink, which is what makes a preview believable.
Surface Warp
Real products aren’t flat. Surface Warp bends your artwork so it follows the curve of the product instead of lying across it like a sticker. Turn on Enable Surface Warp, then raise Intensity until the artwork sits convincingly. Intensity runs from 1 to 50 pixels, which is how far the artwork is allowed to shift to follow the surface.- A mug, a cushion, a rolled sleeve: try somewhere in the middle and adjust by eye.
- A flat canvas, a poster, a card: leave it off. There’s nothing to bend around.
Transition
When your product page has several previews, Transition is the animation a shopper sees as they move between them.
Fade or Slide + Fade suit most stores. Instant is the honest choice if you’d rather your product page felt fast than smooth.
Where to next
Add a mockup preview
Add more product photos to your template.
Warp and realism
Mesh, displacement, and blending on the mockup itself.
The design and preview frames
Which canvas gets printed.
Assign products and go live
Put the template on a product page.