

Add an option
Click Add Option in the header. A new option appears at the bottom of the list, ready to edit.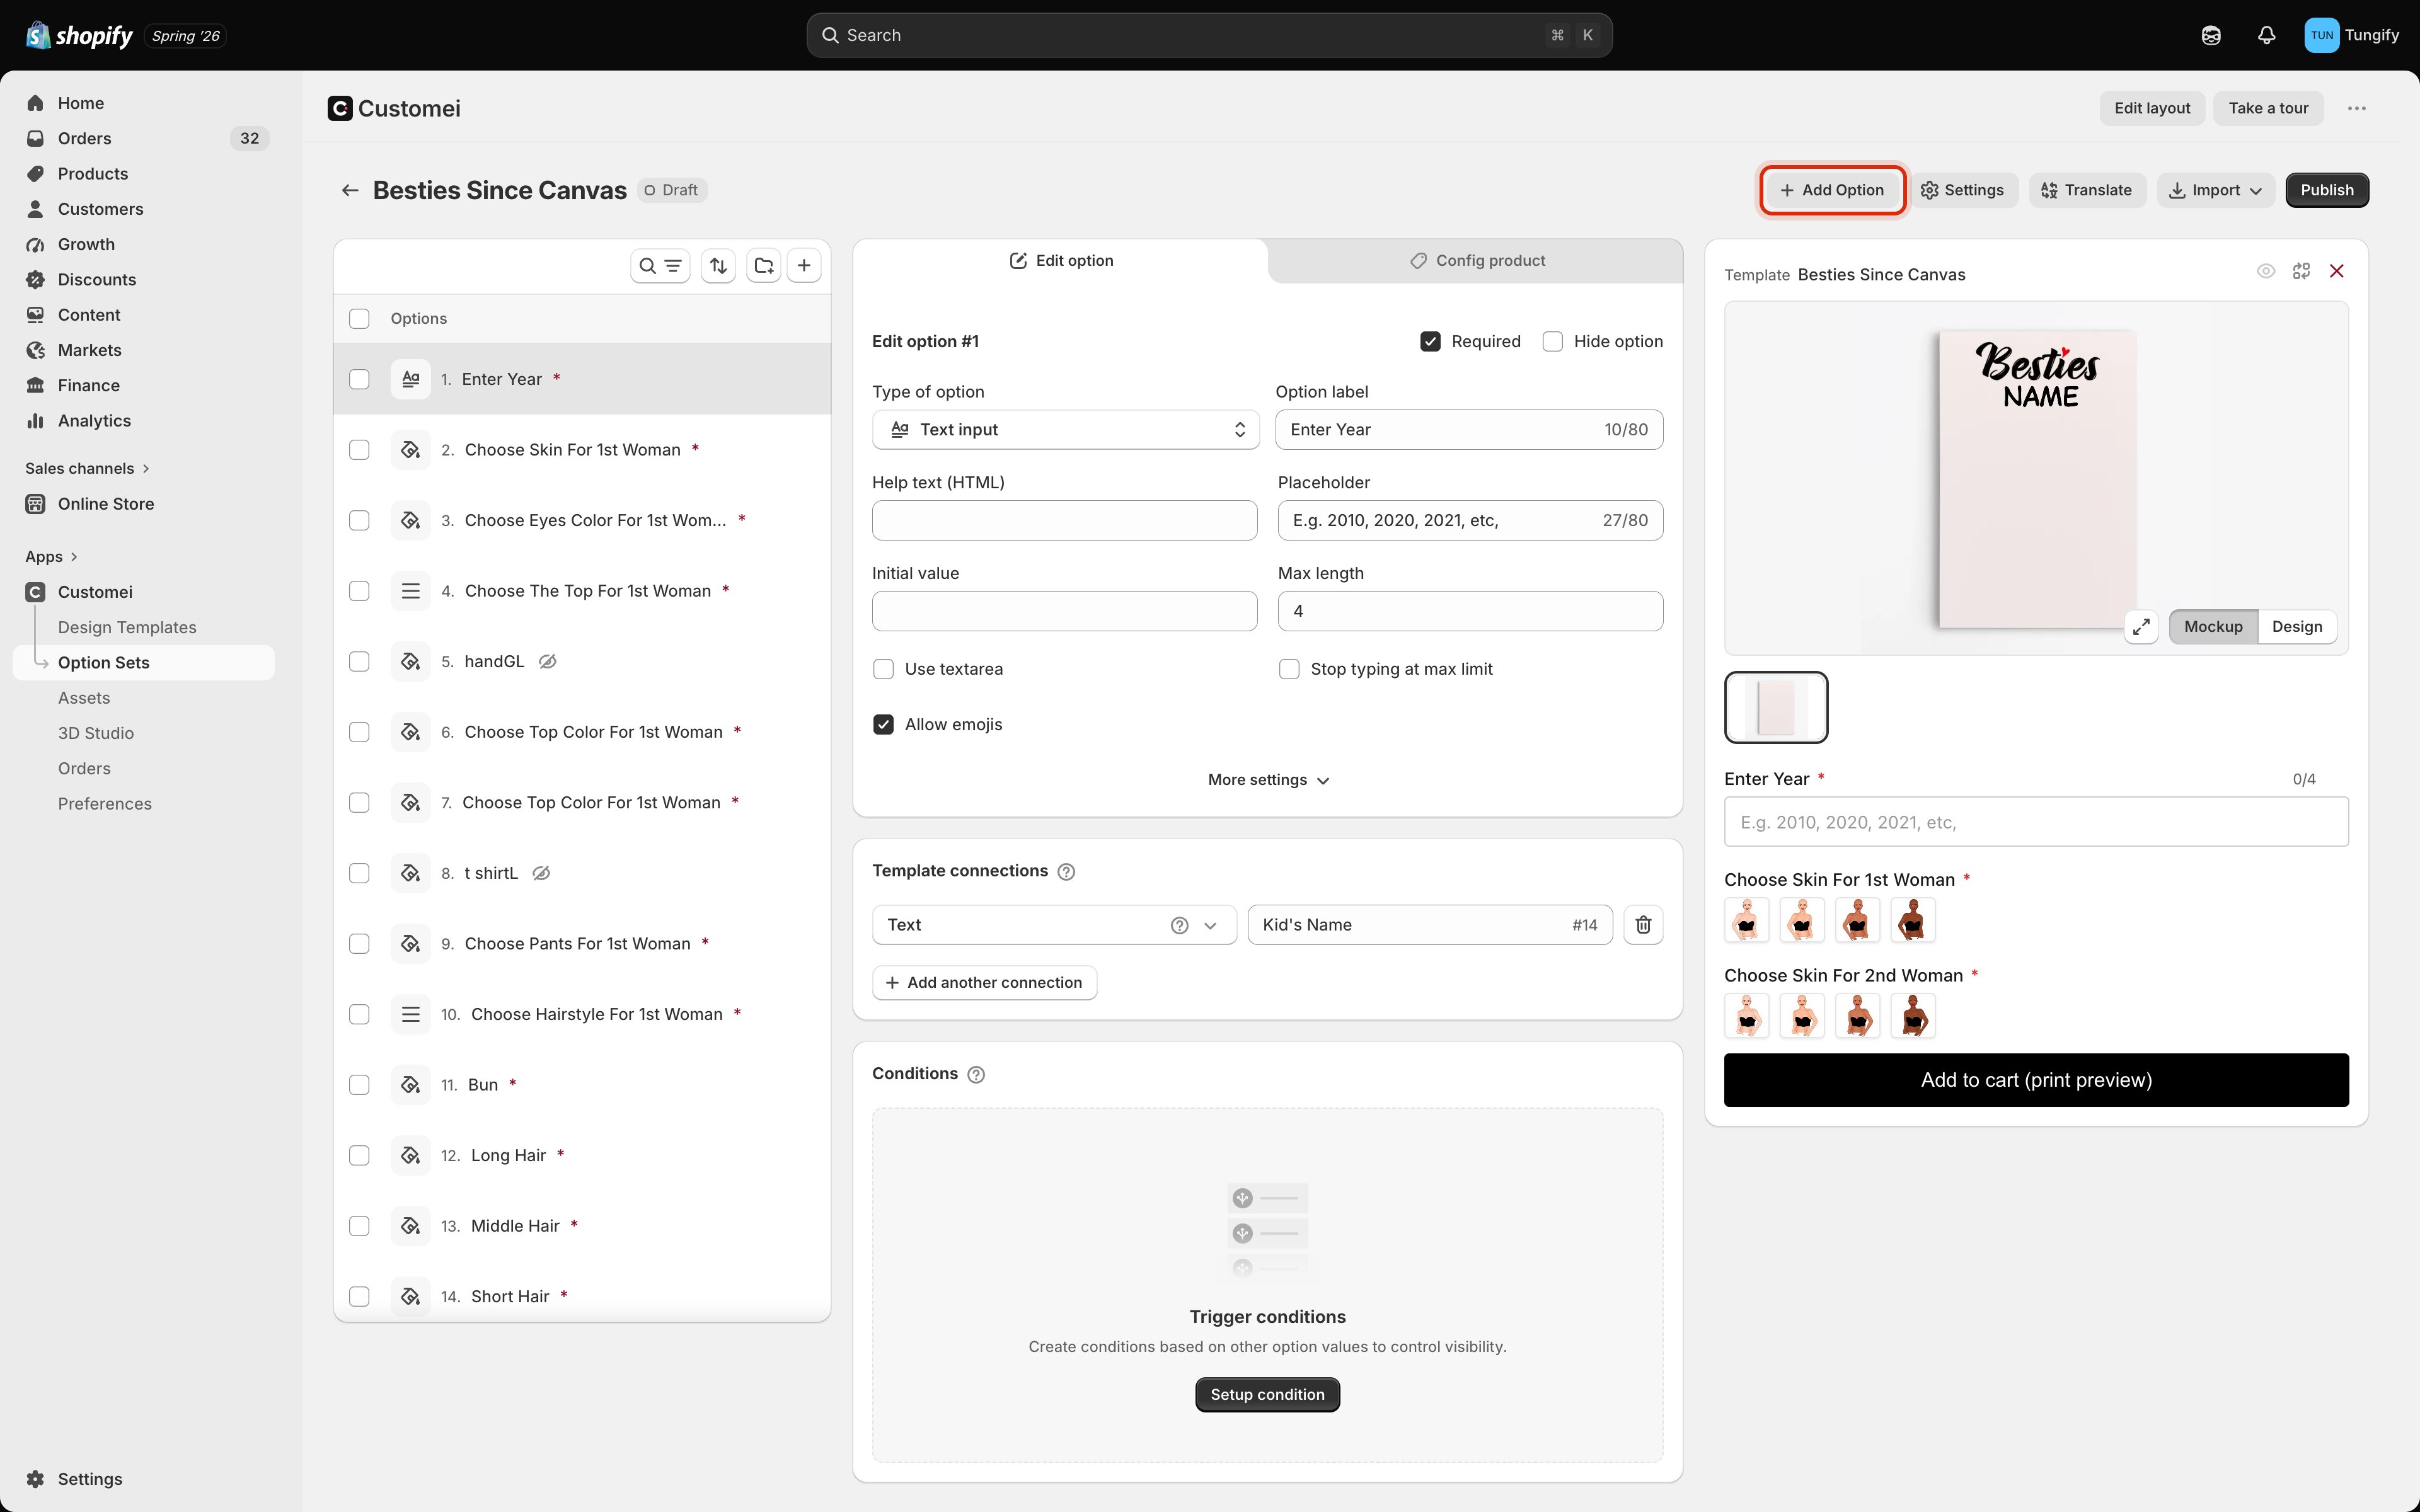
Add Option appends a new option to the list.
Choose the type
The type decides how the shopper answers: by typing, picking, or uploading. Click Type of option to change it.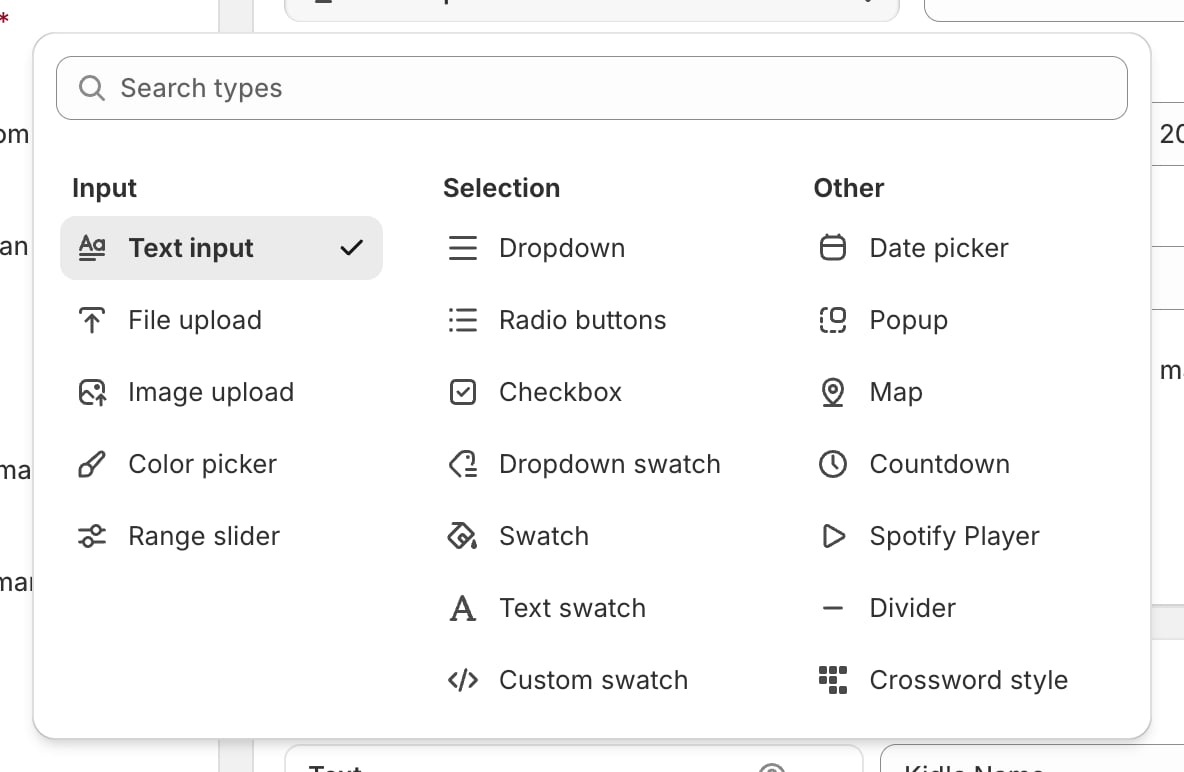
Every option type, grouped by how the customer answers.
Input: the customer types or uploads
Selection: the customer picks from your list
Other
Fill in the settings
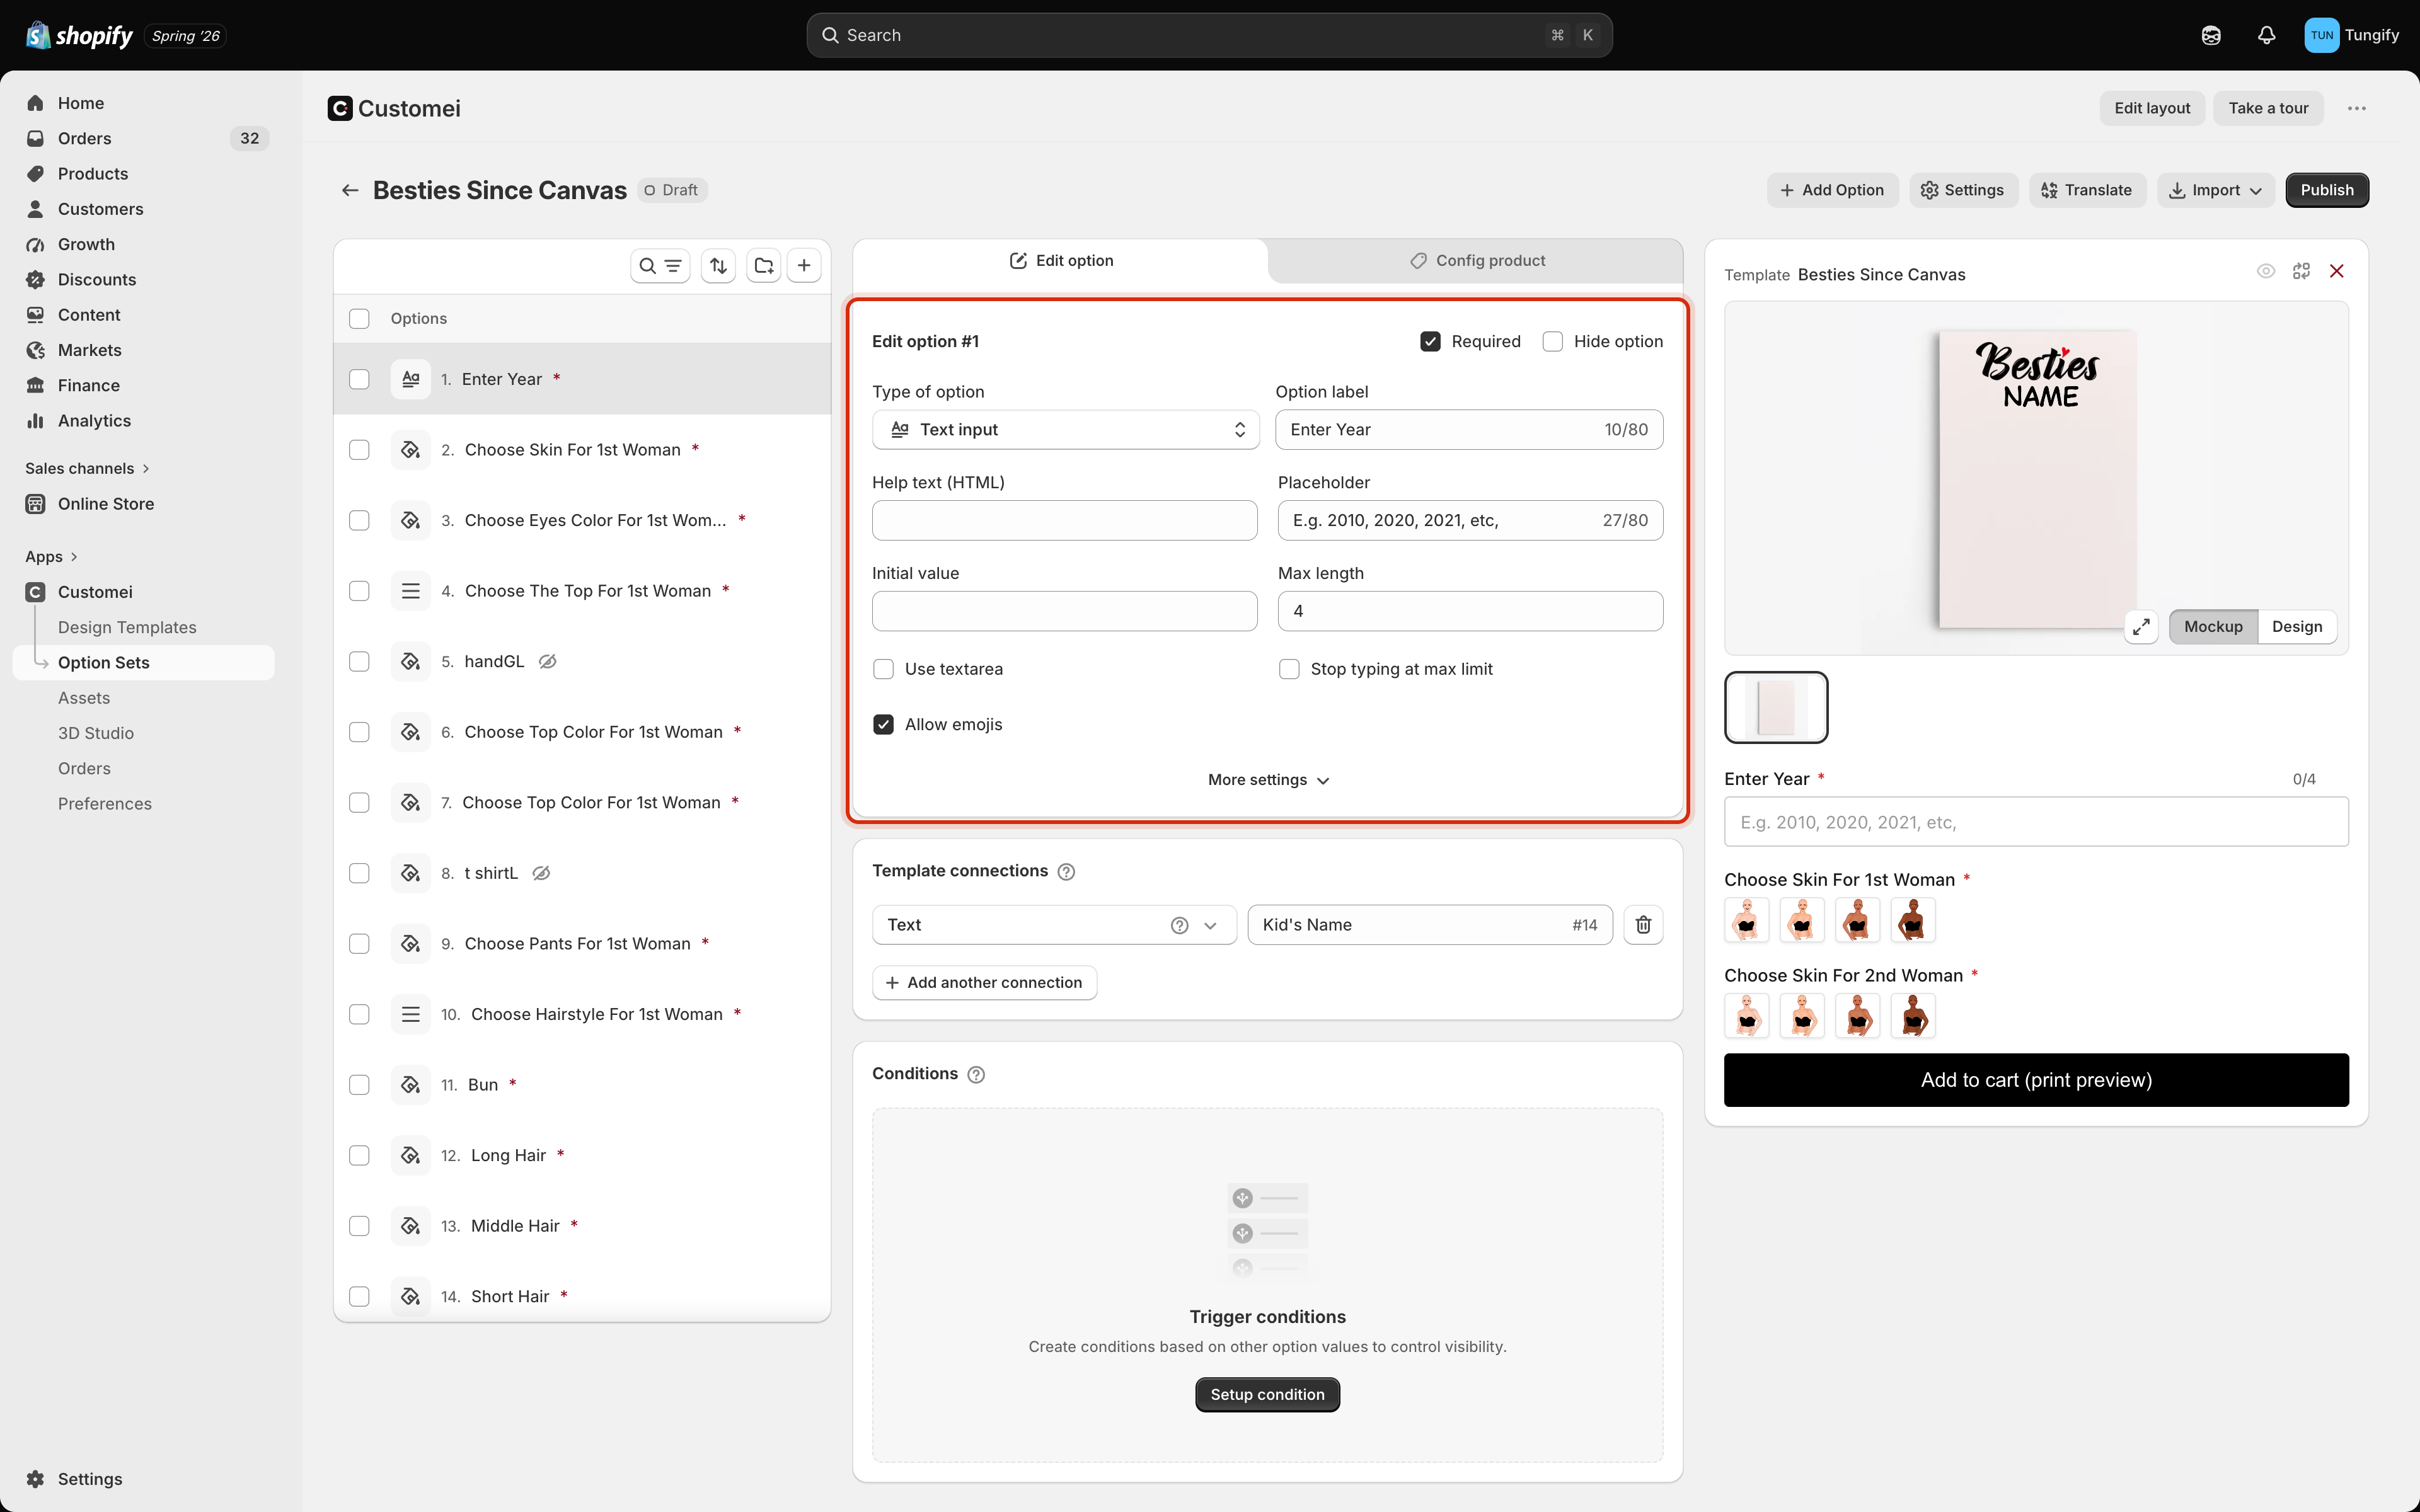
The settings for a text option. Every type has its own set.
More settings opens the extras that only apply to the type you picked.
Fill in the choices
Options where the customer picks from a list have a values table underneath the settings.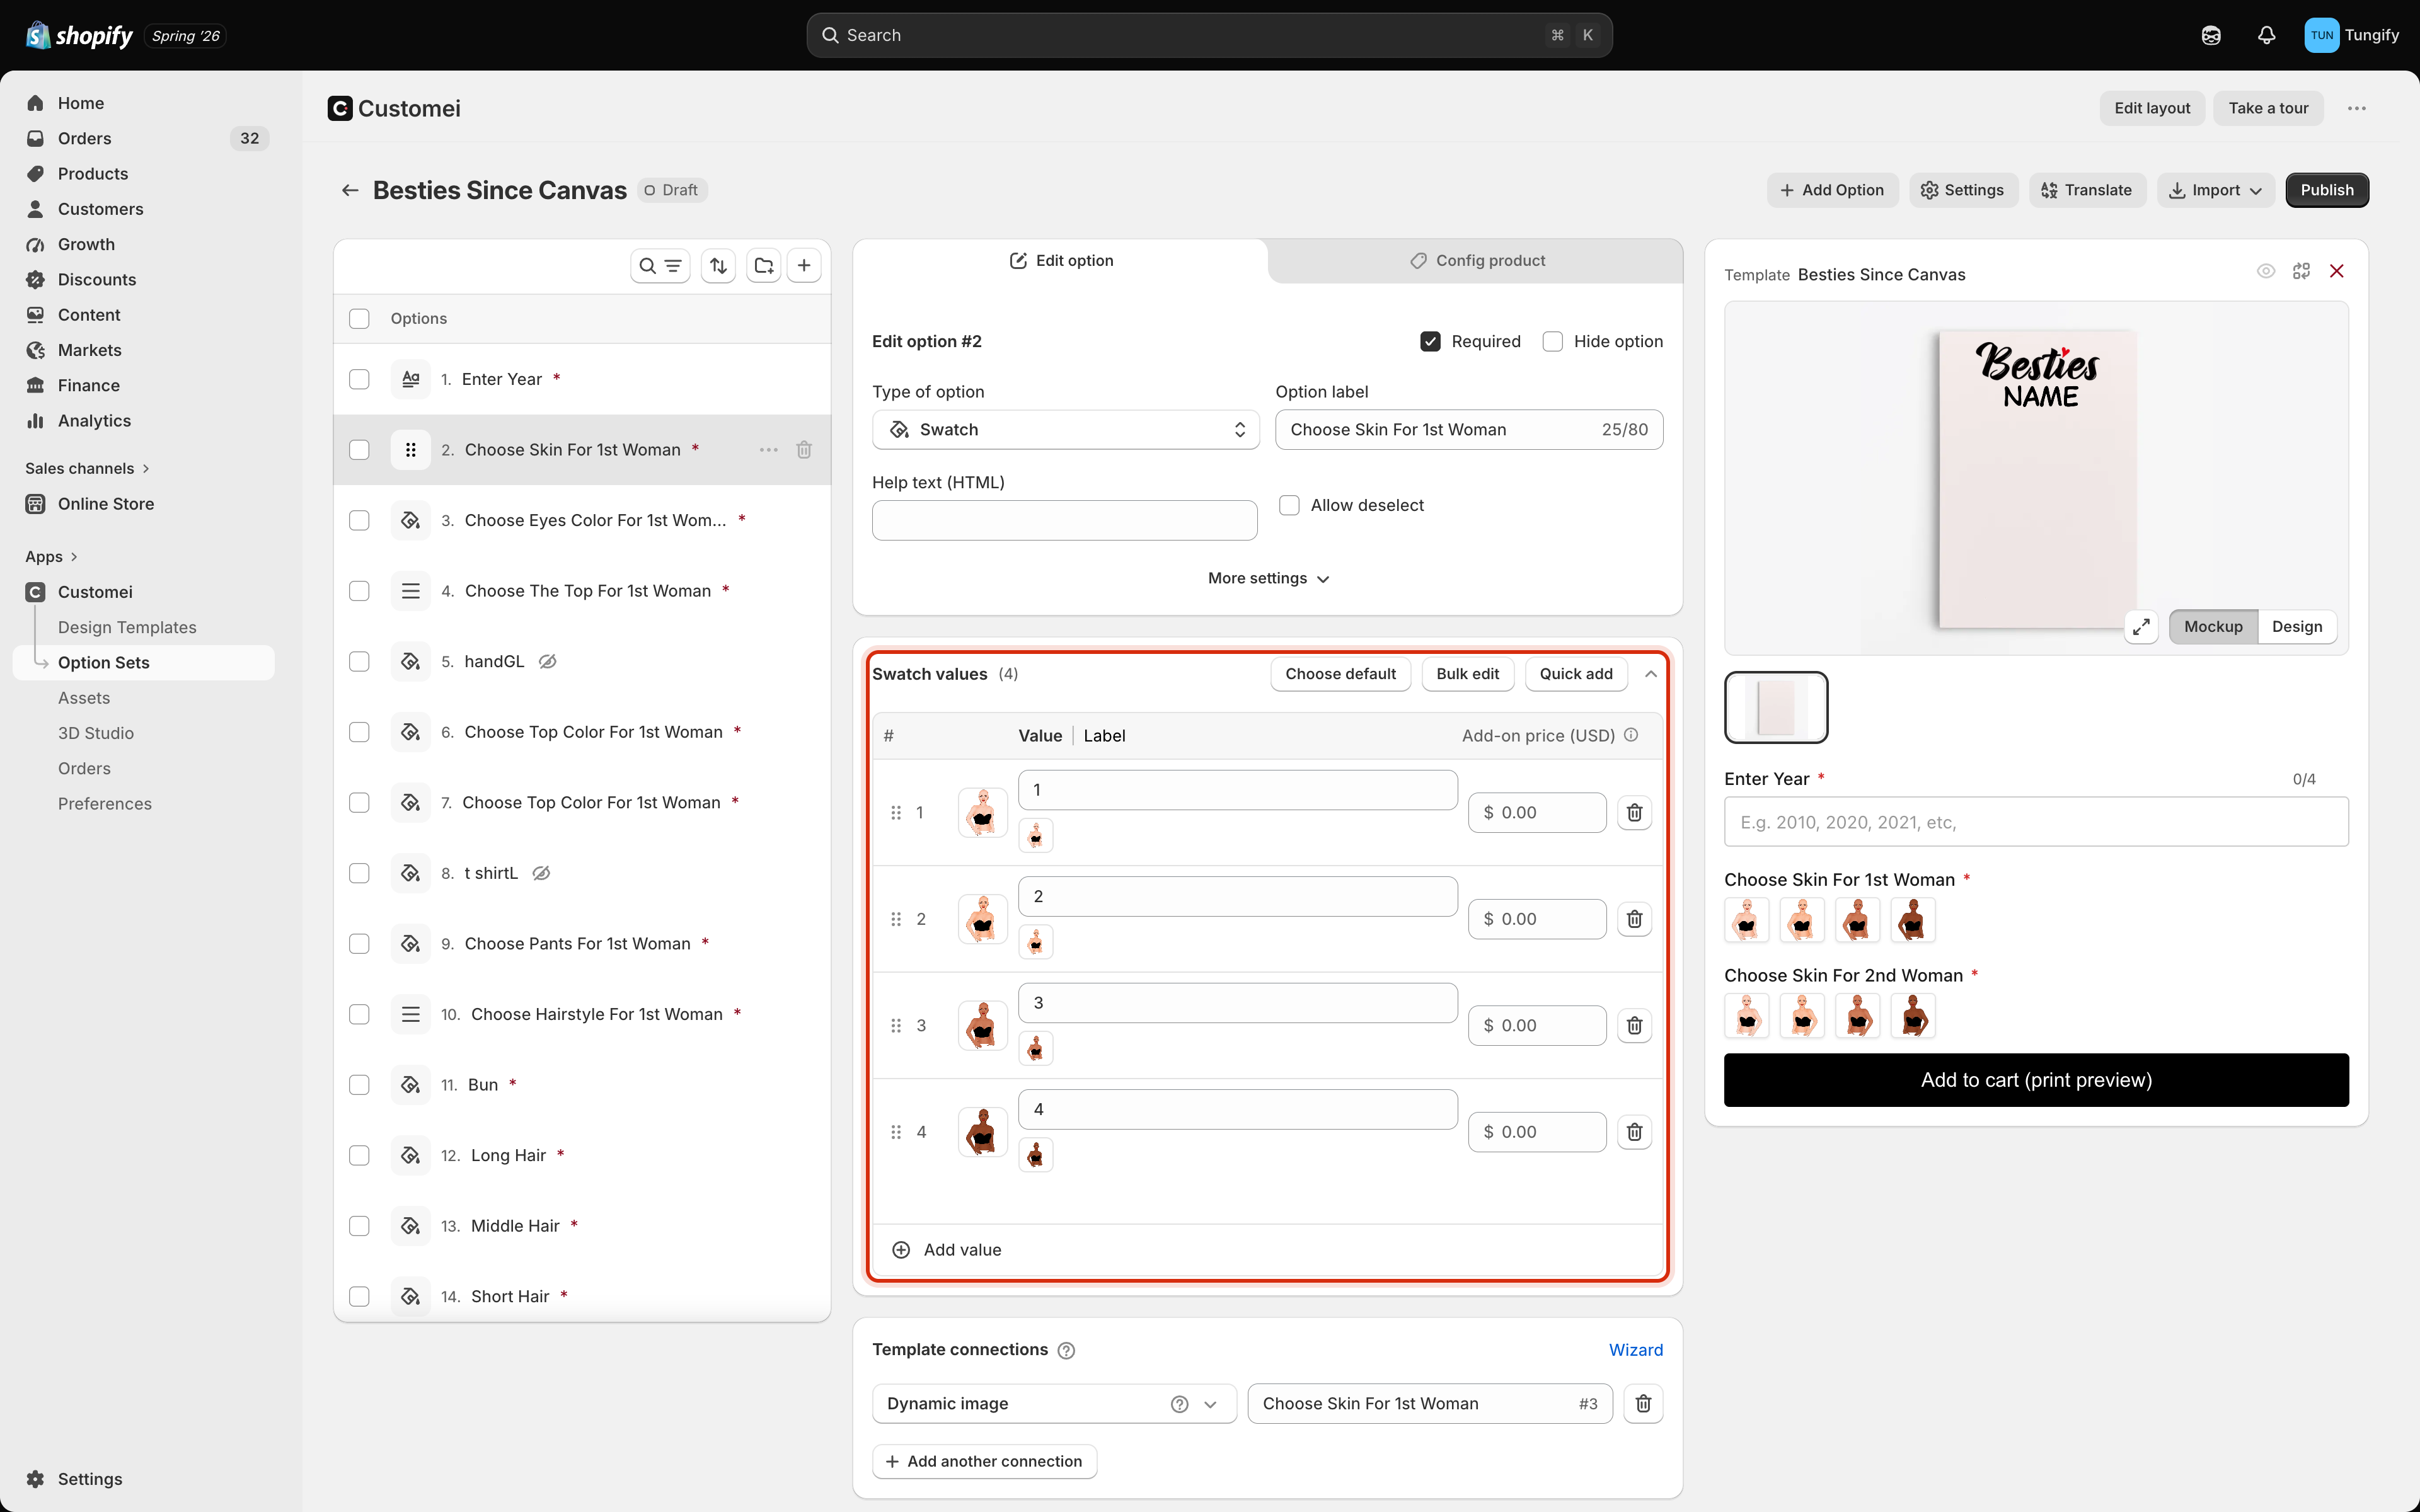
The values table. Each row is one choice a shopper can pick.
Above the table:
- Choose default marks the choice a shopper starts with.
- Bulk edit lets you paste or edit many rows at once instead of one at a time.
- Quick add pulls choices in from a linked library so you don’t retype them.
Charge extra for a choice
Put an amount in Add-on price and that choice adds to the product price when a shopper selects it. A0.00 costs nothing extra.
Use it for anything that costs you more to make: a second photo, gift wrapping, a larger size.
Show an option only when it’s relevant
Every option has a Conditions card below its connections. Use it to hide an option until the shopper has made a related choice. For example, only show Choose Top Colour once they’ve picked which top they want. Pick Show or Hide, choose the option to watch, and set what its answer has to be. You can stack more than one rule with Add another condition.Where to next
Connect options to your design
Make each answer change a layer on your artwork.
Assign products and go live
Put the finished option set on a product page.