

The difference matters. Image upload is the one you connect to a picture layer on your design, and it is the only one that offers editing tools. File upload accepts far more kinds of file but never touches the artwork.
Image upload
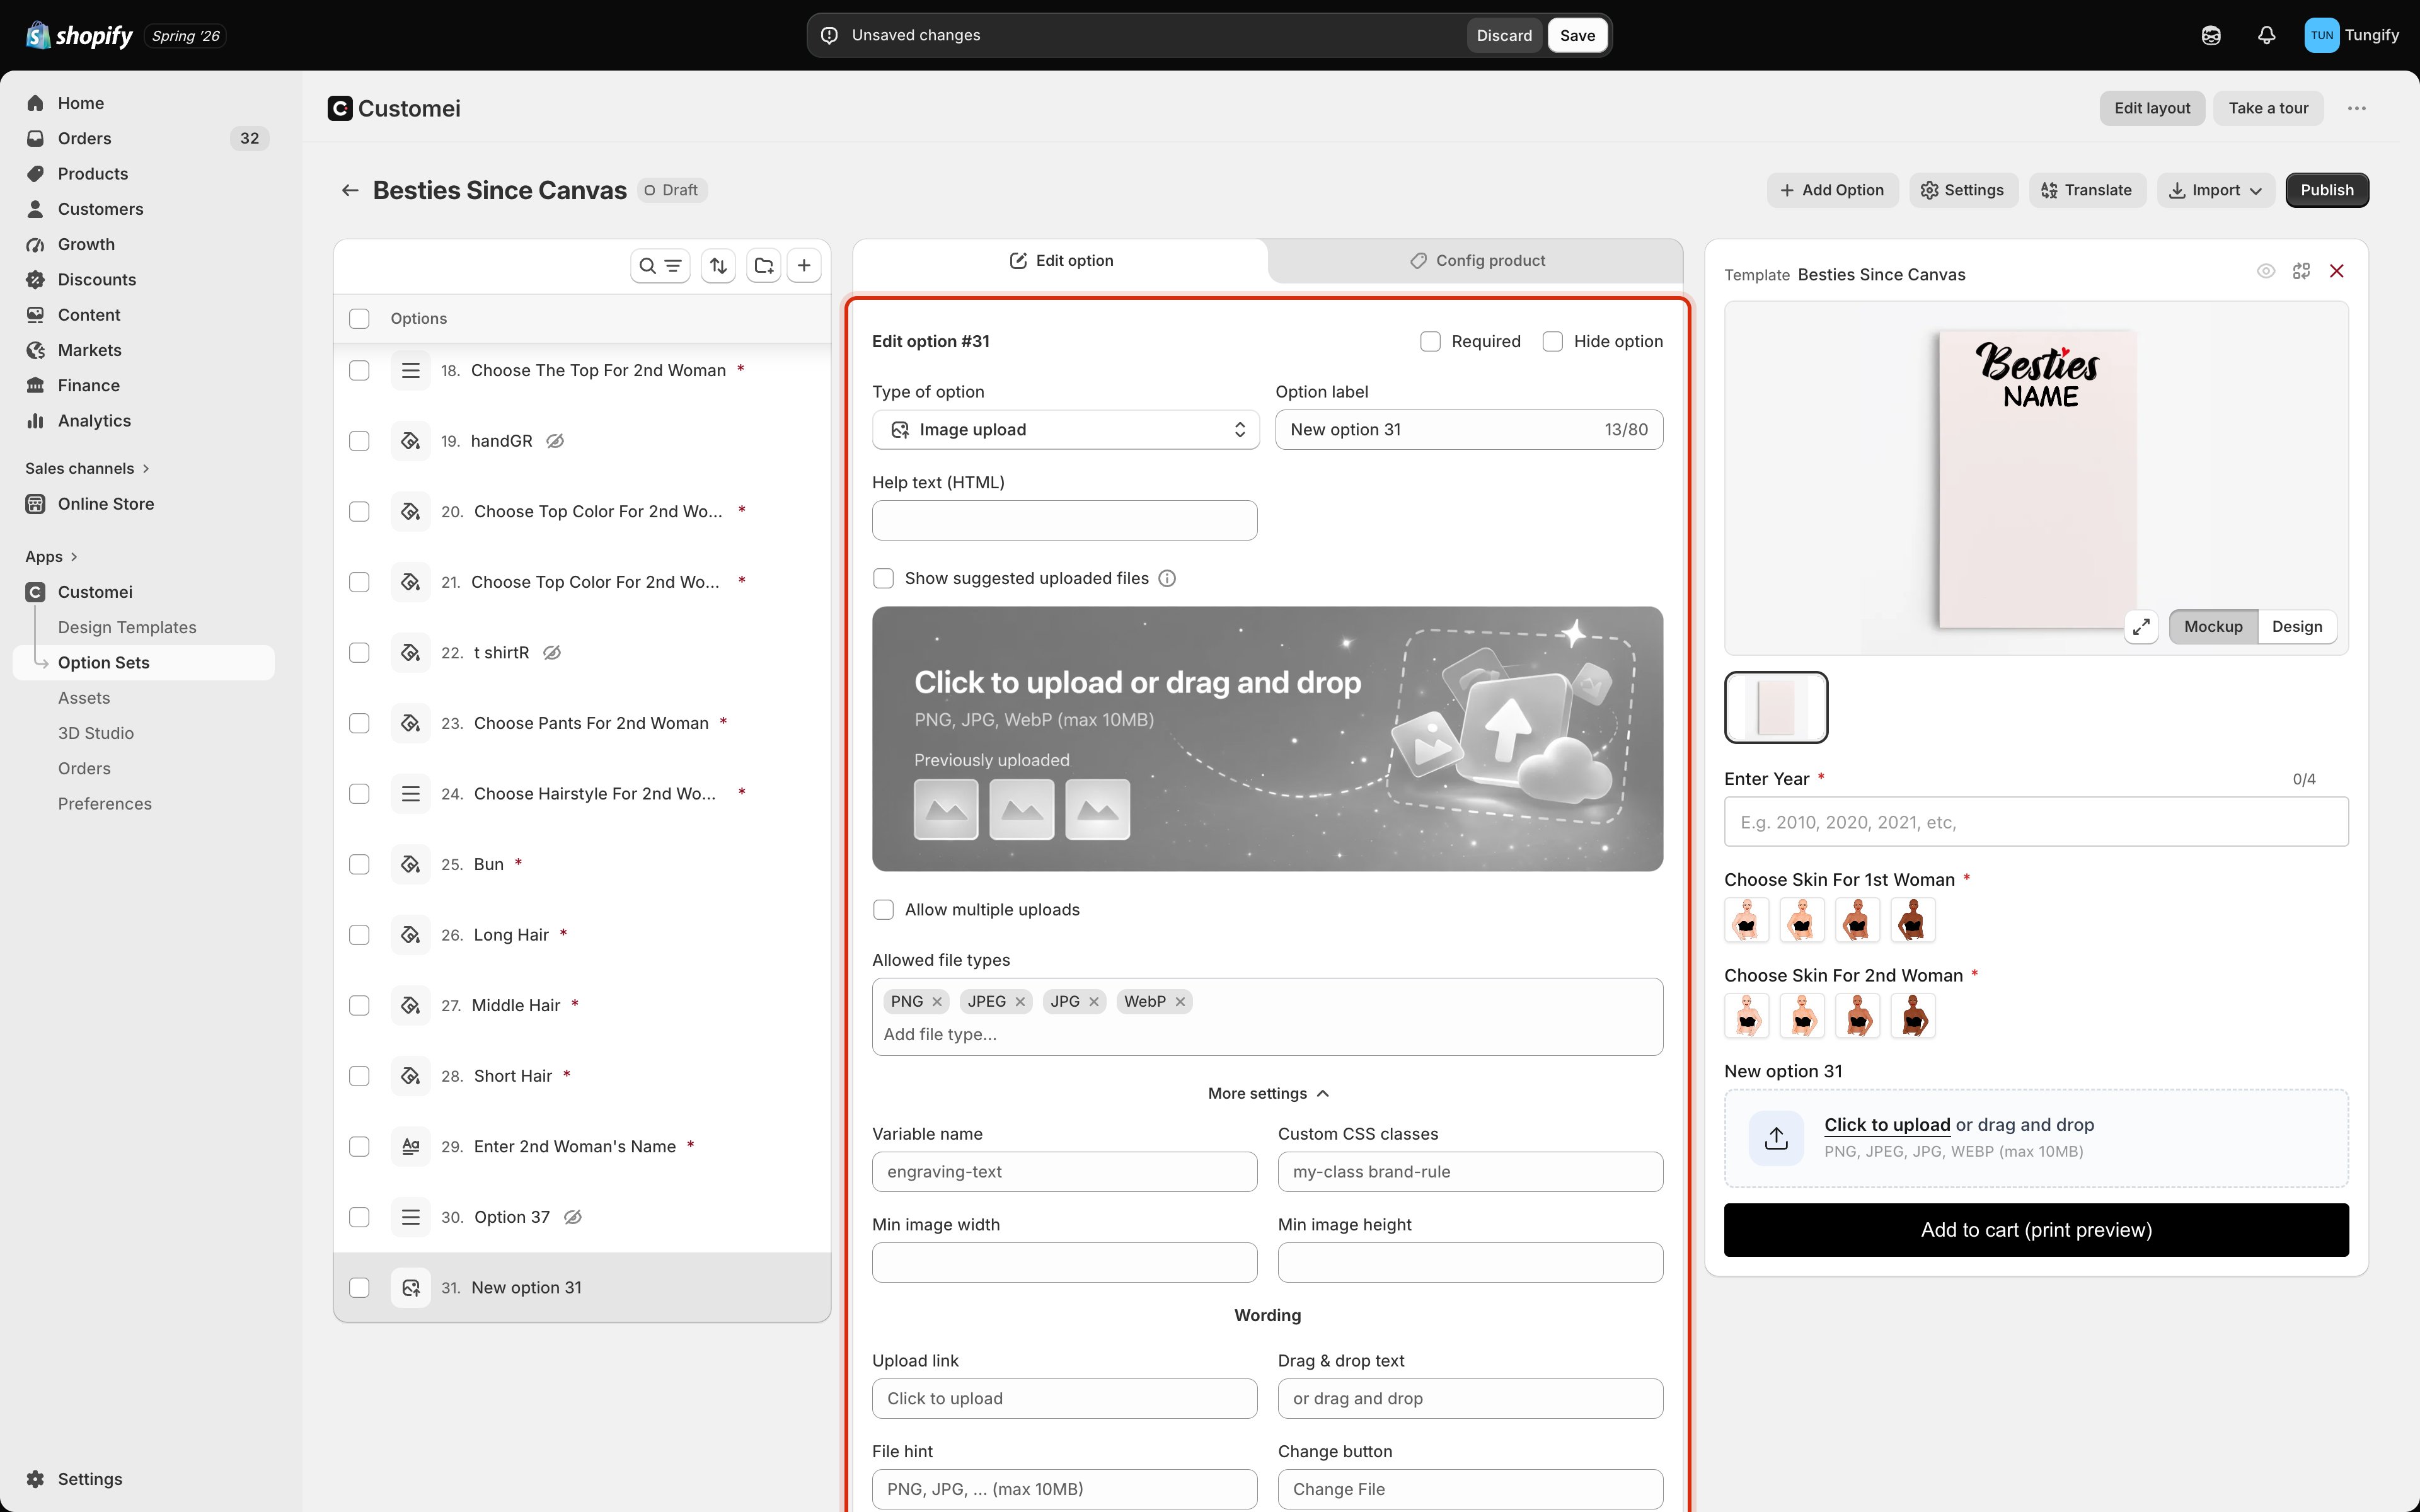
Image upload settings. The dark banner is a preview of the shopper's upload box, not a setting.
Under More settings you also get Min image width and Min image height. Fill these in and a photo smaller than that is refused before it reaches you. It is the cheapest way to stop blurry prints.
The wording your shopper reads
Every word on the upload box can be reworded, under More settings in the Wording section: the upload link, the drag-and-drop line, the file hint, the change and remove buttons, the uploading message, and the two lines shown while a file is being dragged over the page. Leave a box empty and the wording in grey is what the shopper sees.Image editing tools
By default the shopper uploads a picture and that is that. Tick a tool here and they get to fix the photo before ordering.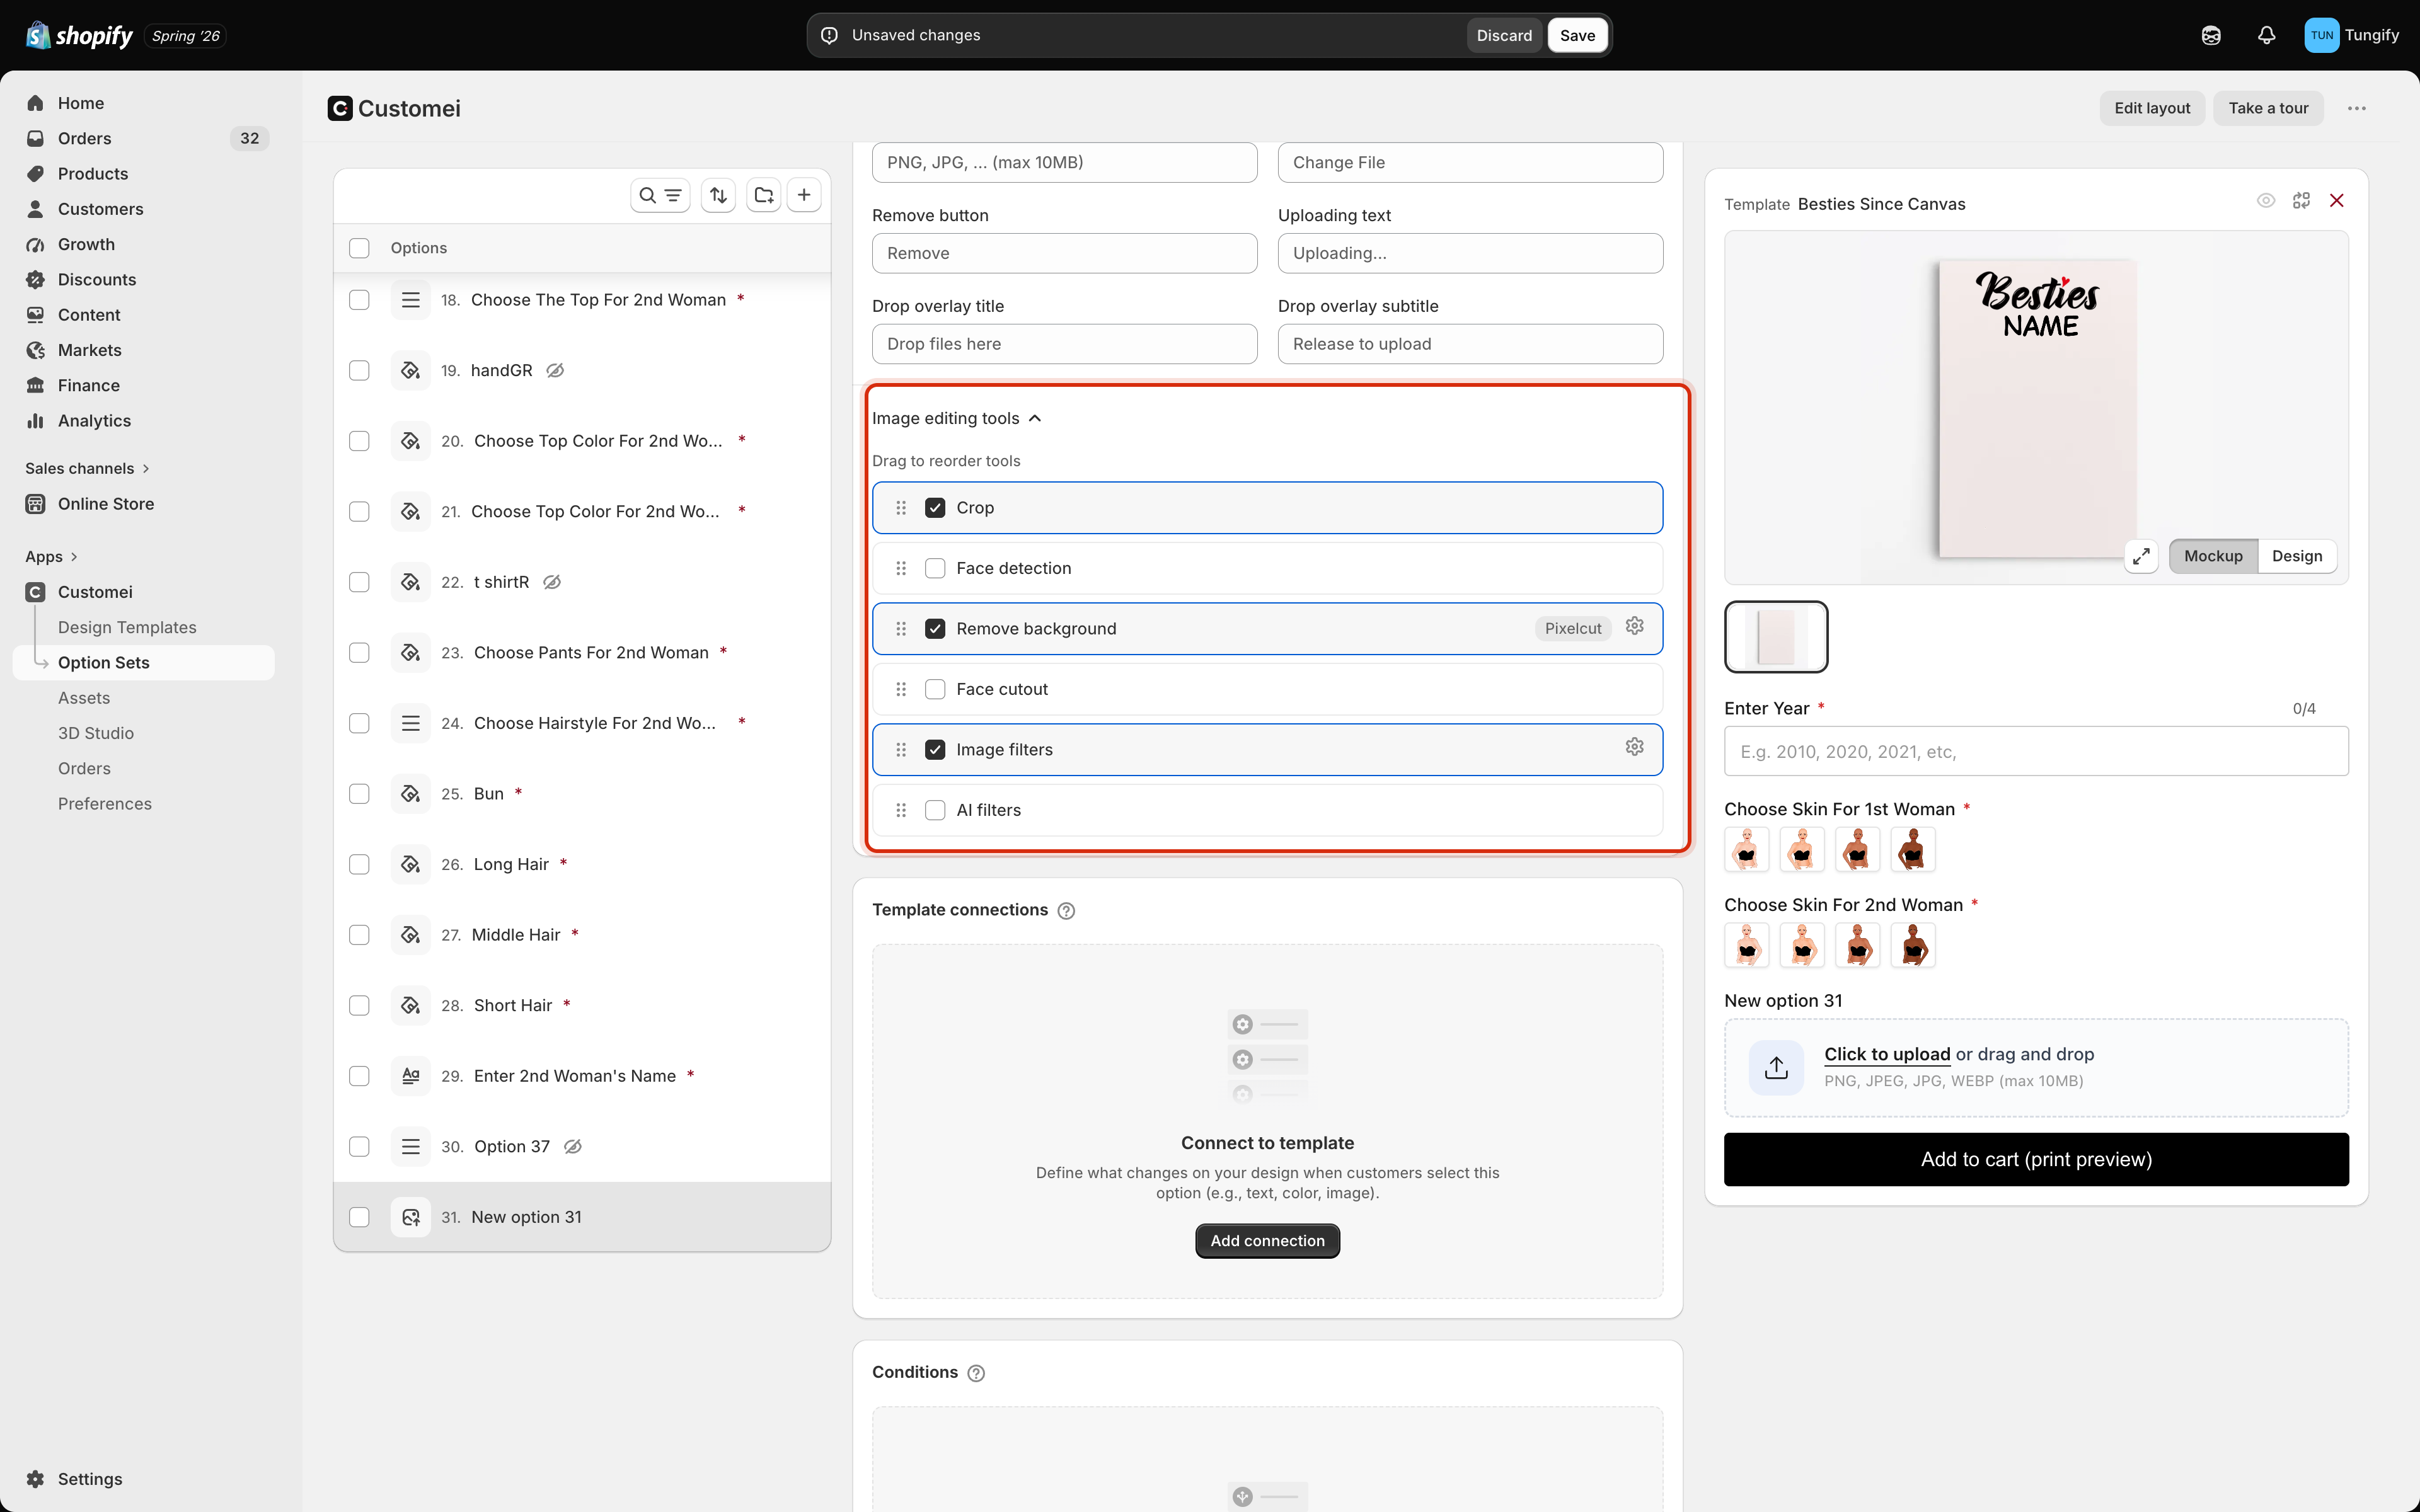
Image editing tools, with Crop, Remove background and Image filters turned on.
Drag to reorder tools. The order in the list is the order the tools run in. Keep Face detection near the top: it is a gate, so a photo it rejects should be rejected before the paid tools touch it.
Ticking Image filters adds a settings icon. Click it and pick which of the twelve looks the shopper may use.
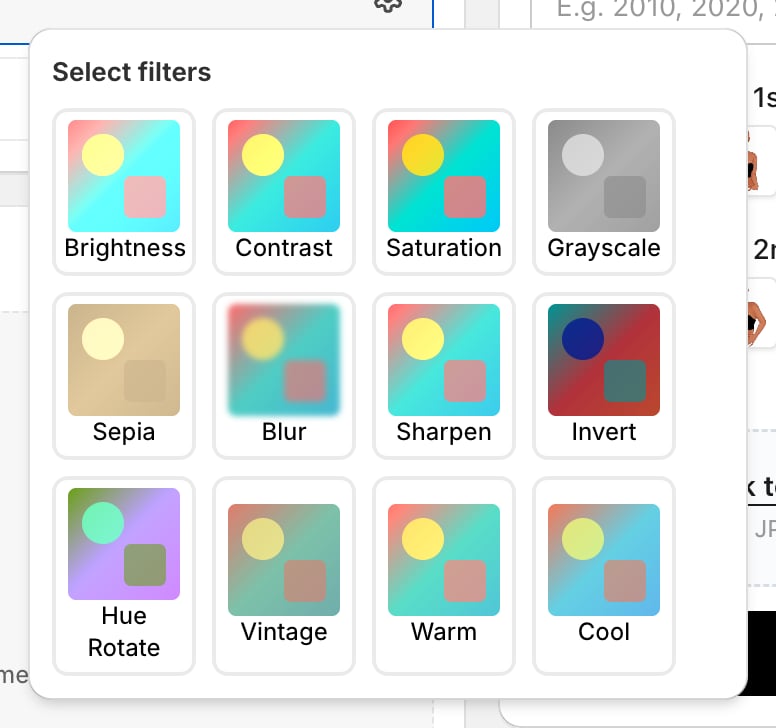
Choose which filters the shopper gets.
Who does the work, and who pays
Background removal, face cutout and face detection are done by an outside service. Each of those rows gets a settings icon showing which service is used and roughly what one photo costs.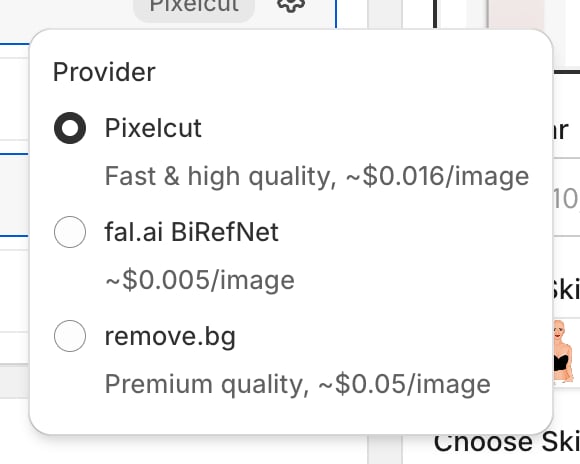
Each photo service shows its rough cost per picture.
- Use Customei’s service. Nothing to set up. Each photo the shopper processes spends credits from your account.
- Use your own account with that service. Add your own key on the Integrations tab and Customei uses it instead. Those photos spend no credits, and the service bills you directly.
Face detection has a free option too. MediaPipe does the checking inside the shopper’s own browser, so it costs nothing either way.
File upload
Use this when you only need to receive the file.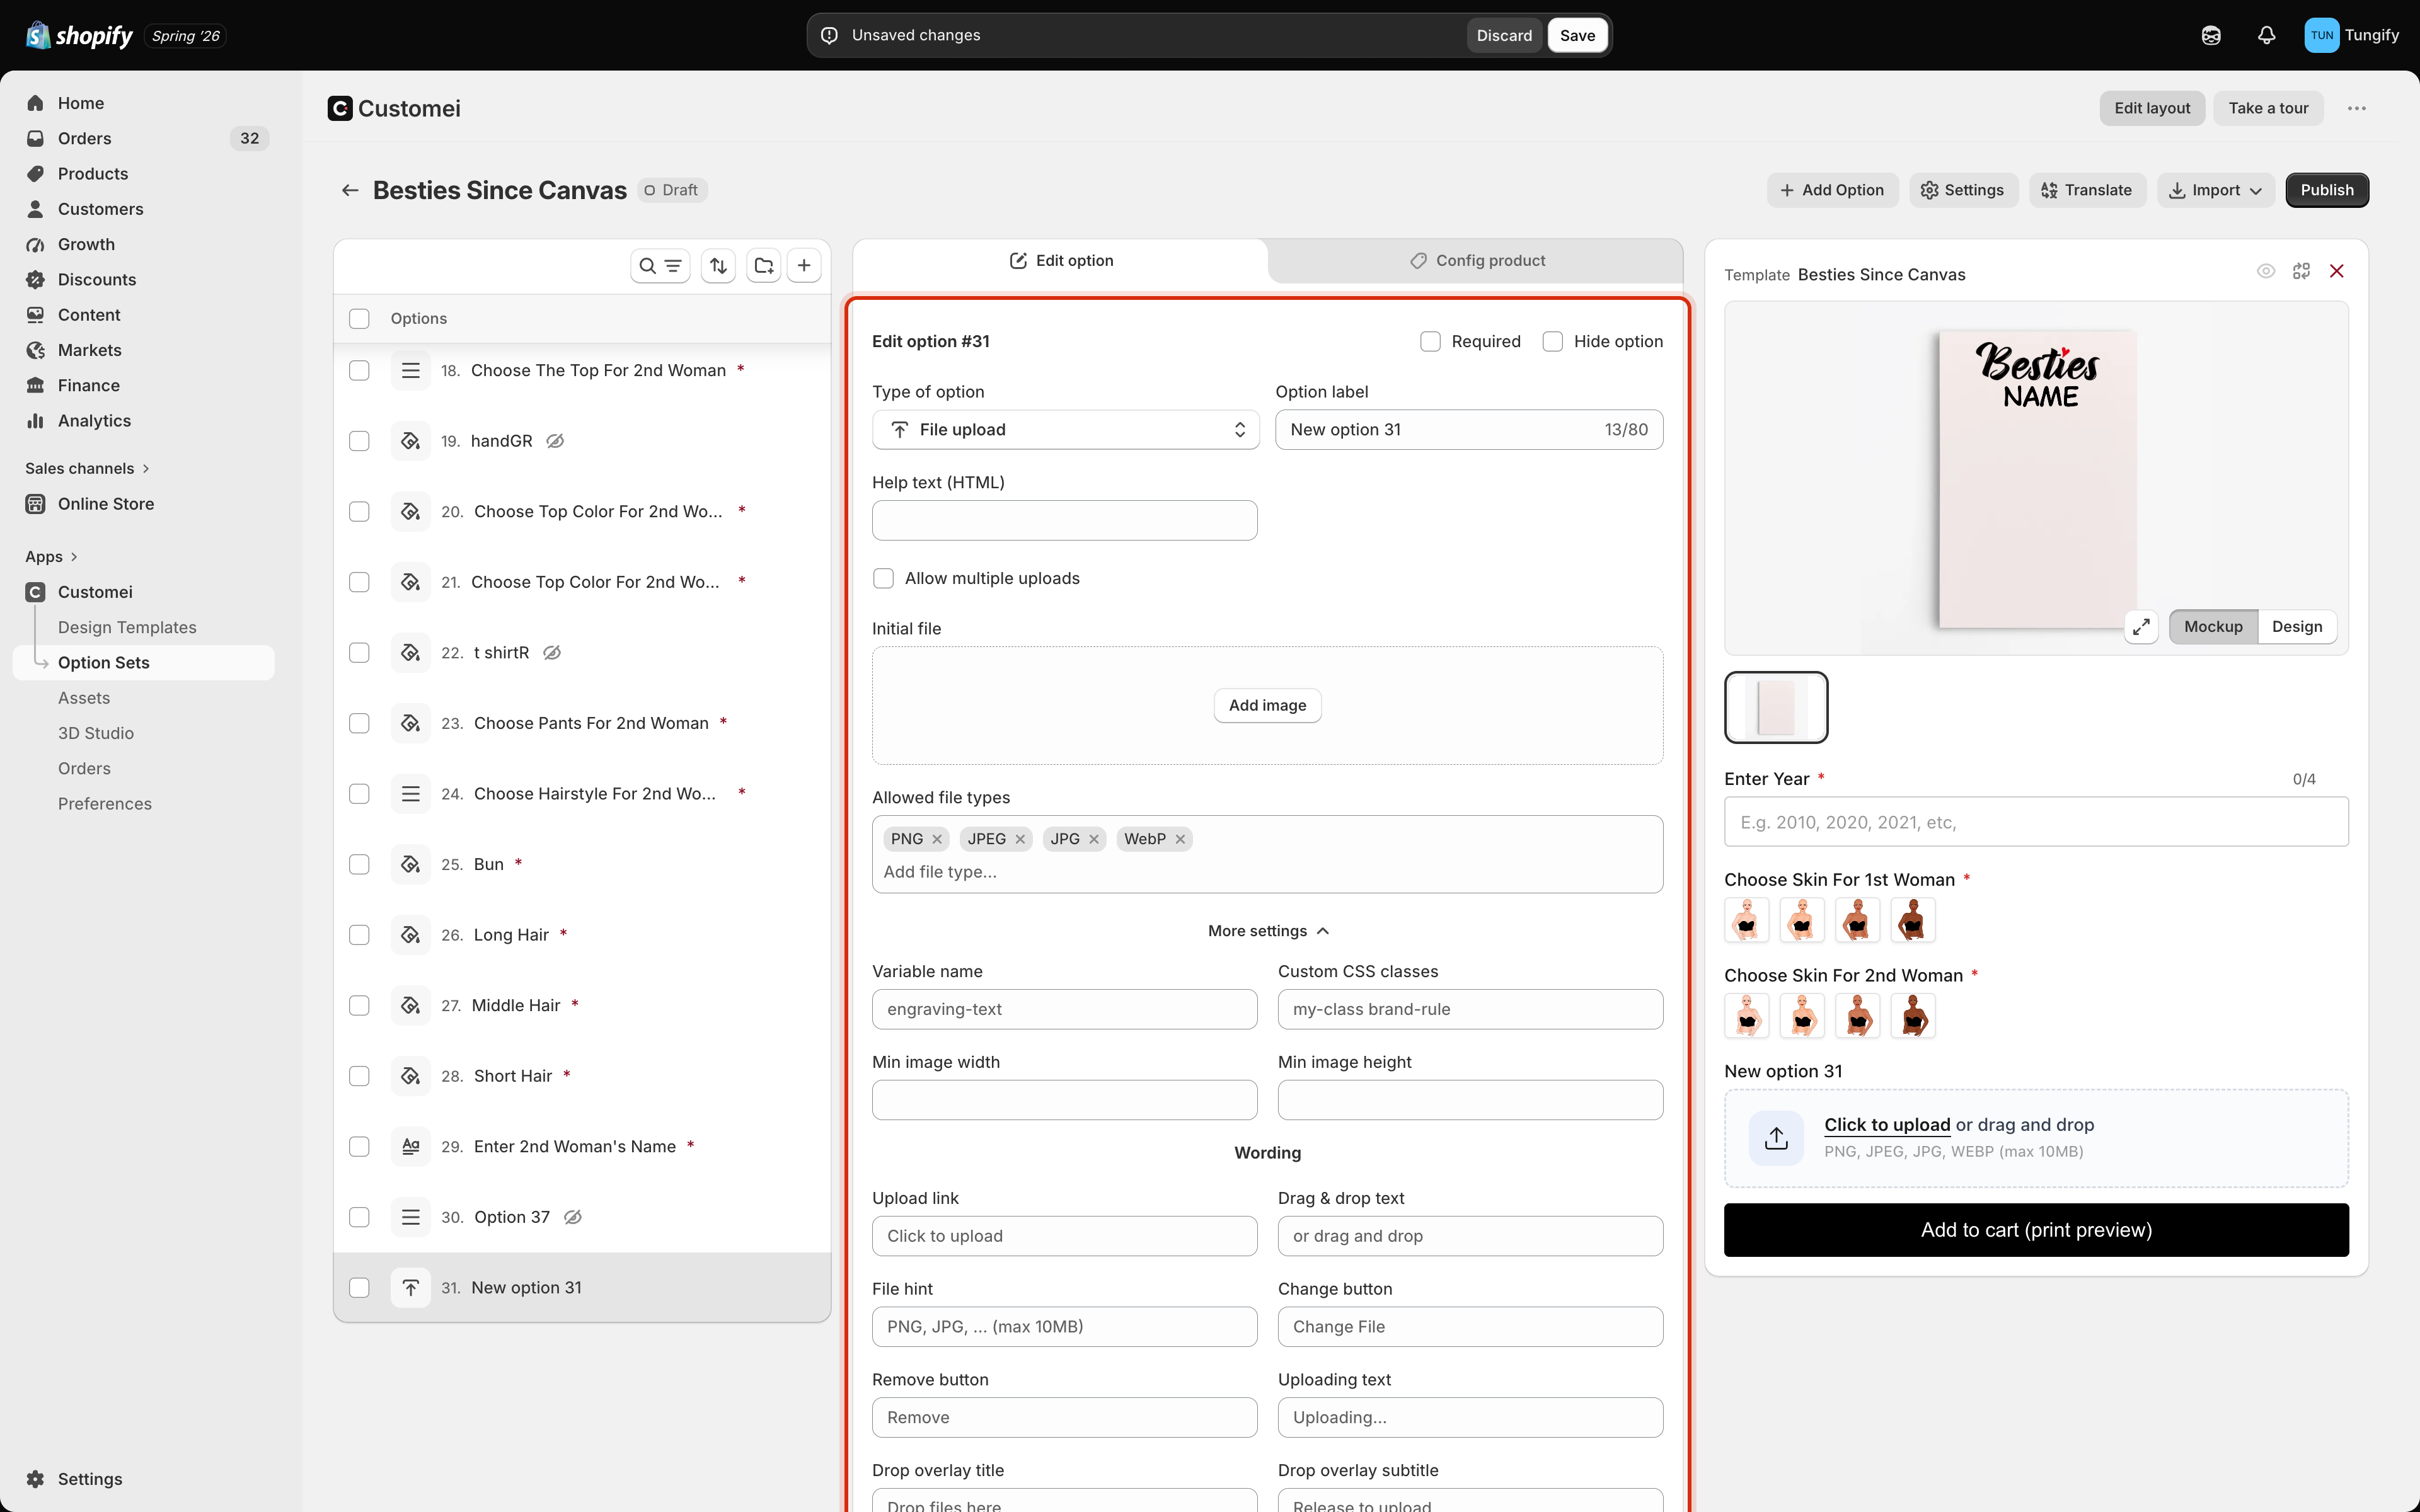
File upload settings.
- Initial file: a file already attached when the page opens, such as a blank form for the shopper to work from.
- Allowed file types: a much longer list here, including PDF, EPS, AI, ZIP, sound and video files.
Where to next
Connect options to your design
Put the uploaded photo into a picture layer.
Pictures in the editor
How a picture layer is set up in the first place.