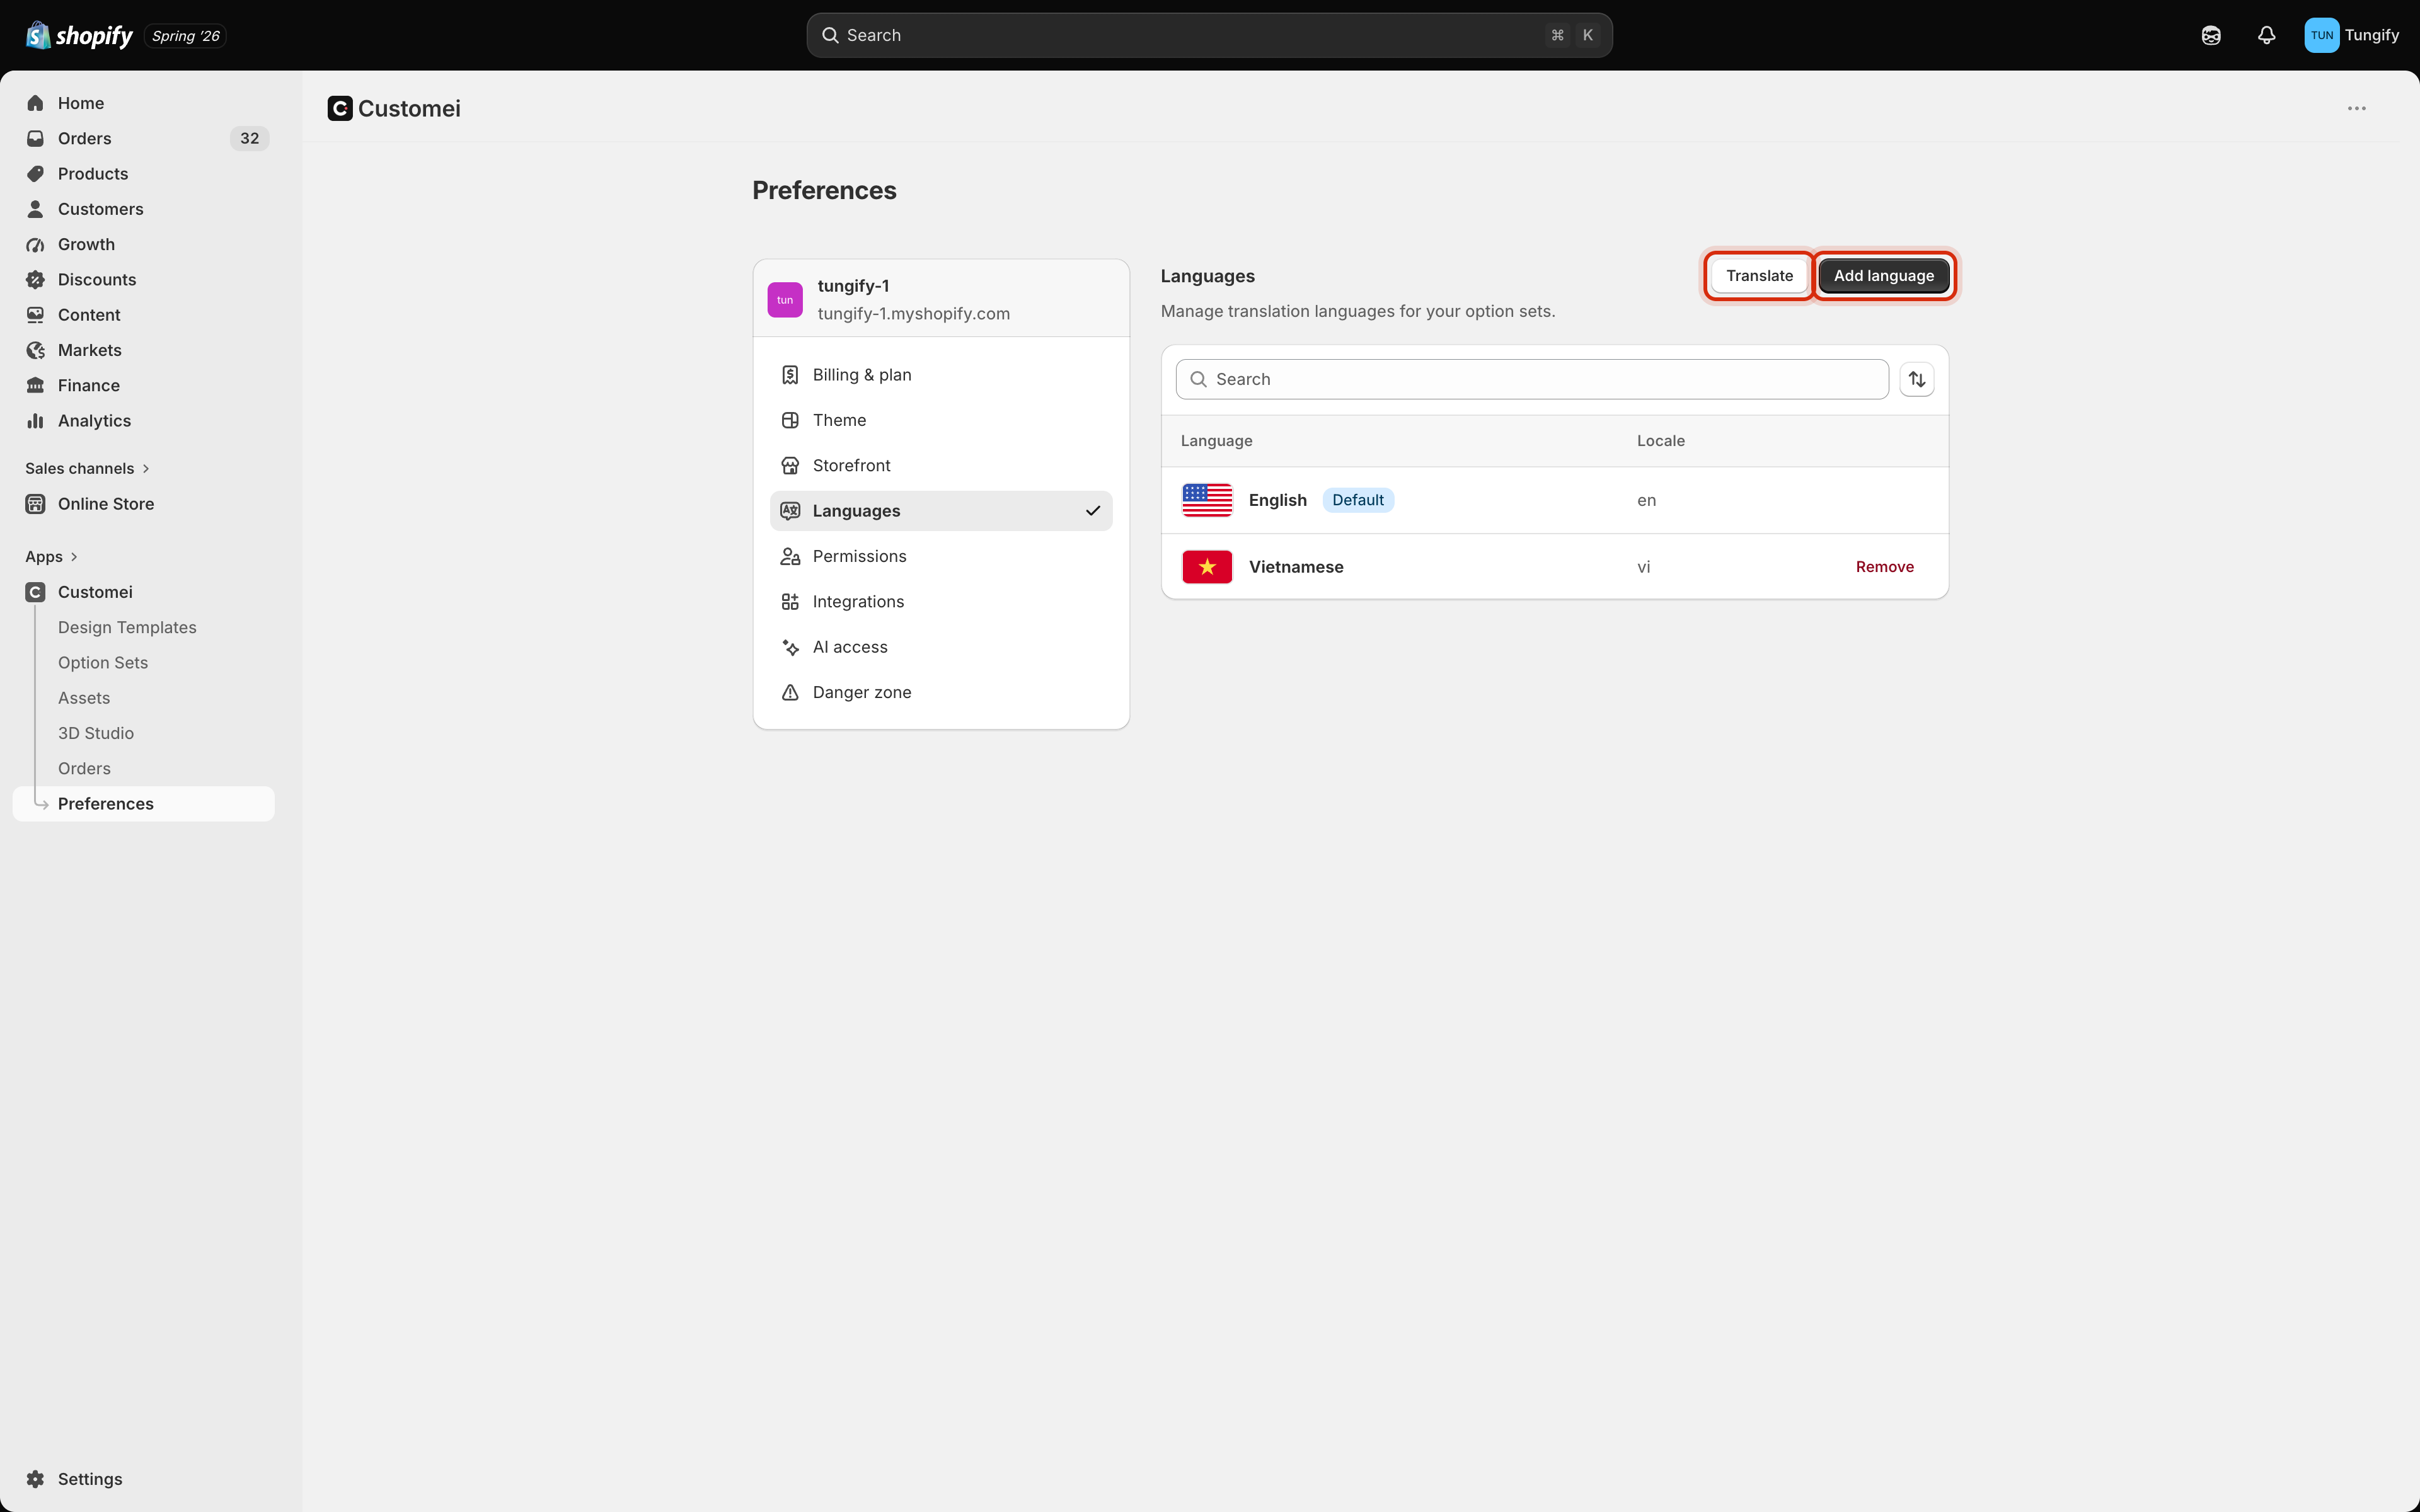
Before you can translate anything, Customei needs to know which languages you sell in. Go to Preferences and open the Languages tab.
The Languages tab in Customei preferences inside Shopify admin, listing English as the default language and Vietnamese below it, with the Translate and Add language buttons highlighted.

Preferences, Languages. Add language on the right, and Translate opens your fixed phrases.

Add one

Click Add language. Tick every language you want, then click Add.
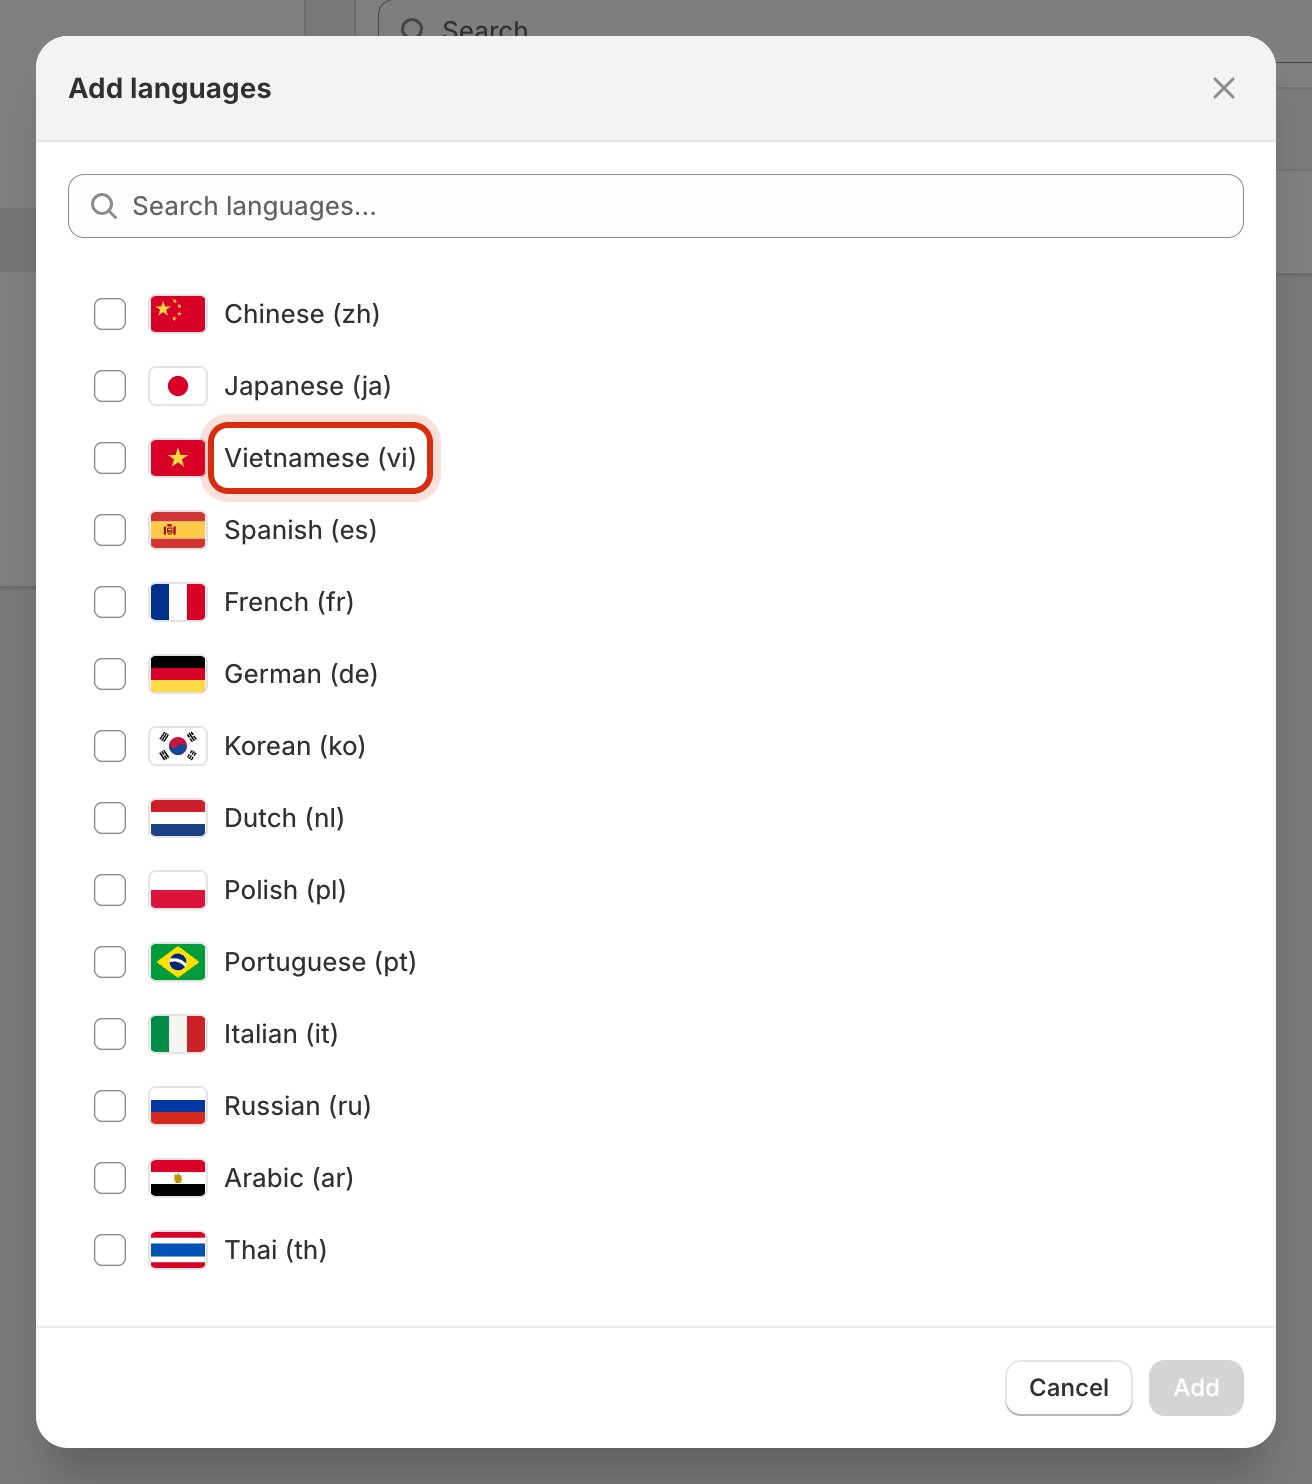
The Add languages dialog listing Chinese, Japanese, Vietnamese, Spanish, French, German and more, each with a flag and a checkbox, with the Vietnamese row highlighted.

Tick the languages you sell in. Search if the list is long.

Fourteen languages are ready to pick from, each with the short code your storefront uses (vi for Vietnamese, de for German). Use the search box if the list is long.

English is your starting point

English is marked Default and can’t be removed. It is the wording you write your questions in, and every translation is a translation of it.

Remove one

Click Remove on its row.
Removing a language removes the translations you had written in it. If you might sell there again later, it is cheaper to leave the language in place than to type it all out a second time.

What happens next

Adding a language doesn’t translate anything on its own. It adds a column, ready to be filled in. Each option set is then translated on its own, which is where the words actually get written. See Translate an option set.
Add every language you plan to sell in before you start translating. Adding one later means going back through the option sets you already did to fill in the new column.

Where to next

Fixed phrases

Words that must always translate the same way.

Translate an option set

Fill in the languages you just added.